In ACTION GAME MAKER’s Visual Script, only the AnimationPlayer node can be used to play animations. You cannot directly play AnimatedSprite2D, which is a Godot node specialized for sprite sheet animations. Although AnimationPlayer can also play sprite animations, it becomes cumbersome when managing multiple sprite sheets.
Here are two solutions to address this issue:
1. Use AnimatedSprite2D Keys in AnimationPlayer
This method treats AnimatedSprite2D as a storage location for sprite sheets. However, if you’re not opposed to using plugins, the second method is recommended.
Preparing AnimatedSprite2D
-
Add an AnimatedSprite2D node from the Add Node menu.
-
Select the AnimatedSprite2D node and create a new SpriteFrames resource.
-
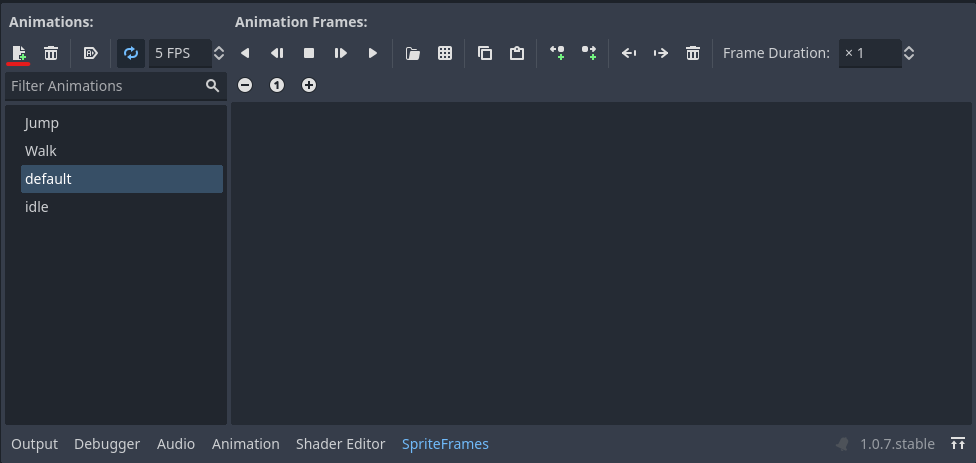
In the SpriteFrames tab at the bottom center, create the required number of animations.
-
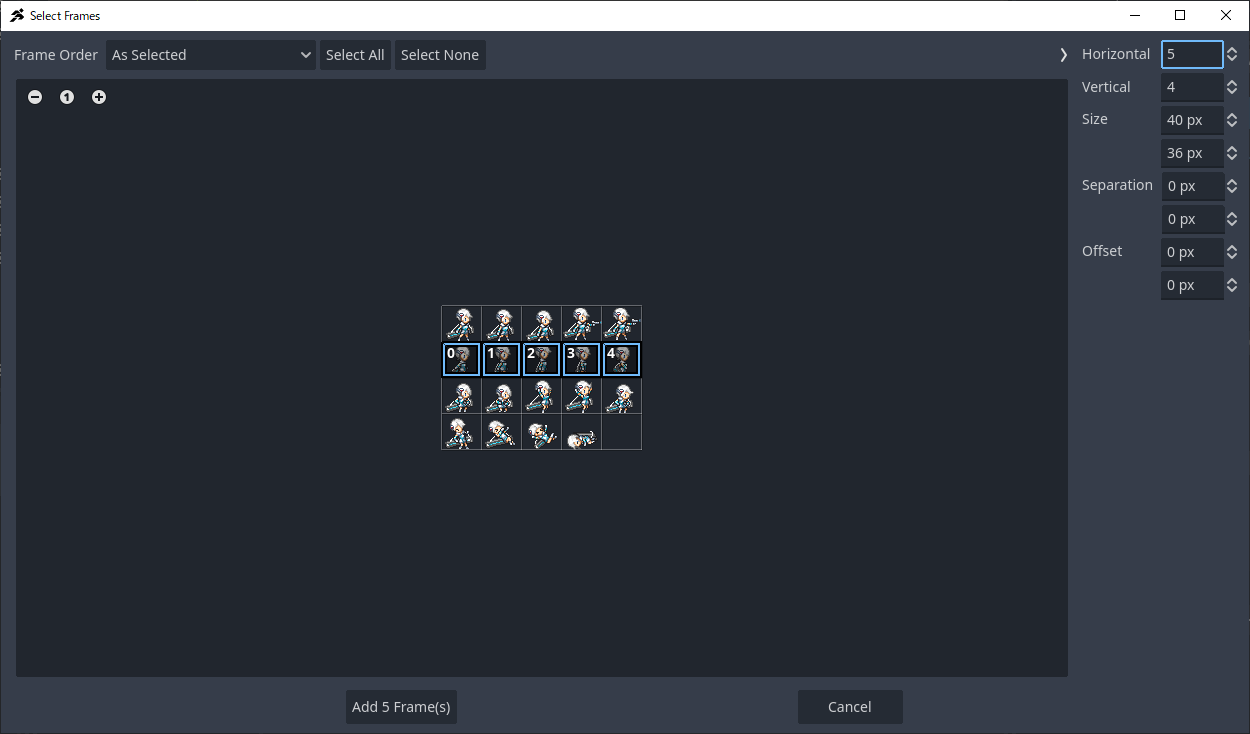
Select any animation and choose “Add Frames from Sprite Sheet.”
-
Choose the sprite sheet you want to add. Use the split menu at the top right to correctly divide the sprite sheet.
-
Then, select the frames you want to add in order.
-
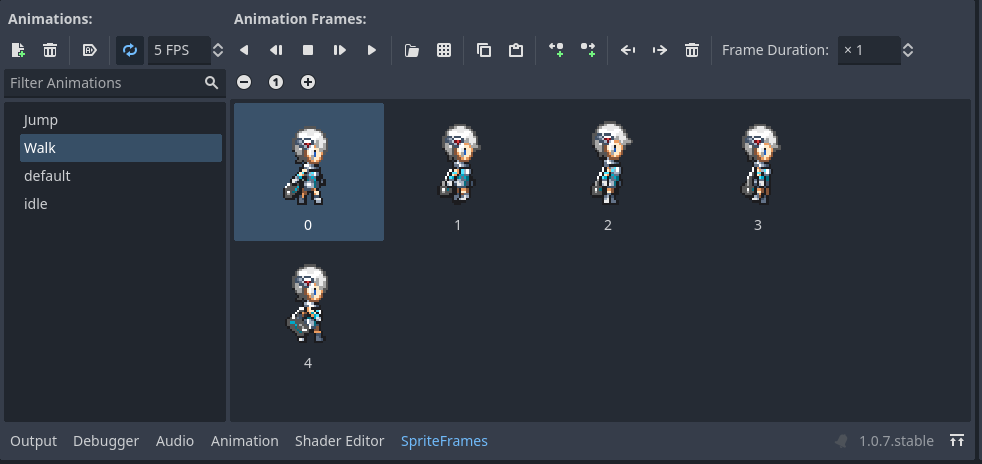
Once frames are loaded, repeat steps 4–6 for each animation you want to add.



Loading into AnimationPlayer
-
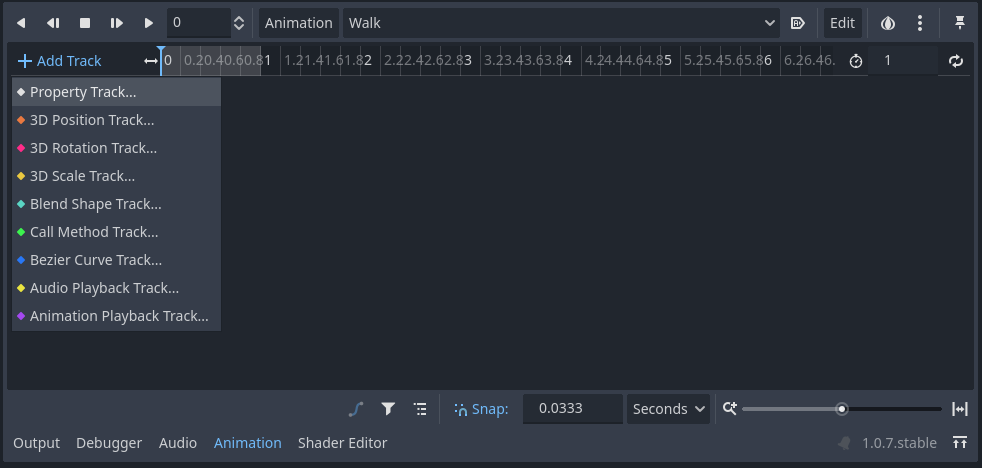
Prepare the required number of animations in AnimationPlayer.
-
From the Add Track menu, select Property Track.
-
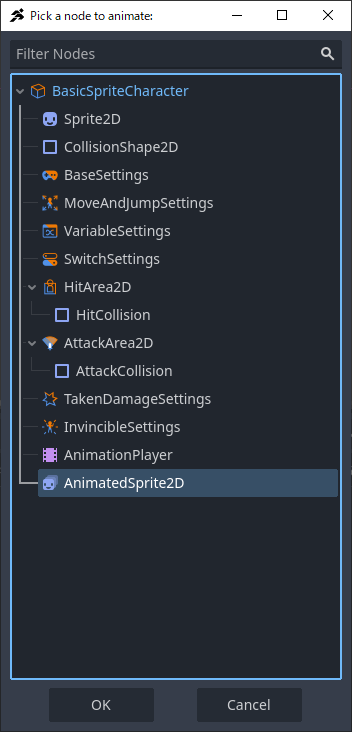
Select AnimatedSprite2D.
-
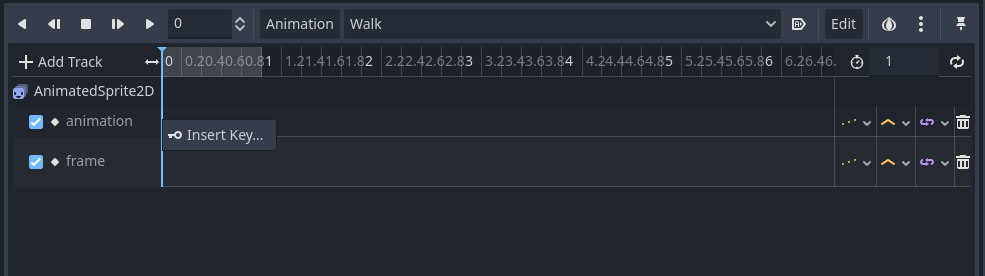
Add the
animationandframeproperties. Since they cannot be added simultaneously, repeat steps 2–3 to add them sequentially.
-
Insert a key at the 0-second mark in the animation track.
-
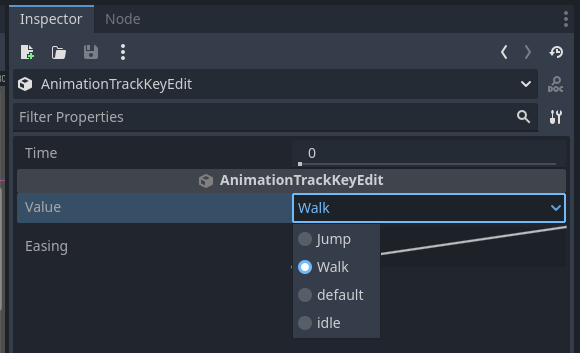
In the Inspector, select the sprite frame animation you want to play for this animation.
-
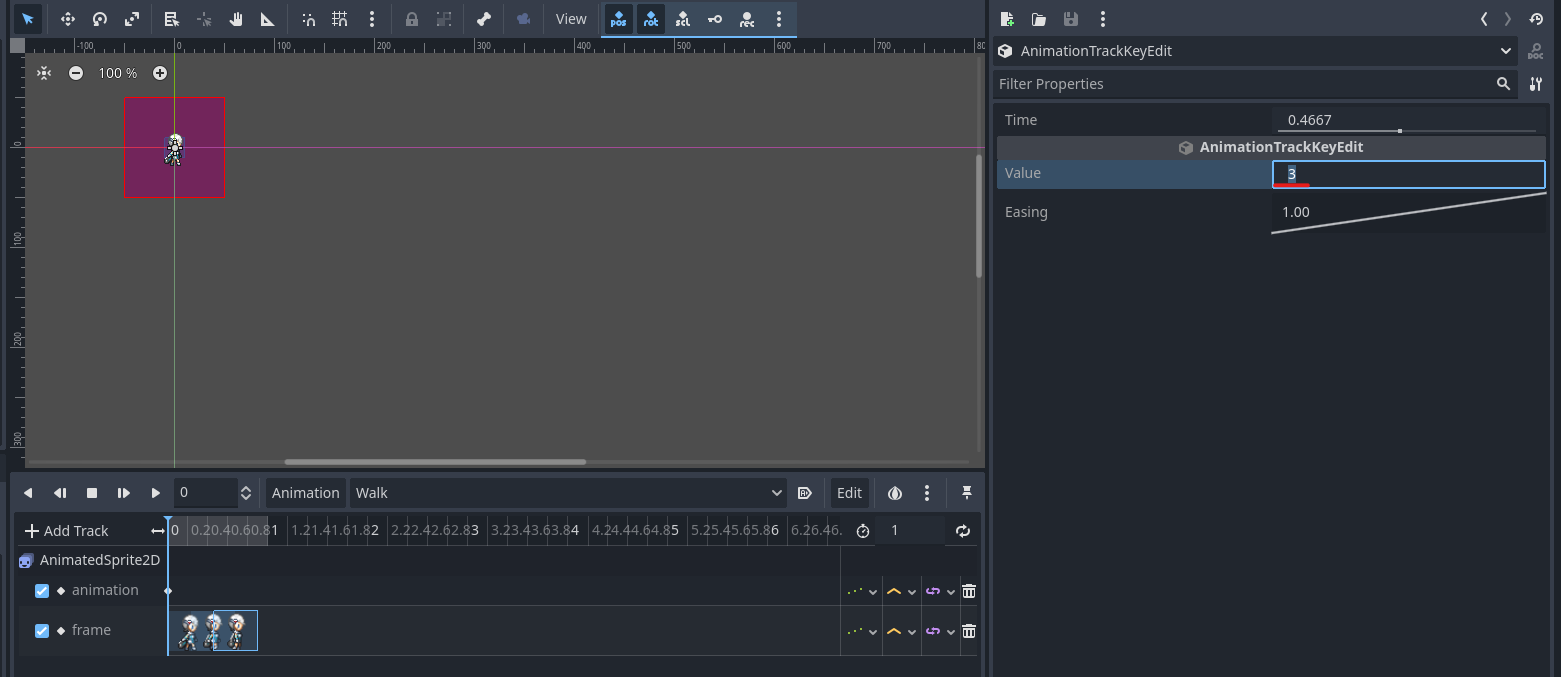
Then, insert keys in the frame track and adjust the frame numbers to arrange the frame animation.

2. Use the “godot-animated-sprite-2-player” Plugin by pocchi the dev
(This method was introduced by Justus Pan. We respectfully acknowledge pocchi the dev for creating this excellent plugin.)
This plugin allows you to import frame animations created in AnimatedSprite2D directly into AnimationPlayer.
Creating Animations in AnimatedSprite2D
-
Follow the AnimatedSprite2D preparation steps from section 1 to load your sprite sheet.
-
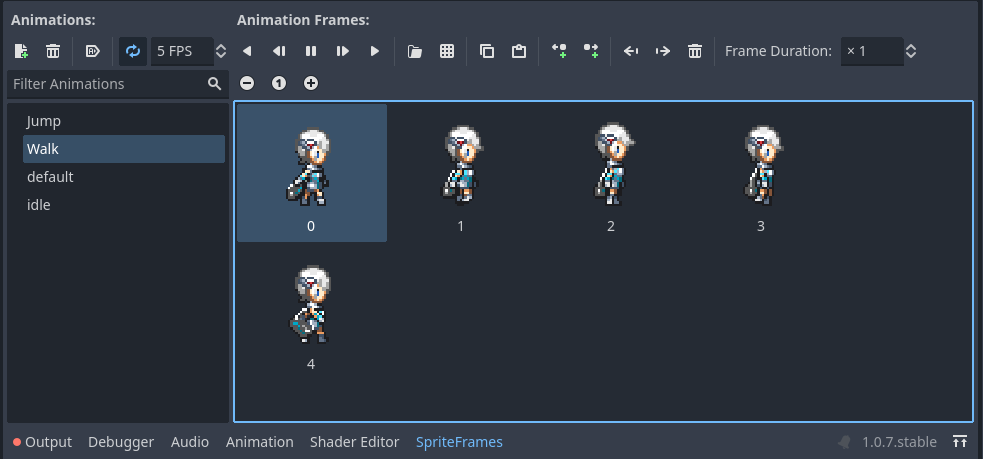
Set up the animation.
- Animation Speed: The value shown as 5 FPS in the image indicates the animation speed—how many frames are displayed per second.
- Loop Setting: The option to the left of the animation speed controls looping. It is enabled by default.
- Frame Duration: Adjust the duration of each frame using a multiplier. For example, setting the duration to 2 for a 5 FPS frame changes its display time from 0.12 seconds to 0.24 seconds.
-
Once all animation settings are complete, you’re ready to proceed.
Enabling and Using the Plugin
-
Download the plugin from the download button below or from the developer’s GitHub repository.
[Download] godot-animated-sprite-2-player_2cb178b.zip (4.9 KB)
godot-animated-sprite-2-player
-
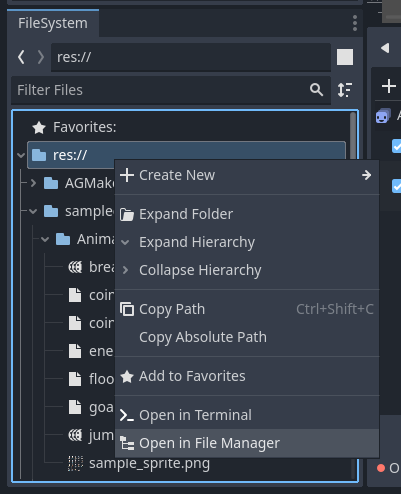
Open your project’s root directory using File Explorer.
-
Extract the downloaded ZIP file and place the
addonsfolder into the root directory.

-
Return to the editor and open Project > Project Settings.
-
Switch to the Plugins tab. Enable the “Animated Sprite to Player” plugin you just added.
-
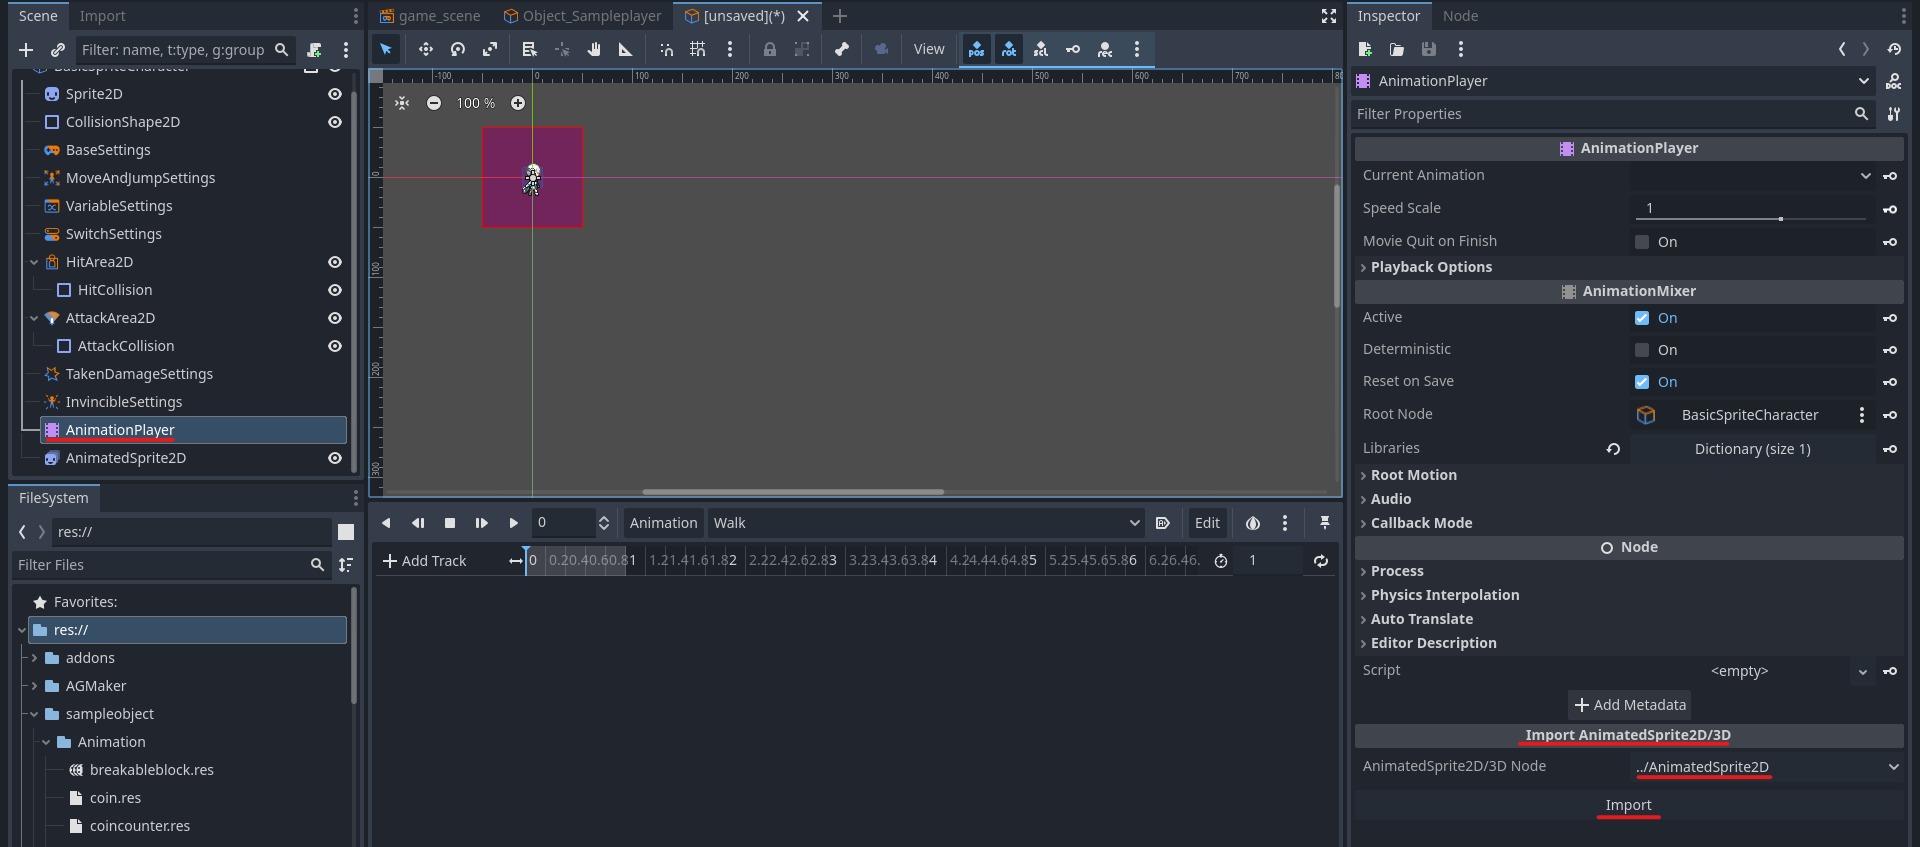
Select AnimationPlayer. A new menu, “Import AnimatedSprite2D/3D,” will appear. Choose the correct AnimatedSprite2D and click Import.
-
The animation will be imported automatically according to the AnimatedSprite2D settings, including loop settings and animation length.
-
The imported animation can be adjusted freely in AnimationPlayer. If you modify the AnimatedSprite2D content afterward, re-importing will reflect the changes.



Note: The plugin must be configured separately for each project, so you’ll need to re-enable it if using it in another project.