Let’s Place a Node in the Scene
Next, let’s learn how to handle nodes. We’ll create a new node, place it in the game world, and customize it.
First, let’s place a rectangle in the scene.
This is the first part of “Select on the left, view in the center, change on the right”: “Select on the left”.
-
Place a node that draws a rectangle into the scene. In Godot, the node used to draw a rectangle on a 2D screen is called “ColorRect”. As its name suggests—Color (color) Rectangle (rectangle)—it is a node that has the function to draw a colored rectangle.
-
Click the “+” (Add Child Node) button in the top-left corner of the Scene window.

- Enter “ColorRect” in the search bar at the top and select the ColorRect node that appears.

-
Press the “Create” button.
-
A white rectangle has appeared in the central editor window. This is the rectangle drawn by the ColorRect node.
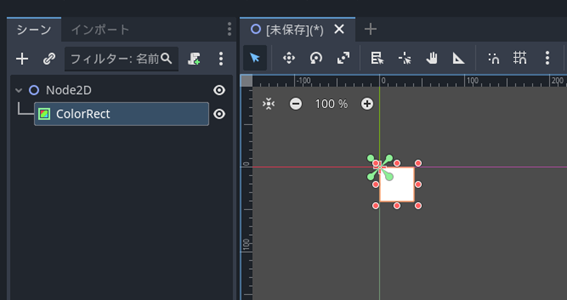
Let’s Launch the Game Screen in Test Play
- Let’s try test play right away. Click the “Run Current Scene (F6)” button in the top-right corner of the screen to start test play.
There is a similar button called “Run Project (F5)”, but it will run a different scene, so be sure to launch it using “Run Current Scene”.

- A new window will open. This shows how it will look when the game actually launches. If you haven’t moved the rectangle, it should be displayed in the top-left corner.

- Once you’ve confirmed the display, close the window using the ✕ button in the top-right corner.
If you don’t see it, close the window once and try “Run Current Scene (F6)” again. If it’s still not visible, you may have moved the rectangle. Try it again after proceeding to the next step.