Set up the “enemy” script.
Since the “enemy” only moves left and right, it is sufficient if it can move left and right and be destroyed when its HP reaches 0. Simply put, you only need three states: “Move Left,” “Move Right,” and “Disappear.” However, this time we can use the “Template Movement” action, which allows automatic setup of simple movement.
Therefore, create two states: “Template Movement” and “Disappear,” and set a link so that the enemy disappears when its HP reaches 0.
Attaching the Visual Script
-
Select the enemy (GameObject) node.
-
Attach the script using the “Attach Script” button.
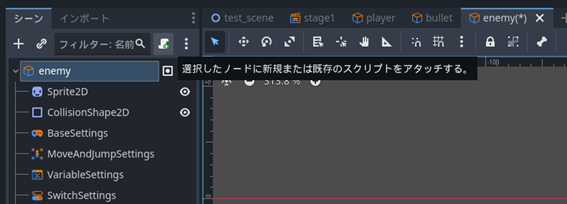
- Create it with the name “enemy.vs” as is.

Creating the “Template Movement” and “Disappear” States
-
Rename State 001 to “Template Movement.”
-
In the Inspector, set the Animation category to “Movement.”
-
Click the “+ Add Execution Action” button.
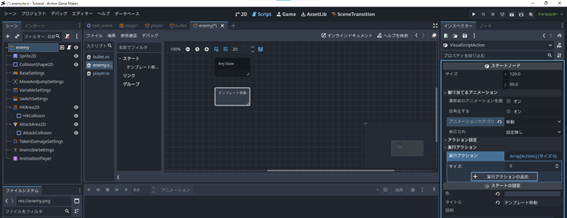
-
Select “Template Movement Settings.”
-
Set “Movement Time” to 3 and turn on “Do Not Fall Off Edges.” This will make it move for 3 seconds or reverse direction if there is a ledge it would fall off.

- Click “Add.”

-
Next, right-click the space to the right of the “Template Movement” state and select “Add State.”
-
Rename State 001 to “Disappear.”
-
Click the “+ Add Execution Action” button.

-
Select “Destroy Self” and add it.
-
If it looks like the following, the state settings are complete.
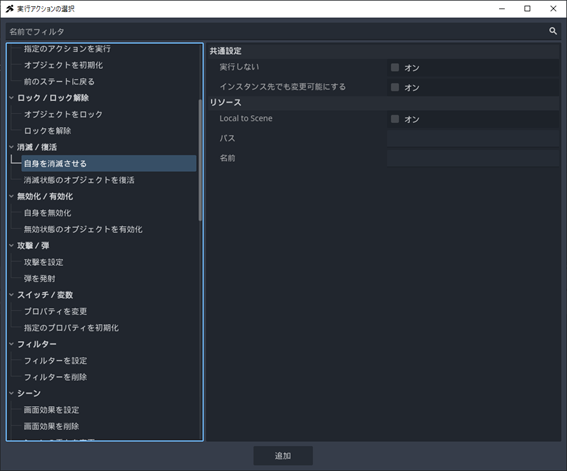
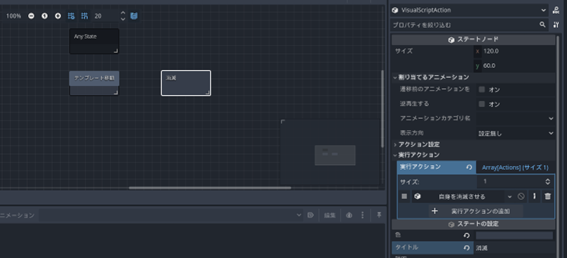
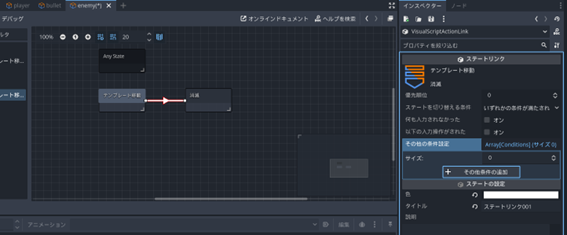
Create a Link from “Template Movement” to “Disappear”
-
Right-click the “Template Movement” state, select “Add Link,” and connect it to the “Disappear” state.
-
Click the “+ Add Other Conditions” button in the Inspector.
-
Select “HP Reached 0.”
-
You can keep the settings as they are (Data Type: Self) and add them.

- If it looks like the following, the setup is complete.
Place “enemy” in the “stage1” Scene
Now that the enemy settings are ready, let’s place it in stage1 and test it. Place it on the same layer as the Player.
-
Change the Editor view from Script to 2D.
-
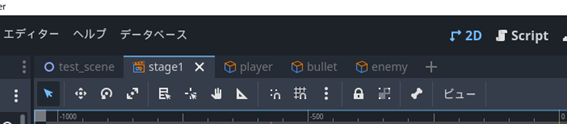
Switch the Scene tab to stage1.
-
Select the Player node in the Scene window.
-
While keeping it selected, drag and drop “enemy.tscn” from the File System to the right of the Player.

- Once placed, try testing the game.
If you confirm that the enemy moves left and right every 3 seconds and disappears after being hit by a bullet three times, you have succeeded.

Checklist when it doesn’t move
When the enemy doesn’t move left and right: Check the “Template Movement” state.
When the enemy reverses but doesn’t flip: Recheck the animation set of the enemy node and the animation specification in the “Template Movement” state.
When the enemy disappears after being hit by a single bullet: Recheck the “HP,” “Max HP,” and “Invincible” settings in enemy’s basesettings.
When bullets don’t hit: Check the CollisionLayer/Mask of [enemy’s “HitArea”] and the CollisionLayer/Mask of [bullet’s “AttackArea”].
When bullets don’t disappear: Check the link from “bullet” movement to the Disappear state and the action in the Disappear state.