Chapter 3: Firing Bullets and Defeating Enemies
Chapter 3 Objectives
In Chapter 2, we achieved the following:
- Created a simple level where the player character can walk and jump.
In this chapter, we will go further and learn how to implement the following:
- The player can defeat enemies by firing bullets.
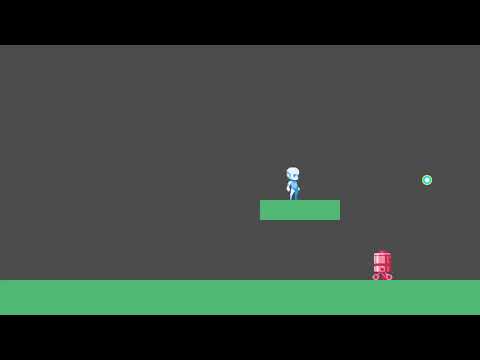
Here is a sample video showing the result after completing Chapter 3:
Planning the Implementation of “Player Shoots and Defeats Enemies”
Let’s first think about the steps required.
- The Player needs to have a new Shot (Shooting) state.
- To fire bullets, we also need to create a new Bullet object.
- Since there are no enemies yet, we also need to create an Enemy object.
Therefore, the objectives for Chapter 3 are as follows:
- Create the Bullet object
- Add the Shot state to the Player
- Create the Enemy object
Finally, to truly implement defeating enemies,
we also need to implement the damage-dealing process, which is an Attack System (Attack System).
ACTION GAME MAKER provides a specialized system for handling attacks and damage.
Therefore, before we begin making the game,
let’s take some time to understand how this system works.
“Attack” and “Damage” in ACTION GAME MAKER
Attack Hits
Do you remember the HitArea2D / HitCollision and AttackArea2D / AttackCollision nodes in the Player object?
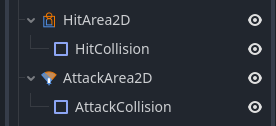
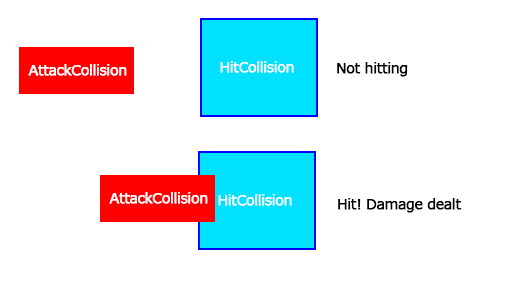
In ACTION GAME MAKER, when an AttackCollision from AttackArea2D collides with a HitCollision from HitArea2D, the system automatically handles damage calculation.
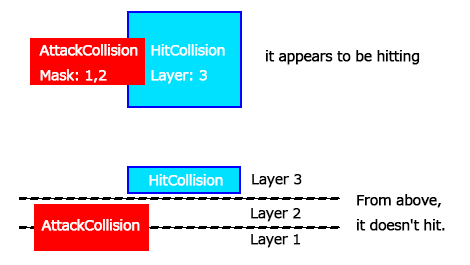
Additionally, using Godot’s built-in CollisionLayer and CollisionMask features, you can precisely control which objects can collide and which cannot.
CollisionLayer and CollisionMask
As mentioned earlier when discussing wall collisions, Godot uses the CollisionLayer and CollisionMask system to control collision relationships.
You can think of them as adding a layer of “depth” rules to collision detection.
In the settings panel, their meanings are as follows:
- Layer (Layer) → “Which layers does this object belong to?”
- Mask (Mask) → “Which layers can this object collide with?”

For example:
- If an AttackCollision’s Mask only includes Layer 1 and Layer 2, it will not hit a HitCollision that exists only on Layer 3.
This mechanism also prevents unreasonable situations, such as a character’s attack collision hitting its own attack collision area.
Damage Processing
When an attack successfully hits, ACTION GAME MAKER automatically performs the following processing steps:
-
Subtract the attacker’s Attack Power (set in BaseSettings) from the target’s HP.
-
Then, enable Invincibility (also set in BaseSettings), making the damaged object immune to further damage for a certain period.
 With this system, ACTION GAME MAKER automatically handles the core logic of attacks and damage. You only need to correctly configure the relevant nodes and parameters.
1 Like
Creating a Bullet Object
After understanding the basic mechanics of the attack system,
we will now create a Bullet.
A bullet is also a Game Object,
so the overall process is similar to creating a player character:
- Specify the image
- Adjust movement speed and other settings
- Use visual scripting for processing
However, there is one key difference:
Bullets are not directly controlled by the player’s input device.
The firing and movement of bullets are handled through the “Shoot Bullet” action,
so we don’t need to write complex movement logic for the bullet.
Creating a Game Object for the Bullet
- Open a new scene tab,
and when creating the root node, select Game Object.
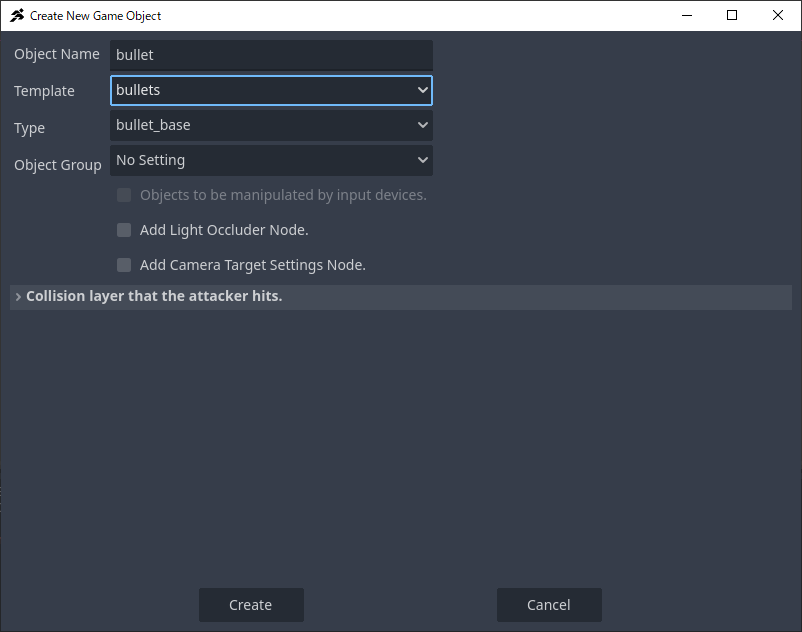
- In the Create New Object window, make the following settings:
- Object Name: bullet
- Template: bullets
- Type: bullet_base
- The bullet object template will be loaded.
- Right-click on [unsaved (*)],
and save the scene as bullet.tscn.
Setting the Bullet’s Image
Next, assign an image to the bullet.
Although we could create an animation for the bullet to make it look cooler,
in this tutorial, we’ll use a static image to keep things simple.
- Right-click the image below and save it to your computer.

-
Drag the downloaded bullet.png
into the FileSystem panel in the editor.
-
In the Scene panel, select the Sprite2D node.
- In the Inspector,
drag bullet.png onto the Texture property (currently showing <empty>).
Adjusting the Bullet’s MoveAndJumpSettings
We want the bullet to move faster than the player.
The player’s movement speed is 300,
so we’ll set the bullet’s speed to 600.
- In the Scene panel, select the MoveAndJumpSettings node.
- In the Inspector, set both values to 600:
- Horizontal Speed (水平速度)
- Vertical Speed (垂直速度)
At this point, we have created a
basic bullet object with image display and independent speed settings.
Adjusting the Bullet’s Attack Hitbox
Setting Collision Layer and Mask in AttackArea2D
By default, this object is on Layer 1,
and its Mask is set to 1 and 2.
This means it can hit objects on Layer 1 and Layer 2.
However, the Player is also on Layer 1,
and uses the same Mask 1, 2.
If we keep the default settings, the bullet will collide with the player immediately upon firing.
To avoid this, we need to move the bullet’s collision settings to
Layer 3, and have it only collide with Layer 3.
-
In the Scene panel, select AttackArea2D.
-
In the Inspector, expand the Collision section.
- A panel for selecting Collision Layer / Mask will appear.
- Change the Layer from 1 → 3
- Change the Mask from 1, 2 → only check 3
Now, the bullet will no longer collide with the player.
Adjusting the Size of AttackCollision
Currently, the bullet’s attack hitbox is much larger than the bullet’s sprite image.
We need to shrink it so it better matches the bullet itself.
-
In the Scene panel, select AttackCollision.
-
In the editor view, drag the orange control points around the shape to adjust its size.
- Adjust it so the attack hitbox is slightly larger than the bullet image.
At this point, the bullet’s collision settings are correctly configured:
- The bullet will no longer hit the player itself
- The attack hitbox size now matches the bullet’s size
Bullet Script Setup
The Bullet’s CollisionShape2D size is already appropriate, so no further adjustment is needed.
After completing the basic setup, we will now create a script for the bullet.
The bullet should disappear under the following conditions:
- Hit an enemy
- Hit a tile
- Move out of the camera view
For this, we only need two states: Move and Disappear.
Let’s proceed with the setup.
Attach Script
-
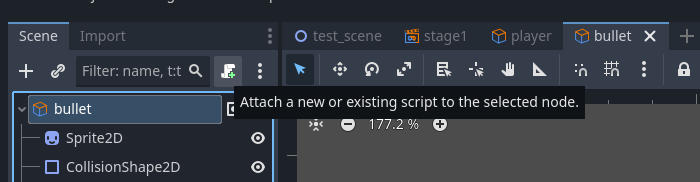
Select the Bullet (GameObject) node.
-
In the Scene panel, click the  + (Attach Script, Attach Script) button.
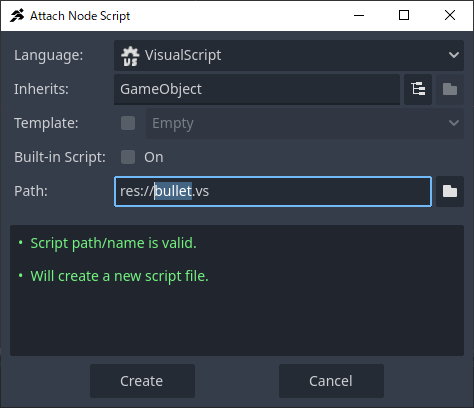
- Keep the default options and click Create,
creating a new script named bullet.vs.
Set Up the “Move” State
We will use the default State001 as the Move state.
Since the bullet’s movement is controlled by the “Shooter,”
this state does not require additional action settings.
-
Select State001.
-
In the Inspector, change the Title to Move.
Create the “Disappear” State
-
Right-click on the Move state and select Add State (Add State).
-
Select the newly created State001 and rename the Title to Disappear.
-
In the Inspector, click + Add Executable Action.
- Select RemoveSelf, then click Add.
- This means that as soon as the bullet enters the Disappear state,
it will be immediately removed from the scene.
Connect Move → Disappear
The bullet should enter the Disappear state under the following conditions:
- Collision with an enemy
- Collision with a tile
- Moving out of the camera range
We can combine multiple conditions in a single link using AND (and) / OR (or).
Here, we use OR logic:
Hit enemy OR hit tile OR leave camera range
Follow these steps:
-
Right-click on the Move state and select Add Link (Add Link).
-
Connect the link to the Disappear state.
-
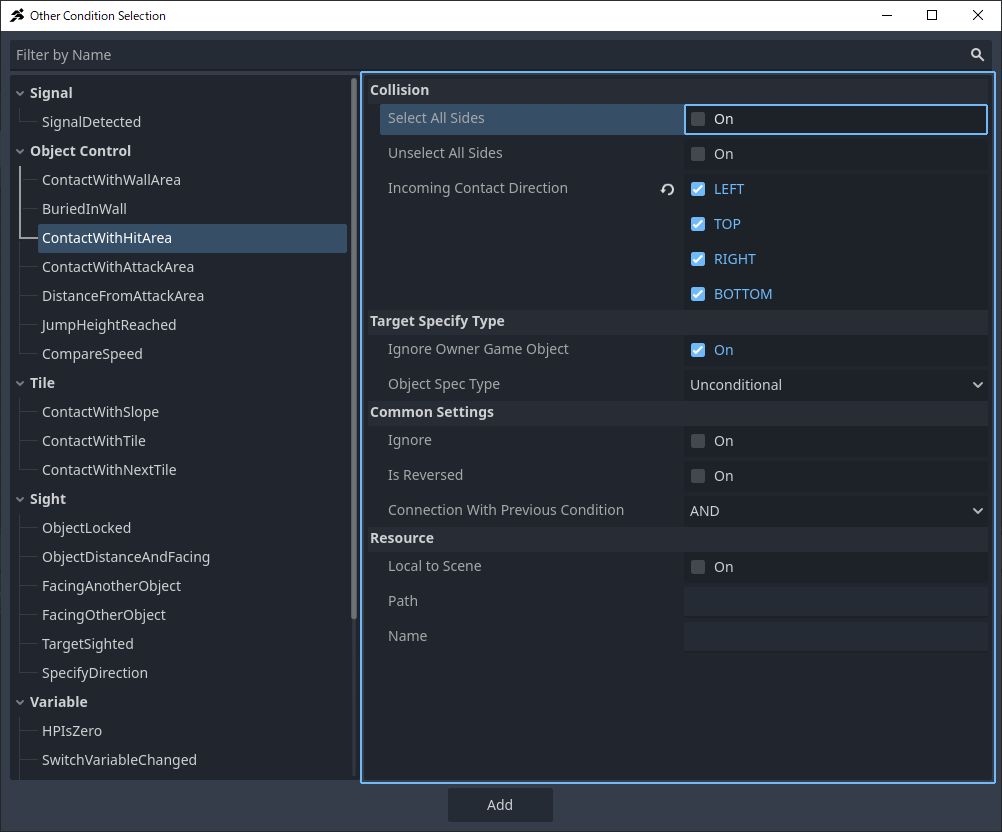
Select the newly created link and click + Add Condition in the Inspector.
-
Select ContactWithHitArea.
-
Check Select All Sides (Select All Sides), then click Add.
-
Click + Add Condition again.
-
This time, select ContactWithTile.
-
Set the direction to All Directions,
and in the logical condition, select OR, then click Add.
-
Then click + Add Other Condition to add a third condition.
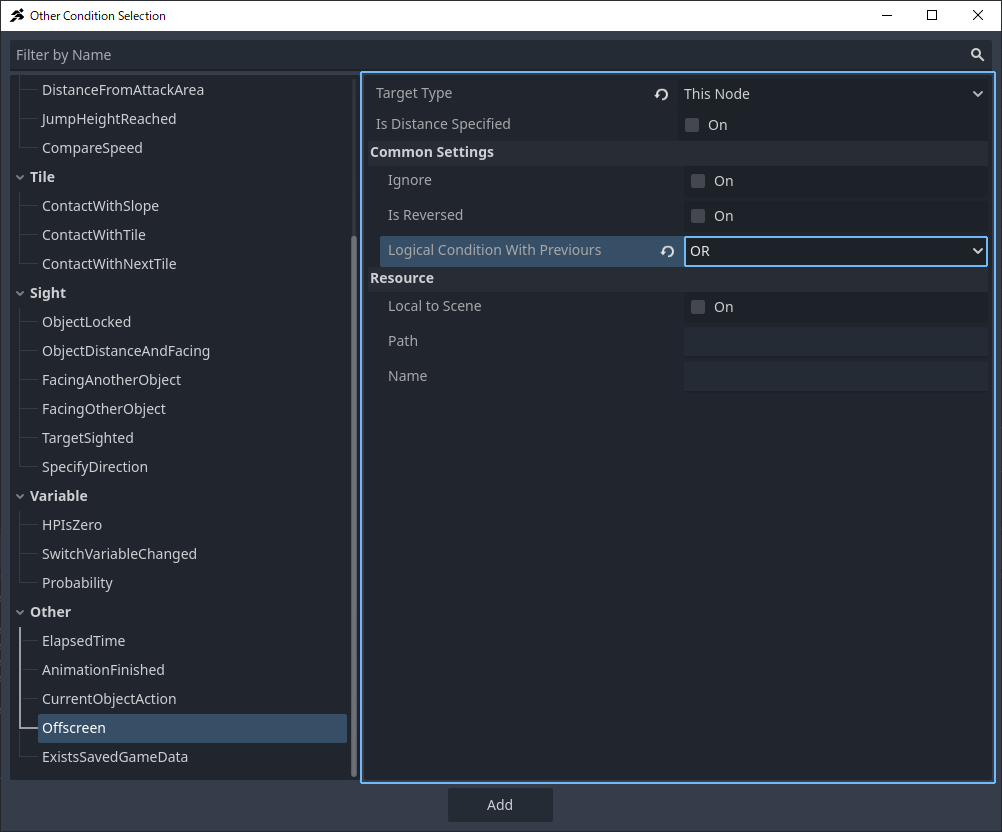
-
Scroll down and select Offscreen (Out of Screen).
-
Set Target Type to This Node,
and set the logic to OR, then click Add.
- Confirm the condition configuration matches the image below.
- If the AND/OR settings are incorrect,
you can click the icon to switch between them.
Explanation: Why Isn’t “ContactWithHitArea” Using AND?
The AND/OR setting represents the relationship with the previous condition.
Since ContactWithHitArea is the first condition,
the result will not be affected regardless of whether it is set to AND or OR.
However, if you move it below other conditions,
AND will take effect.
To avoid confusion, it is recommended to keep it as OR.
Bullet script setup is now complete!
Don’t forget to save the scene.
Modify the Player Object to Fire Bullets
To enable the player to fire bullets, we need to complete four steps:
A. Create a shooting animation
B. Add and configure the BulletsSettings node
C. Add and configure the Connector node (firing position)
D. Create a “Shoot Bullet” state in the visual script
Let’s begin with the first step: adding the shooting animation.
A. Creating the Shooting Animation
First, let’s think about when the player will shoot.
Since this tutorial follows a Mega Man-style design,
it might seem intuitive to need three shooting states:
- Standing shot
- Moving shot
- Air shot
However, our previously created Move (Movement) animation,
already features the character running while extending their hand forward,
which can directly serve as the “moving shot” animation.
This means we only need to create two new animations:
As before, the required shooting poses are already included in the loaded sprite sheet.
The overall process remains the same:
Create animation → Insert keyframes → Load into Animation Set
Creating the “Ground Shot” and “Air Shot” Animations
-
Switch the Scene tab to Player,
and set the editor view to 2D.
-
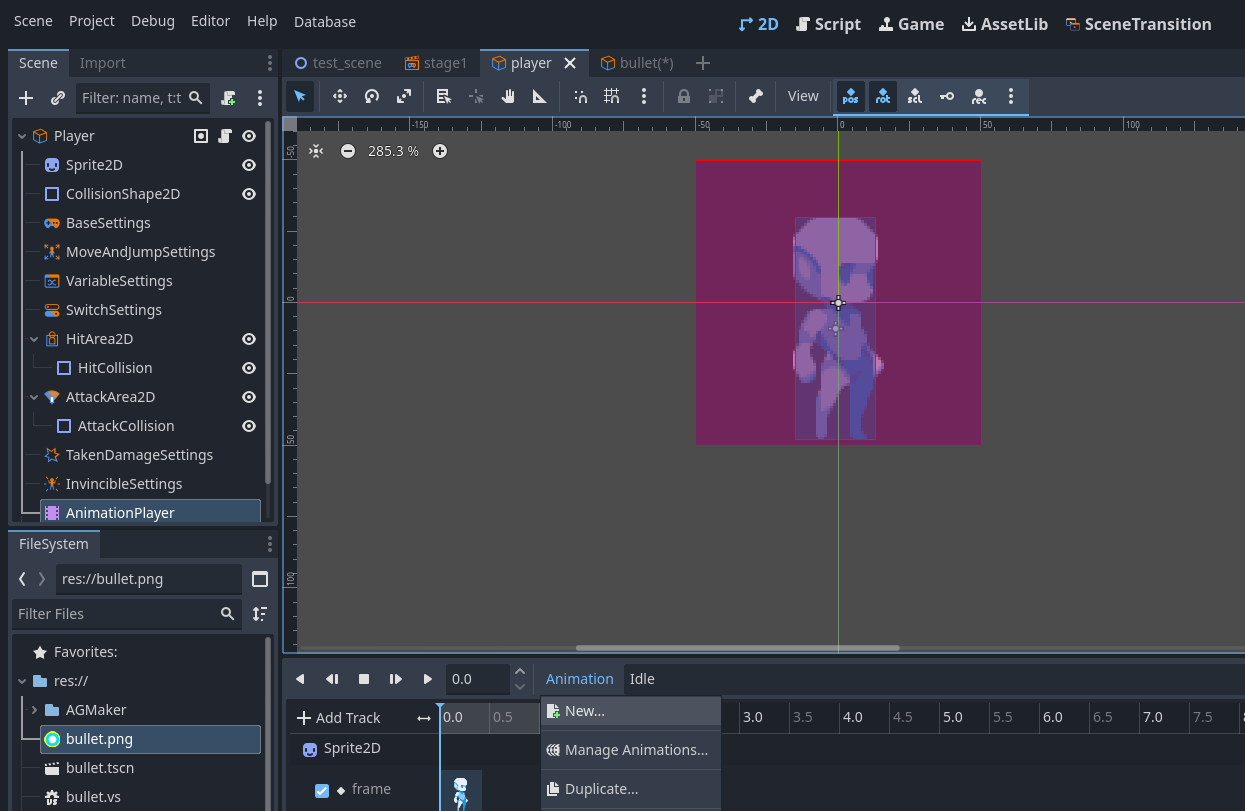
Select the AnimationPlayer node.
-
In the Animation panel at the bottom, click Animation to create a new animation.
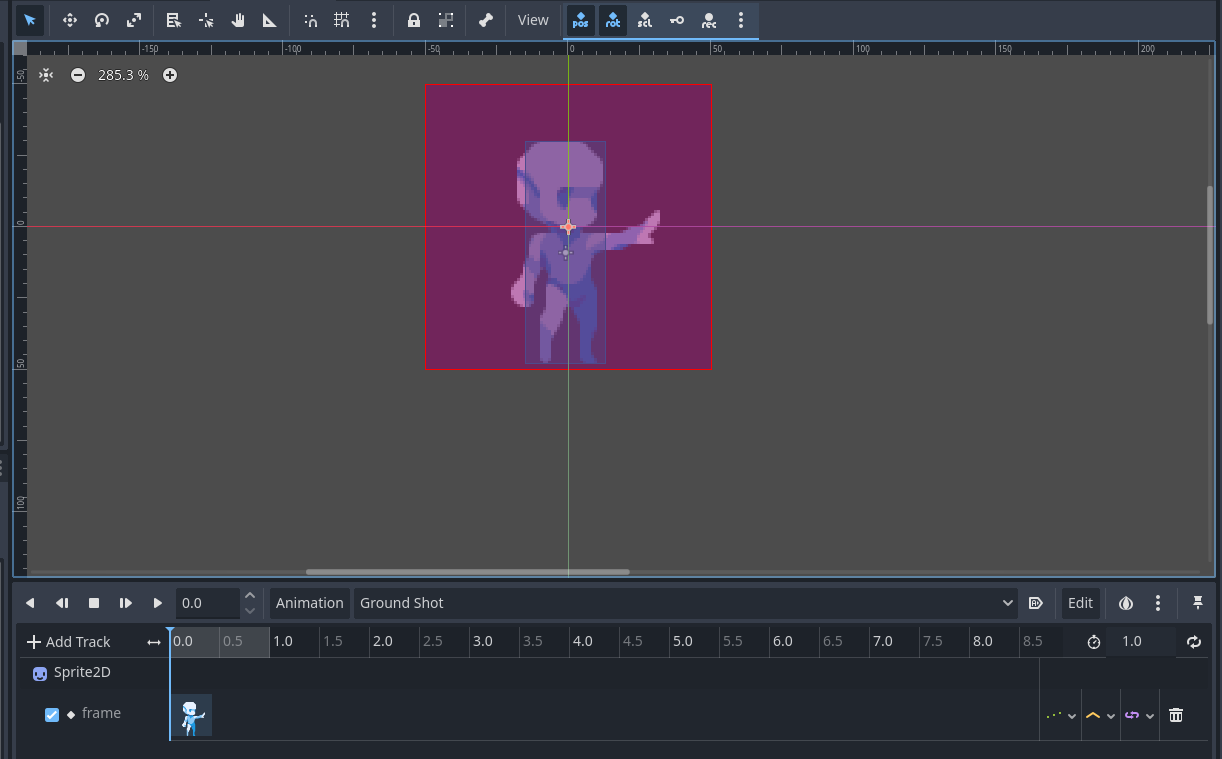
- Name the new animation Ground Shot.
-
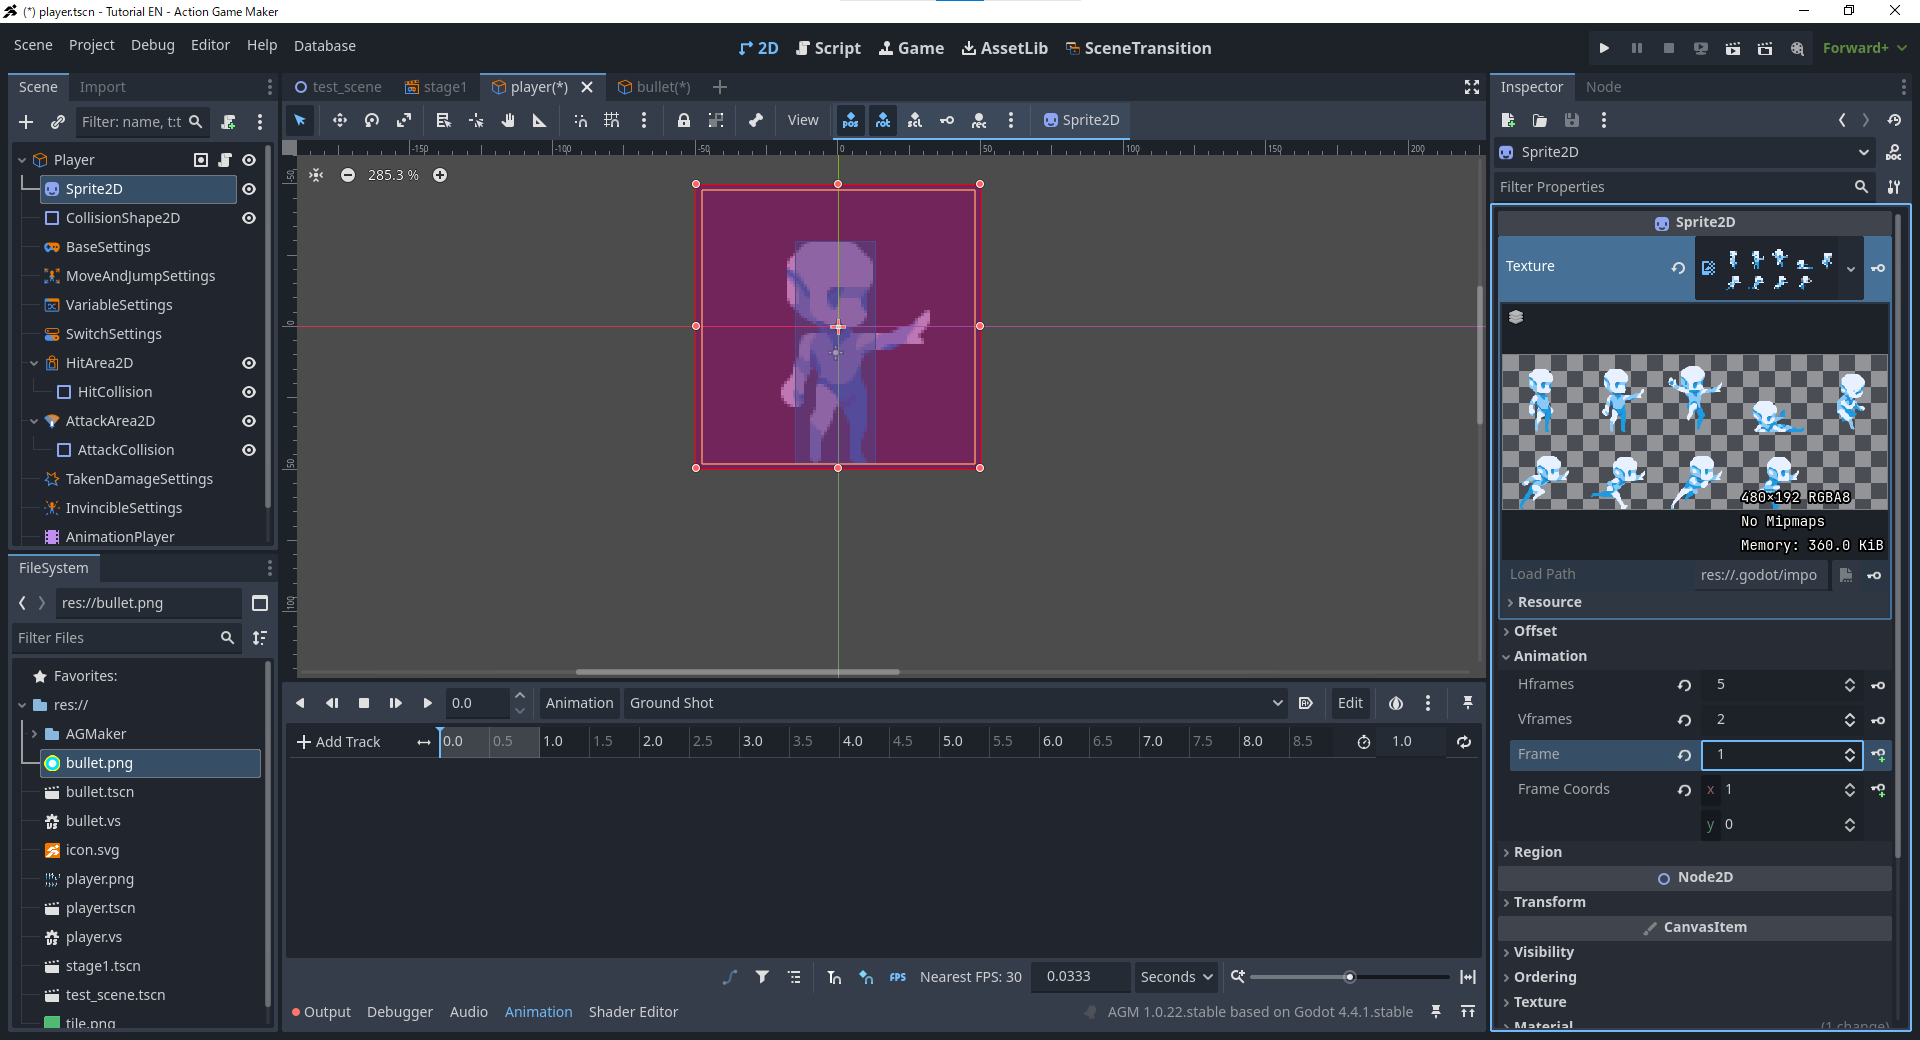
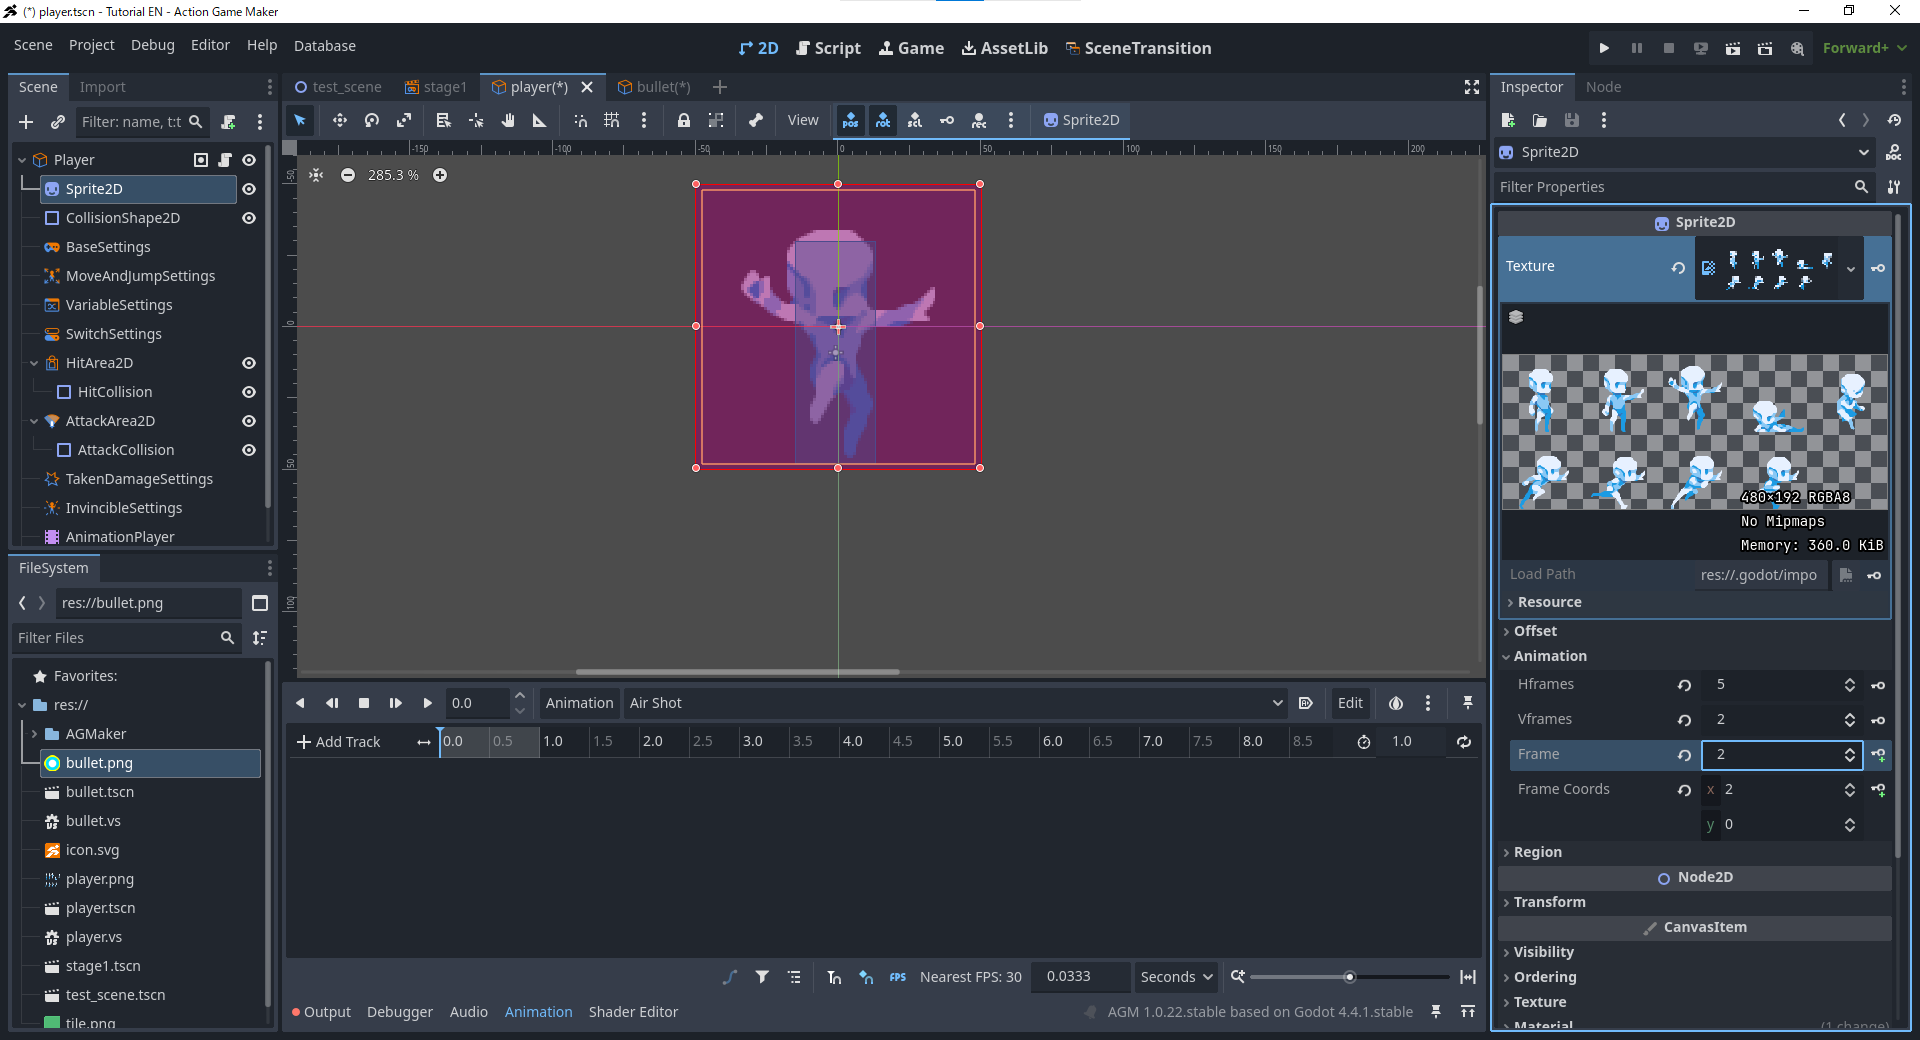
Select the Sprite2D,
and expand the Animation property in the Inspector.
-
Set Frame to 1
(the frame where the character stands on the ground with hand extended forward),
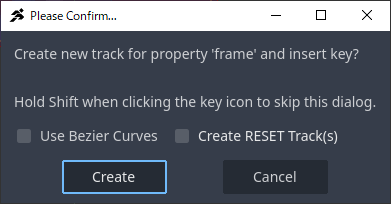
then click the  + (Add Keyframe) button.
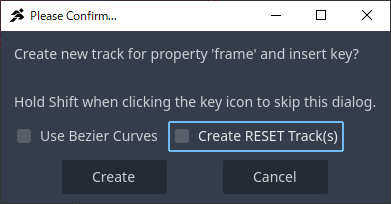
- In the pop-up window, uncheck Create RESET Track,
then click Create.
- Repeat steps 2–3 to create another new animation,
this time naming it Air Shot.
- Keep the Sprite2D selected,
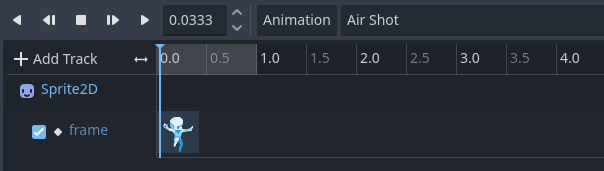
set Frame to 2
(the frame where the character is in the air with hand extended forward),
then click the + (Add Keyframe) button to insert a keyframe.
Registering the Animations into the Animation Set
-
Select the Player (GameObject) node.
-
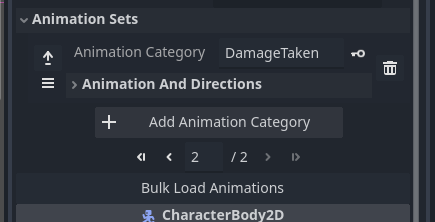
In the Inspector, click the Bulk Load Animations button.
- At this point, Ground Shot and Air Shot
will be automatically added to the Animation Set.
C. Add and Configure the Connector Node
The Connector node is used in visual scripting to specify a “position,”
such as the starting point of a bullet or the location where an object is spawned.
This time, the Connector will serve as the bullet’s firing point,
so we need to place it at the front of the character’s hand in the shooting animation.
-
Select the Player (GameObject) node.
-
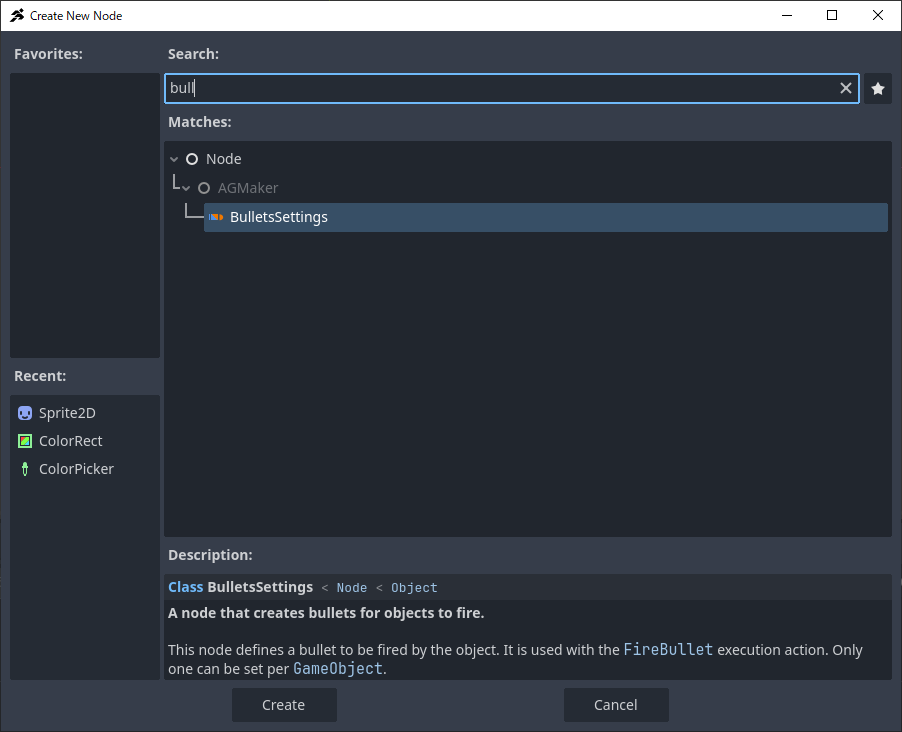
Click the + (Add Child Node, Add Child Node) button in the top-left corner,
to open the Create New Node (Create New Node) window.
- Select Connector, then click Create.
- Select the AnimationPlayer node,
and switch the current animation to Ground Shot.
-
Select the Connector node again.
-
Switch the editor tool to Move Mode (Move Mode).
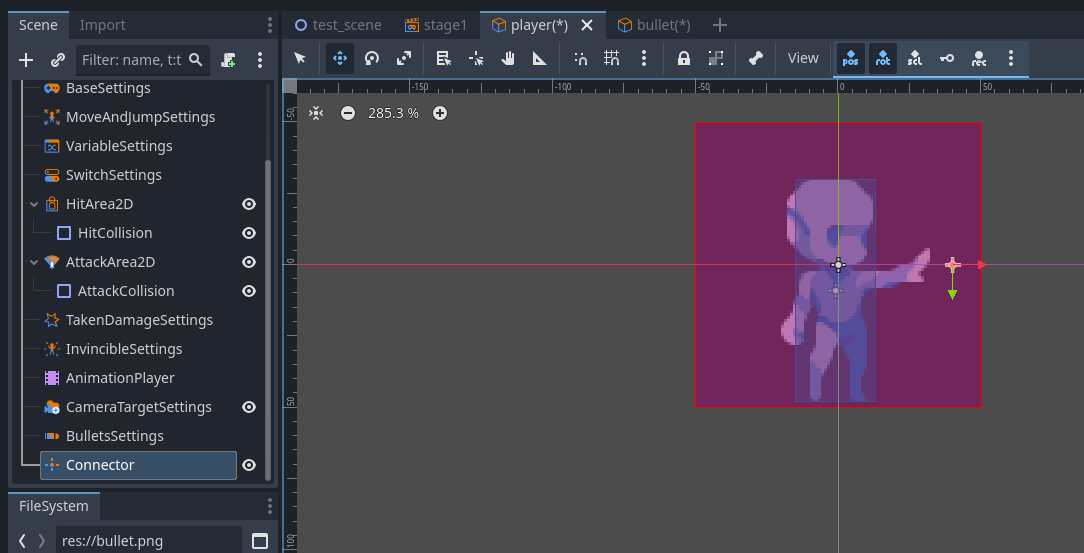
- Drag the ✛ (Connector Marker),
and place it at the front of the character’s hand.
At this point, the Connector setup is complete.
1 Like
D. Adding the Shoot State
Next, we’ll add the states for shooting bullets.
We need the following shooting states:
- Ground Shot (Ground Shooting)
- Moving Shot (Shooting While Moving)
- Air Shot (Aerial Shooting)
However, aerial shooting requires special handling.
If we simply switch from Air Shot back to Jump,
then every shot will trigger the jump action again, causing the character to jump higher and higher.
To solve this, we need to split the Jump state into two states:
Their responsibilities are as follows:
- The Jump state only handles “jumping” and will immediately switch to Air
- The Air state indicates the character is in the air
- In the Air state, if the character’s feet touch the ground (collide with a Tile below), return to Idle
- Air Shot returns to Air after completion, avoiding repeated jump triggers
Let’s build this step by step.
Creating Ground Shot and Moving Shot States
-
Switch to the Script tab.
-
Create a new state near the left side of the Idle state.
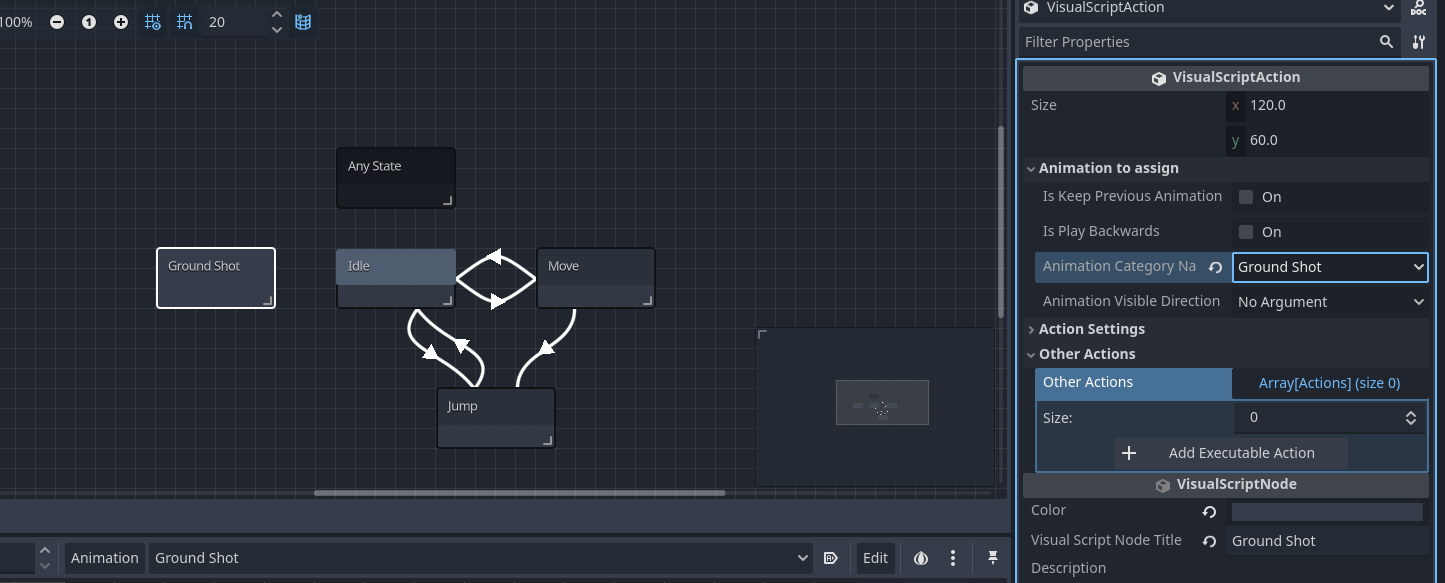
-
Rename the newly created State001 to Ground Shot.
-
In Select Animation, set the animation to Ground Shot.
-
Click + Add Execution Action.
-
Select FireBullet as the execution action.
-
In Bullet Data, specify the bullet object created earlier.
-
Click the Assign button on the right side of Connector.
-
In the Select Node window, select the previously created Connector node.
-
Confirm Bullet Data = bullet, Connector = Connector, then click Add.
-
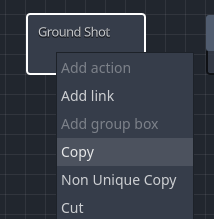
Next, create Moving Shot by copying the Ground Shot state:
- Right-click Ground Shot, select Copy
- Right-click near the **Move** state, select **Paste State**
- Rename the new state to **Moving Shot**
- Check Continue Previous Animation.
Since Moving Shot uses the same animation as Move, no animation switch is needed.
Connecting Idle ↔ Ground Shot and Move ↔ Moving Shot
When the character is in Idle or Move state,
pressing the Attack key will enter the corresponding shooting state.
After 0.3 seconds of shooting, return to the original state.
-
Right-click Idle, add a link to Ground Shot.
-
In the properties, check Trigger On Input.
-
Expand Input Operations List (Array[InputCondition]).
-
Click + Add Input to add a new input condition.
-
Click the blank item, select New Input Condition.
- Expand Input Condition, set Input Key = Attack.
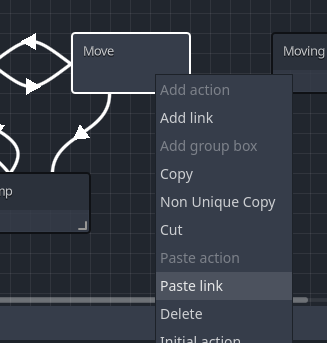
- Right-click the link, select Copy.
- Right-click Move, select Paste Link.
-
Connect this link to Moving Shot.
-
Right-click Ground Shot, add a link back to Idle.
-
In the Inspector, click + Add Condition.
-
Select the condition Elapsed Time.
-
Change the time from 1 second to 0.3 seconds.
-
Right-click this link, select Copy.
-
Right-click Moving Shot, select Paste Link, and connect it back to Move.
At this point, the ground shooting states are complete.
Testing Ground Shooting
-
Click Run Project (F5) in the top-right corner.
-
In Idle or Move state, press X to shoot bullets.
-
If it doesn’t work properly, check:
- Animation not playing → Check state animation settings and AnimationPlayer
- Animation plays but no bullets → Check FireBullet action settings
- Bullets appear but don’t move or move in wrong direction → Check BulletsSettings
Once confirmed correct, close the test window.
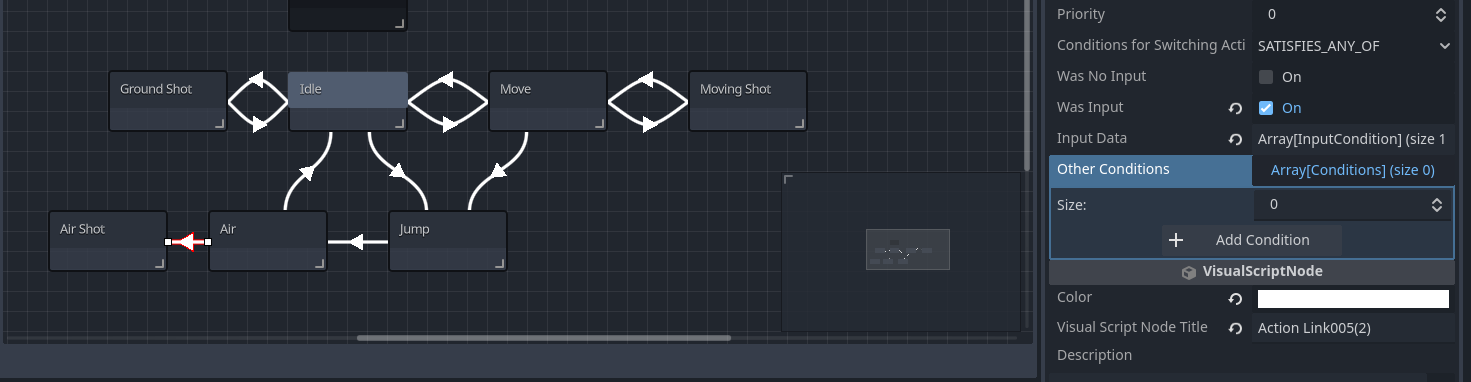
Splitting Jump into Jump and Air States
-
Create a new state to the left of Jump.
-
Rename State001 to Air.
-
Set its Animation to Jump (for aerial display).
-
Right-click Jump, add a link to Air.
-
In the Inspector, set Conditions for Switching to Unconditional
(meaning Jump will immediately switch to Air).
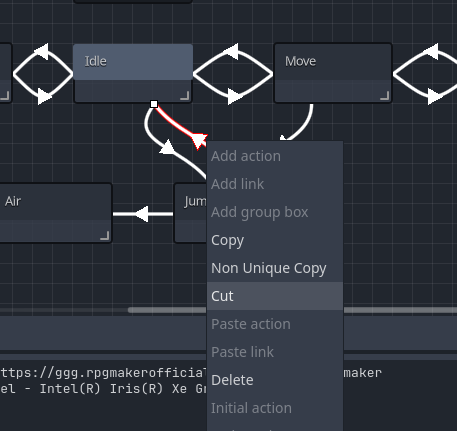
- Cut the existing Jump → Idle link: select it, right-click → Cut.
-
Right-click Air, select Paste Link, and connect it to Idle.
-
Now, the landing detection will return to Idle from Air, not from Jump.
- Test once to confirm the jump → air → landing flow is correct.
Creating Air Shot and Connecting It
Since Air Shot has the same logic as Ground Shot, only with different animations,
we can directly reuse the existing state.
-
Right-click Ground Shot, select Copy.
-
Paste it to the left of the Air state.
-
Rename Ground Shot (1) to Air Shot.
-
In the Inspector, change the Animation to Air Shot.
-
Copy the Idle → Ground Shot link.
-
Right-click Air, paste the link, and connect it to Air Shot.
-
Copy the Ground Shot → Idle link.
-
Right-click Air Shot, paste the link, and connect it back to Air.
Final Testing
Run the project again:
- In Idle or Move state, press X → player shoots bullets
- Jump with Z, then press X in the air → player performs aerial shooting
If both scenarios work correctly,
 Your shooting system is complete!
1 Like
Creating the Enemy Object
Next, let’s create the enemy object.
This time, we’ll start with the simplest enemy — an enemy that only moves left and right.
The overall process is the same as when creating the player character:
- Create a scene
- Set up the image and animation
- Configure the nodes
- Write behavior using visual scripting
Create the enemy GameObject
-
Switch the editor view back from Script to 2D.
-
Create a new scene tab, and in Create Root Node, select GameObject.
-
In the Create New Object window, set the following:
- Object Name:
enemy
- Template: Character
- Type: 2DSprite Character Base
- Object Group: Enemy
- Right-click on Unsaved, and save the scene as enemy.tscn.
Setting the Enemy’s Image and Animation
Next, let’s set up the image and animation for the enemy.
Unlike bullets, which are circular and symmetric left-to-right, this enemy is a non-symmetric character,
so it needs to be flipped horizontally depending on its movement direction.
Since horizontal flipping is handled automatically by the Animation Set,
the process here is exactly the same as for the player character:
- Use Sprite2D to set the texture
- Use AnimationPlayer to create animations
- Configure the Animation Set on the enemy (GameObject) node
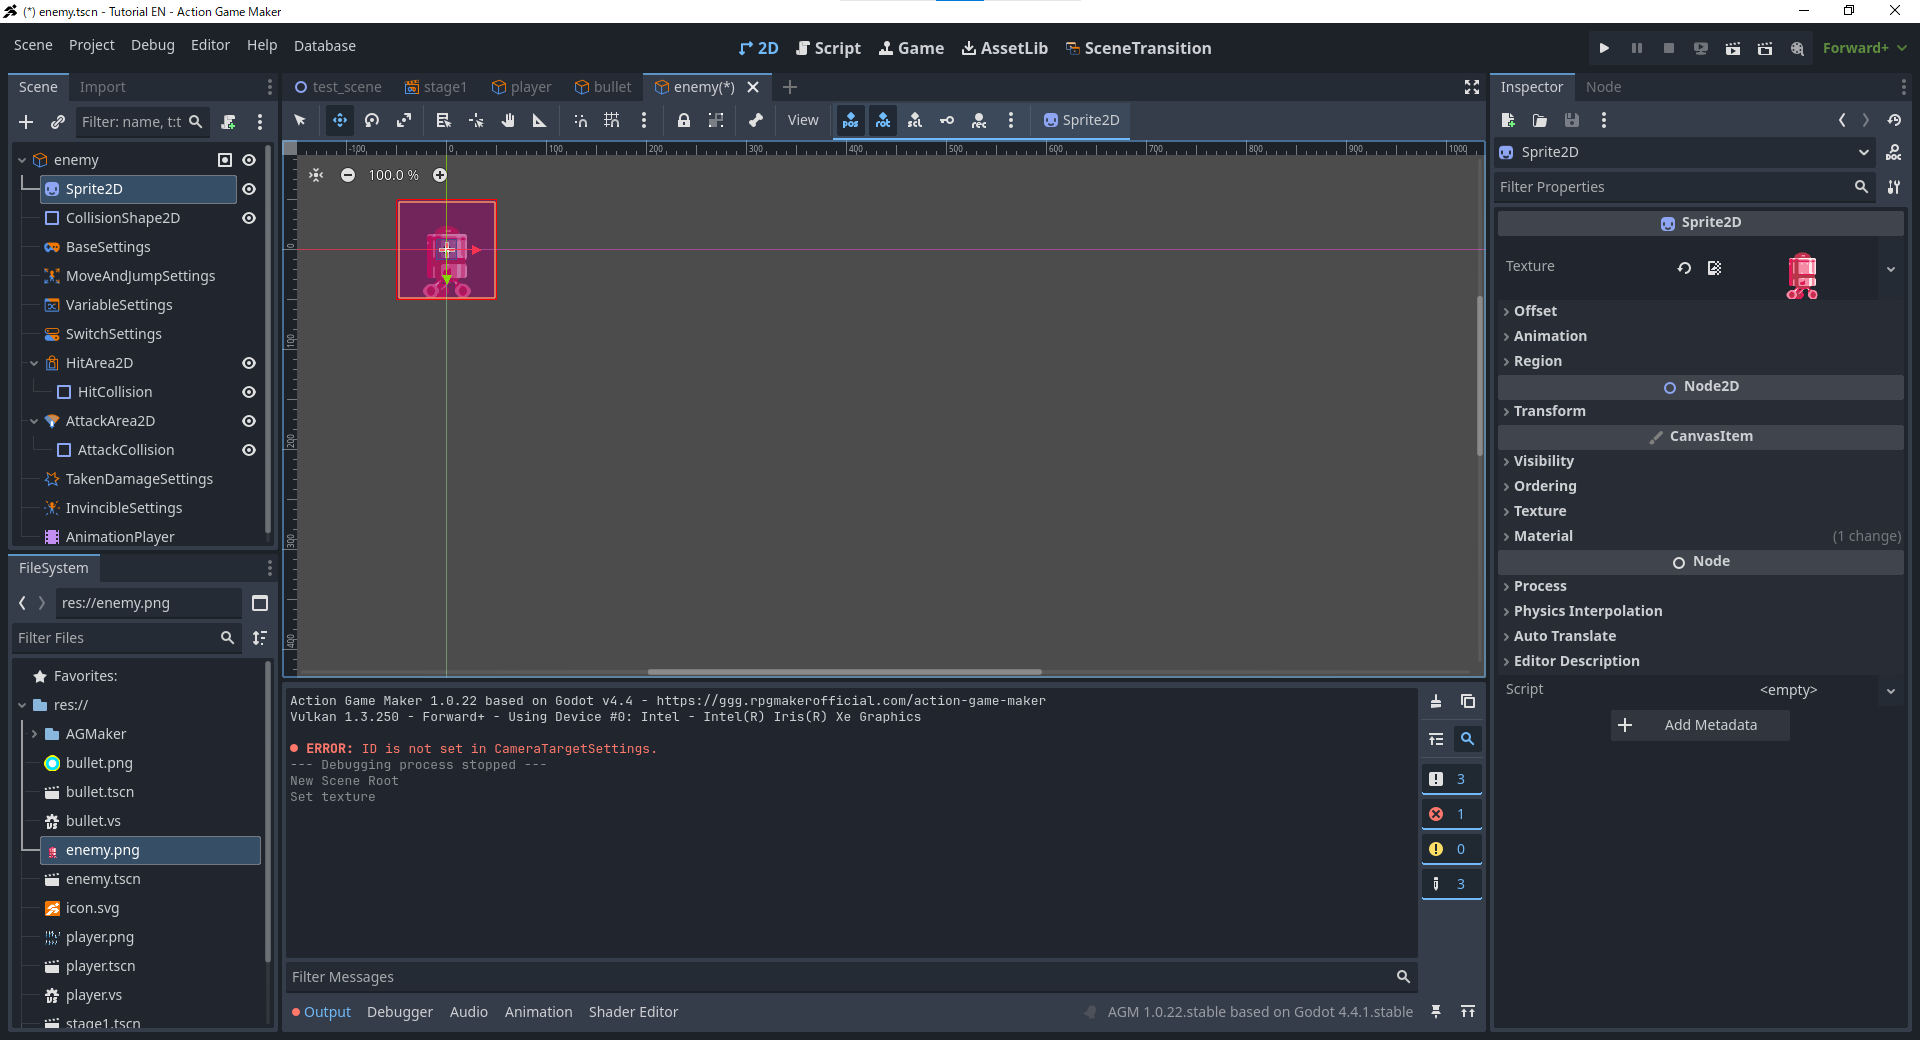
Configuring Sprite2D
- Right-click the image below and save it to your computer.

-
Drag the downloaded image into the editor’s FileSystem to import it.
-
In the Scene panel, select the Sprite2D node.
-
In the Inspector, drag enemy.png into the Texture property.
Since this image doesn’t need to be split into multiple frames, the Sprite setup is now complete.
Adjusting Collision Shape with CollisionShape2D
The current collision area is clearly smaller than the character image, so we need to adjust its size.
-
In the Scene panel, select the CollisionShape2D node.
-
Drag the orange control points at the corners of the collision box
to resize it so it roughly matches the size of the character image.
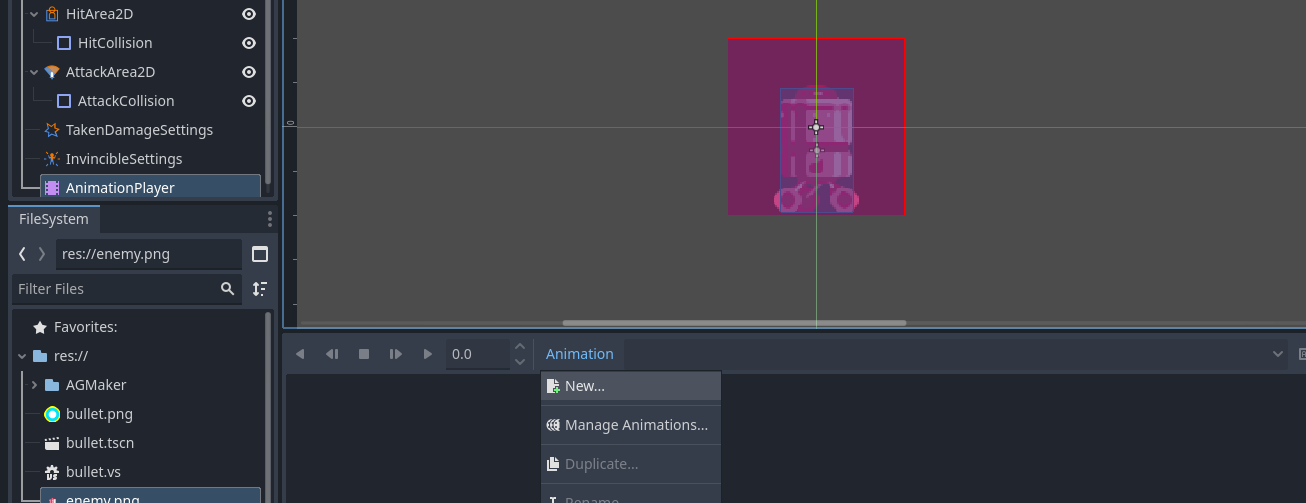
Configuring AnimationPlayer and Creating Animation Set
To use the Animation Set, there must be at least one animation.
Since this enemy doesn’t need frame switching, we only need to create a simple animation.
-
Select the AnimationPlayer node.
-
In the animation window at the bottom, click Animation → New.
- Name the new animation Move and create it.
Since no tracks need to be added, this animation is now complete.
-
Select the enemy (GameObject) node.
-
In the Inspector, click AnimationPlayer.
-
Confirm the correct AnimationPlayer is selected, then click OK.
-
In the Inspector, click the Bulk Load Animations button.
-
Expand Animation Set and confirm that the Move animation has been registered correctly.
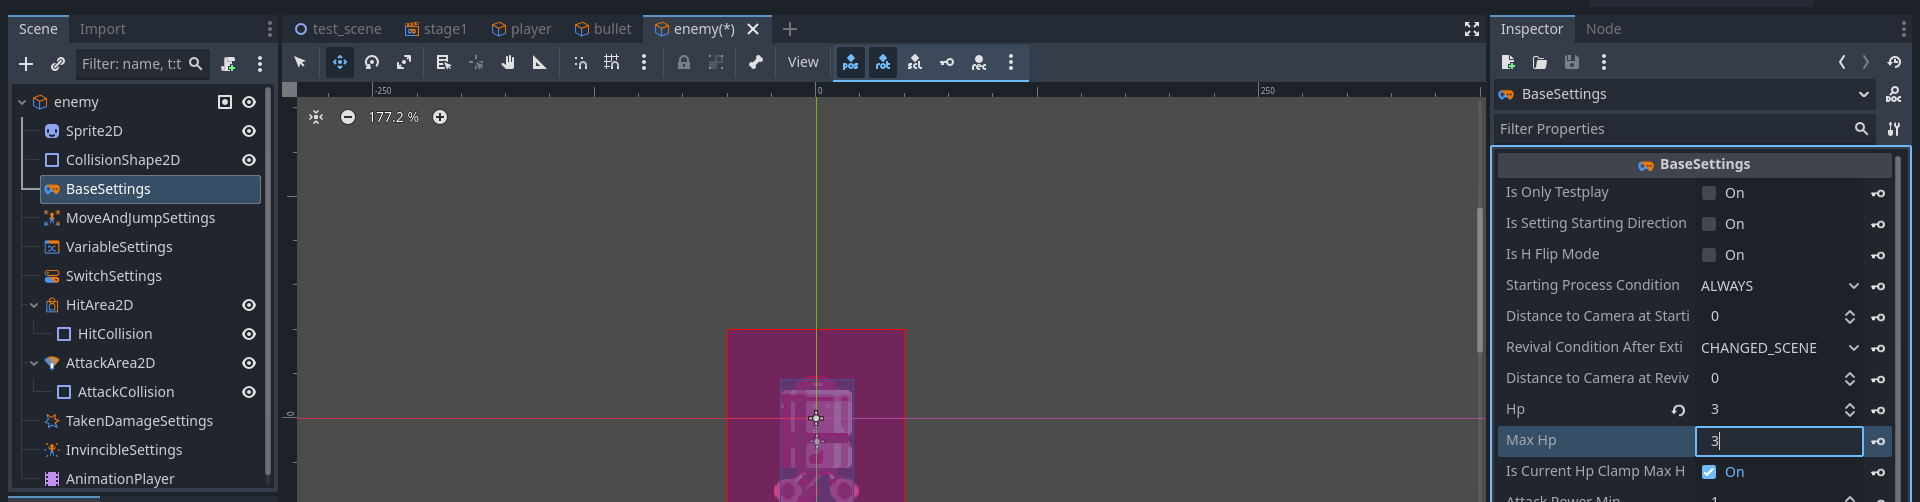
Adjusting the Enemy’s BaseSettings
To make enemies truly defeatable, we need to configure their HP (Health Points) and invincibility duration settings.
Setting Health Points (HP)
-
Select the BaseSettings node.
-
In the Inspector, change both HP and Max HP from 1 to 3.
- This means the enemy will reach 0 HP after taking 3 points of damage.
Setting Invincibility Duration
Invincibility duration prevents an object from taking multiple HP deductions in a very short time after being hit.
Without this mechanism, enemies might die instantly when hit by multiple bullets at the same time.
Since the player’s firing interval is set to 0.3 seconds, setting the invincibility duration to approximately 0.2 seconds is a suitable value.
- If set to 0.4 seconds, the enemy might ignore the second bullet in a rapid fire sequence.
- If set to exactly 0.3 seconds, the second bullet may fail to register a hit during close-range shooting.
Additionally, the invincibility system includes a flashing effect, where the character flashes periodically while invincible.
With an invincibility duration of 0.2 seconds, setting the Blink Duration to 0.1 seconds makes the flashing effect more noticeable.
-
In the Inspector, change Invincibility Duration from 1.0 to 0.2.
-
Then, change Blink Duration from 1.0 to 0.1.
Adjusting the Enemy’s Hitbox
Next, configure the enemy’s hit detection area.
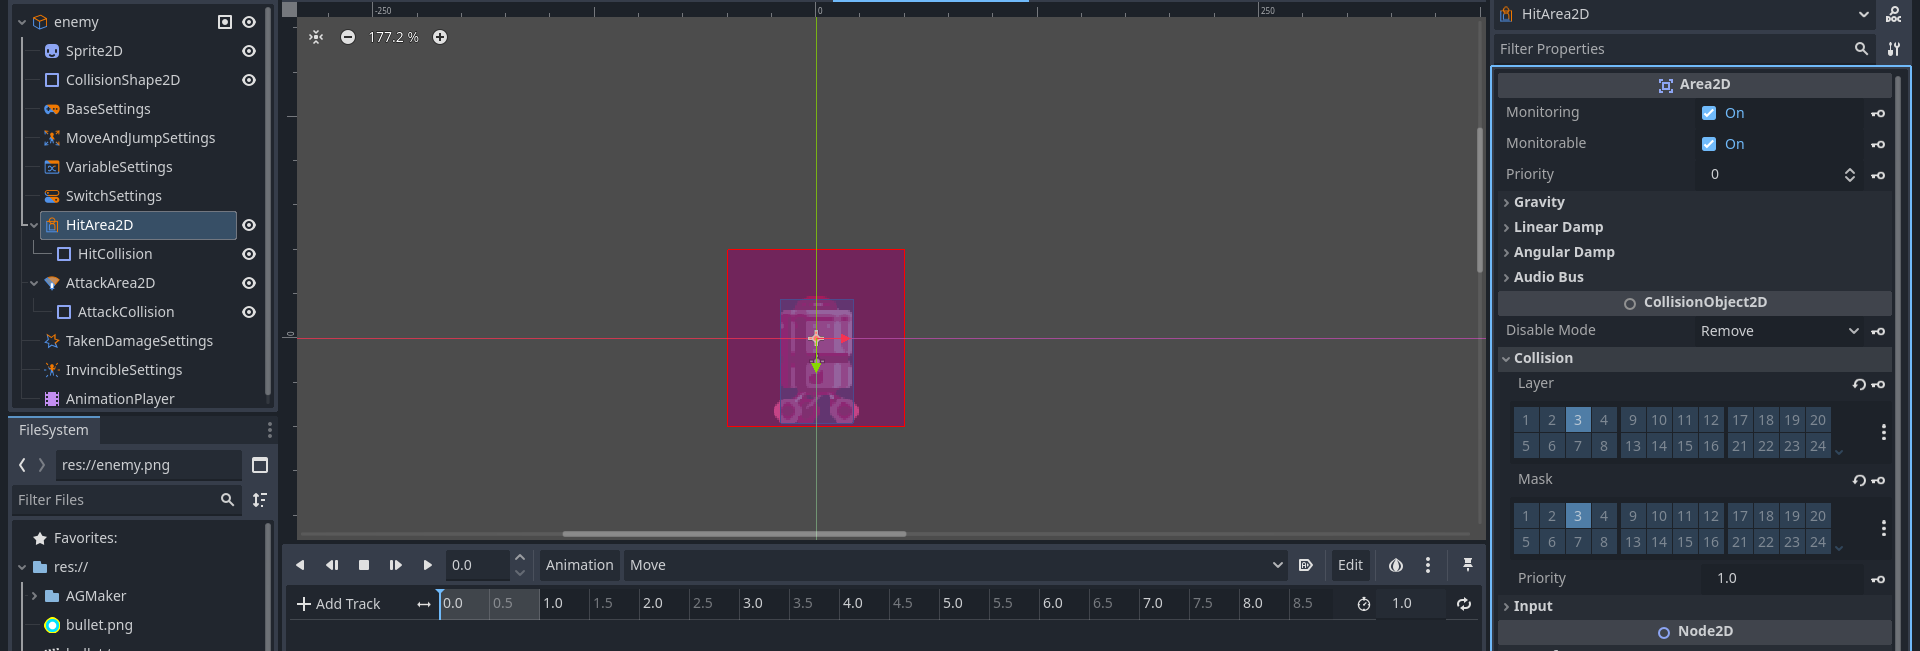
Since we previously set the bullet object’s collision layer to Layer 3,
the enemy must also be on Layer 3 to properly interact with the bullets.
Configuring Collision Layer and Mask in HitArea2D
- Select the HitArea2D node.
- In the Inspector, expand the Collision section.
- Set both Layer and Mask to 3.
- This ensures the enemy’s hit detection correctly interacts with the bullet’s attack collision.
Adjusting the Size of HitCollision
The current HitCollision area is too large and needs adjustment.
- In the Scene panel, select the HitCollision node.
- Drag the orange control points at the corners of the collision box to resize it,
making it slightly larger than the visible enemy image.
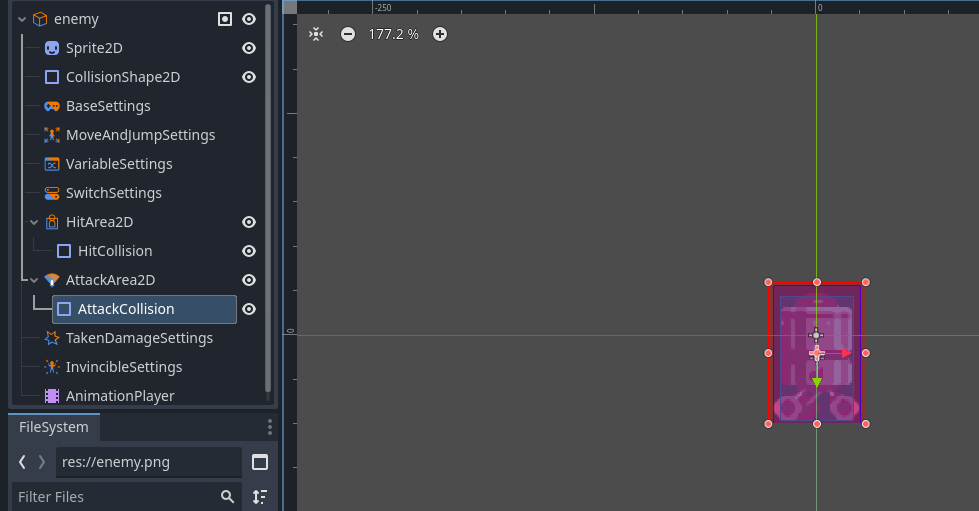
Adjusting the Enemy’s Attack Collision
Next, configure the enemy’s attack collision area.
Unlike bullets, the enemy’s attack collision only needs to interact with the player.
Since the player’s collision layer (Collision Layer / Mask) remains at the default setting,
no layer or mask adjustments are needed here—
just adjust the size of the attack collision.
-
In the Scene panel, select the AttackCollision node.
-
Drag the orange control points at the corners of the attack collision box
to resize it to match or closely align with the enemy’s hitbox.
Enemy Script Setup
The enemy only needs to move left and right and disappear when its HP reaches 0.
In theory, this can be achieved using three states: Move Left, Move Right, and Vanish.
However, we can use the Template Movement action, which automatically handles simple patrol movement.
Therefore, we only need to create two states:
When the enemy’s HP reaches 0, transition from Template Move to Vanish to make the enemy disappear.
Binding the Visual Script
-
Select the enemy (GameObject) node.
-
Click the Attach Script button.
- Keep the default name
enemy.vs and click Create.
Creating the “Template Move” and “Vanish” States
-
Rename the default State001 to Template Move.
-
In the Inspector, set the Animation Category to Move.
-
Click + Add Executable Action.
-
Select MovementTemplate.
-
Set Move Time to 3 and check Can’t Fall Off Ledges.
- This means the enemy will walk in one direction for 3 seconds,
or automatically turn when encountering a ledge.
-
Click Add.
-
Right-click the blank area to the right of the Template Move state and select Add State.
-
Rename the newly created State001 to Vanish.
-
Click + Add Executable Action.
- Select RemoveSelf and add it.
If the state structure matches the image below, the states have been created correctly.
Connecting Template Move → Vanish
-
Right-click the Template Move state, select Add Link, and connect it to Vanish.
-
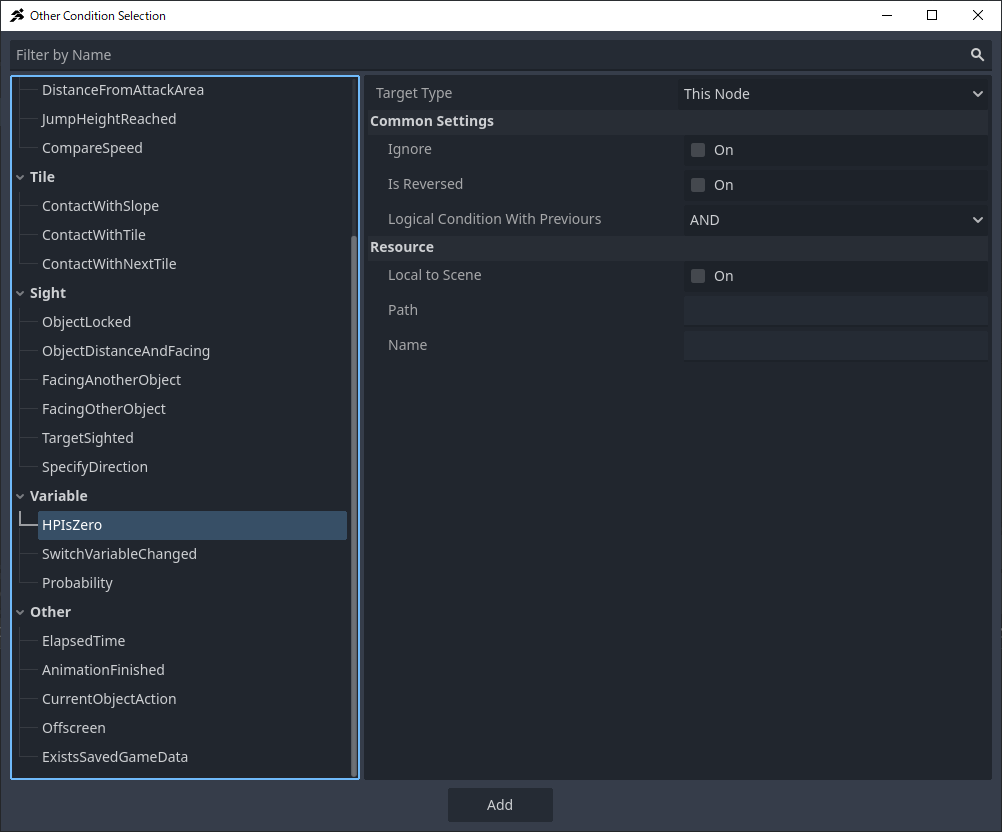
In the Inspector, click + Add Condition.
-
Select HPIsZero.
-
Keep the default settings (TargetType: This Node), and click Add.
If the connection matches the example, the setup is complete.
Placing the Enemy in the Stage1 Scene
The enemy is now ready. Next, place it in the stage1 scene to test it with the player.
-
Switch the editor view from Script back to 2D.
-
Switch to the stage1 scene tab.
-
In the Scene panel, select the Player node.
-
With Player selected, drag enemy.tscn from the FileSystem into the scene,
placing it to the right of the Player.
- Run the game to test.
If everything is set up correctly:
- The enemy will patrol back and forth every 3 seconds or so.
- The enemy will disappear after being hit by 3 bullets.
Troubleshooting Checklist
-
Enemy doesn’t move left and right
→ Check the settings in the Template Move state.
-
Enemy doesn’t flip direction when turning
→ Check the enemy node’s Animation Set and ensure the Template Move state specifies the correct animation.
-
Enemy disappears after 1 bullet hit
→ Check the enemy’s BaseSettings for HP, Max HP, and Invincibility settings.
-
Bullets don’t hit the enemy
→ Check the enemy’s HitArea Collision Layer / Mask
and the bullet’s AttackArea Collision Layer / Mask.
-
Bullets don’t disappear after hitting the enemy
→ Check the bullet script’s Move → Disappear link,
and ensure the Disappear state has the RemoveSelf action set.
1 Like
Adding Damage Handling for the Player
So far, we have achieved the goal of this section:
“The player can defeat enemies by shooting.”
However, there is still an issue:
- Enemies already have an attack hitbox,
but the player has no reaction when taking damage.
- Additionally, since the player also has an attack hitbox,
currently the player can defeat enemies simply by colliding with them.
Next, we need to adjust the player’s setup to make their behavior more realistic:
- The player should react when taking damage
- Play a “Damage” animation
- Enter an invincibility period after being hit
- Correctly adjust the player’s hitbox and attack box
- Finally, add the corresponding damage handling logic in the Visual Script
Adjusting Invincibility Time in BaseSettings
Next, we’ll configure the player’s invincibility time.
Since this is a player character, it’s more appropriate to give them a slightly longer invincibility period.
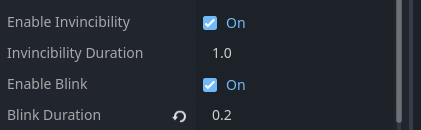
Here, we’ll set the invincibility time to 1 second and the blink interval to 0.2 seconds.
Additionally, during invincibility, we need to disable the hitbox (Hit Collision).
Even though the player won’t lose HP while invincible,
if the hitbox isn’t disabled, the system will still register collisions with attacks.
Setup Steps
-
Select the BaseSettings node.
-
In the Inspector, change Blink Duration from 1.0 to 0.2.
-
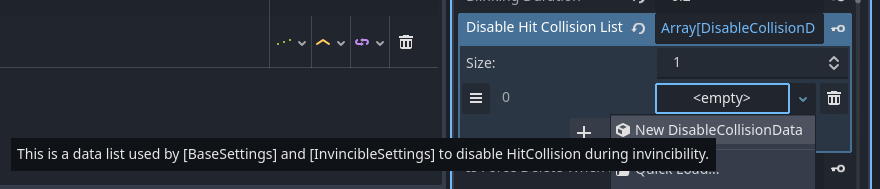
Below Blink Duration, expand Disabled Hit Collision List (Array…),
then click + Add Element.
-
Click the newly added blank entry and set it to New DisableCollisionData.
-
Once the item changes to DisableCollisionData, click it to expand the settings.
-
Click the Assign button.
-
In the pop-up node selection window, select HitCollision, then click OK.
After completing the above setup:
- When the player takes damage
- They will enter a 1-second invincibility state
- During this time, the character will blink every 0.2 seconds
- Simultaneously, HitCollision will be disabled, preventing re-triggering of damage detection
Adjusting Attack and Hit Collisions
First, let’s adjust the size of the HitCollision.
Currently, it’s too large and needs to be reduced.
Also, since this tutorial uses a Mega Man-style system,
the player character does not need an attack collision (Attack Hitbox).
(If you were creating a melee attack character, this collision would be important;
but in this tutorial, we won’t be adding melee attacks.)
Therefore, we will completely remove the AttackArea2D.
Adjusting the Size of HitCollision
-
Select the HitCollision node.
-
Drag the corner control points of the collision box to resize it so that it is slightly larger than the wall collision (CollisionShape2D).
Deleting AttackArea2D
-
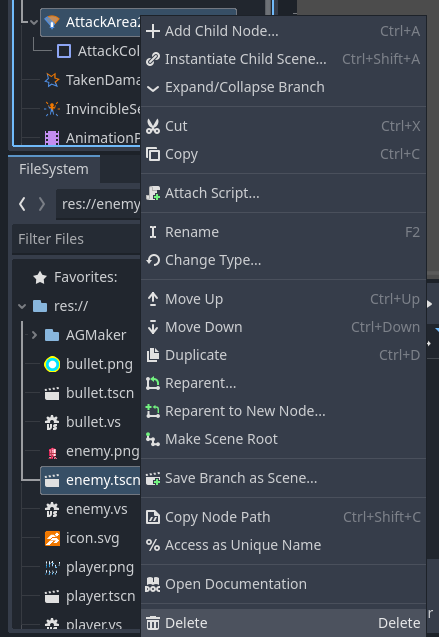
Right-click the AttackArea2D node.
-
In the menu, select Delete (Delete) at the bottom.
- A confirmation window will appear, asking if you want to delete AttackArea2D and its child node AttackCollision.
Click OK to complete the deletion.













 icon next to Bullet Object Path,