In the previous chapter, we laid the foundation of the gameplay,
implementing the ability for the player to fire bullets and defeat enemies.
In this chapter, we’ll take it a step further,
and refine this project into a fully playable game.
What’s Missing to Make It a “Game”?
In the current version, the player can move and enemies exist,
but some key elements are still missing.
The level is too small, so we need to expand the stage (map).
Although the player has a damage reaction, they cannot be truly defeated.
Also, the player cannot visually see their remaining HP, so we need to make it visible.
Finally, the game lacks a clear objective.
Ideally, we could add a boss battle,
but in this tutorial, we’ll simplify the goal: Defeat 5 enemies to complete the game.
First, let’s expand the level by adding more tiles.
Since the level will become larger, the player will eventually move outside the current camera view, so we also need to ensure that the camera follows the player.
Adding More Tiles
The level terrain is created using the Base (TileMapLayer) node, so we’ll use this node to expand the stage.
Switch to the stage1 scene tab.
In the Scene (Scene) window, select the Base (TileMapLayer) node.
In ACTION GAME MAKER, camera following is controlled through a system called Target ID.
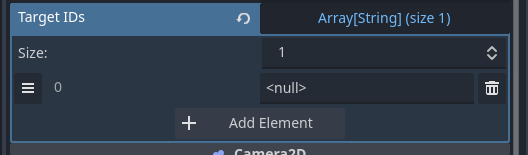
Do you remember the CameraTargetSettings node you added when creating the player? This node has a property called Target ID.
The ZoomCamera2D camera node also has a Target ID property.
When the camera and a game object have the same Target ID, the camera will automatically follow that object.
We will now set the same Target ID for both the ZoomCamera2D and the player’s CameraTargetSettings.
Set Target ID for InitialCamera (ZoomCamera2D)
Switch to the Stage1 scene tab and select the InitialCamera (ZoomCamera2D) node.
If everything is set up correctly, the camera should smoothly follow the player’s movement.
Checklist
Camera is not following the player:
Double-check that both the InitialCamera in Stage1 and the player’s CameraTargetSettings have the same Target ID.
Cannot reach the far right of the level:
Check and adjust the terrain layout in the Base (TileMapLayer), such as the width of pits or the height of walls, which might be too high.
Add a “Death” Effect for Players: Creating Particle Effects
Similar to enemies, when the player’s HP reaches zero, they should also be defeated.
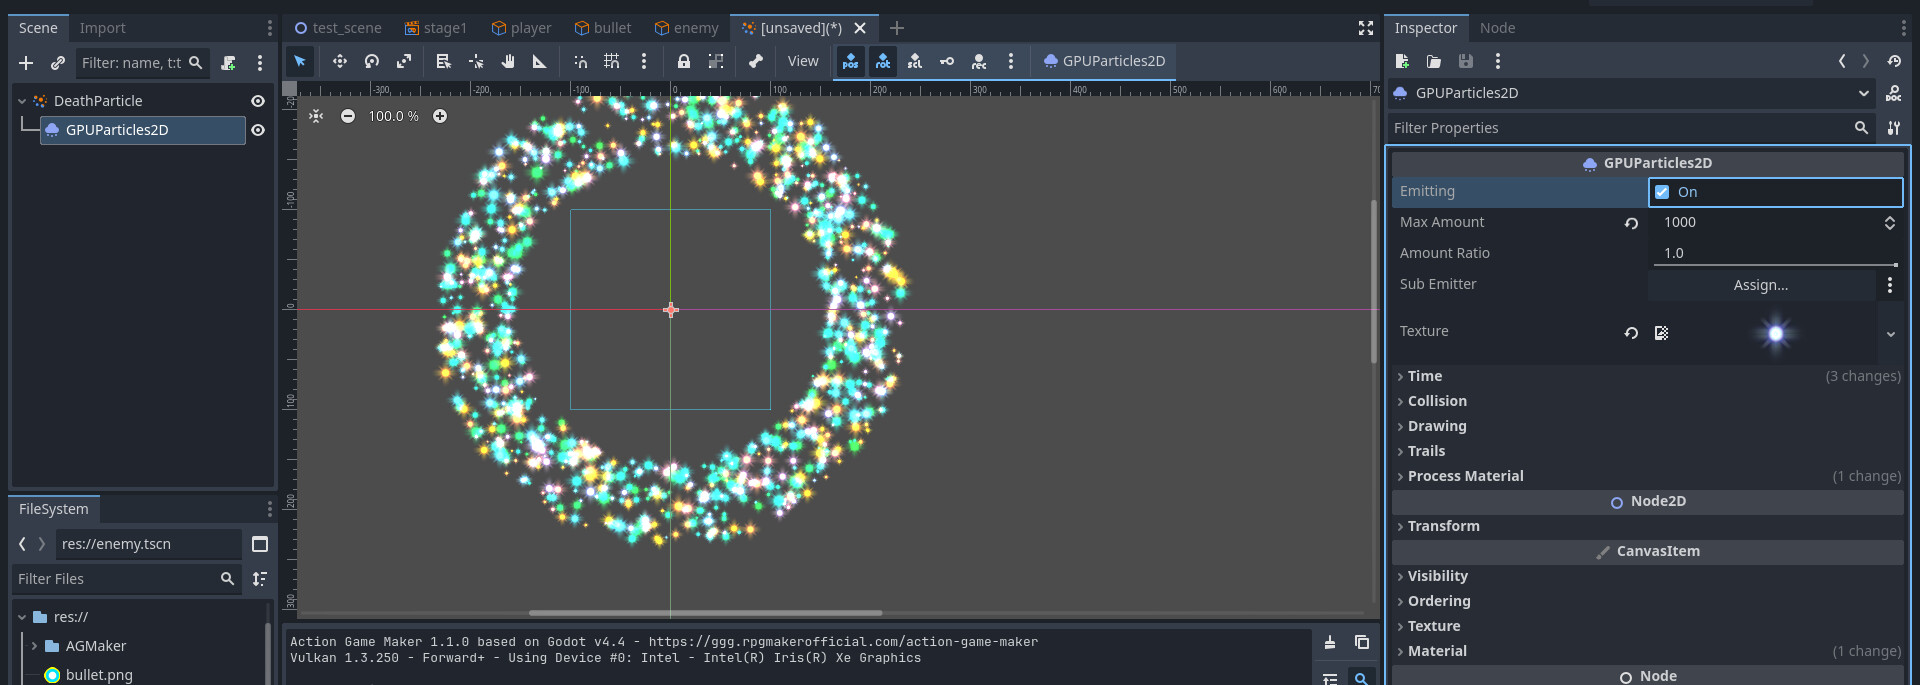
Since the current character sprite sheet does not contain suitable “death animation” frames, we will use particle effects to visually represent the player’s defeat.
What Are Particles?
Particles are essentially numerous small, scattered images that create visual effects through their movement and transformation.
Think of them as confetti or fireworks—each individual element is small, but together they form a striking visual display.
In Godot Engine, particle effects are typically created using GPUParticles2D or CPUParticles2D nodes.
In ACTION GAME MAKER, particle effects are managed via the ParticleObject node.
The ParticleObject includes over 20 built-in particle templates, which can be used directly—very convenient.
Creating a Particle Object
The process of creating a particle object is identical to creating a regular Game Object.
When the player’s HP drops to 0, the character should stop moving and play the Death Particle Effect we just created.
Structurally, connecting this state from AnyState makes the most sense. However, there’s a problem:
As shown in the image below, currently, whenever the player collides with an enemy attack, it transitions from AnyState to the Take Damage state — regardless of the current state.
Since we don’t have a dedicated death animation frame, we’ll reuse the DamageTaken animation. To make death more visually distinct, we’ll overlay a filter effect to gradually fade the character out.
Open the Player scene.
Switch the editor view from 2D to Script.
Right-click in the empty area near the Take Damage state and select Add State.
It’s a bit harsh that the player dies in one hit, so let’s first increase the player’s HP.
However, once the player has more HP, we need a way to visually display the remaining health.
To achieve this, we’ll create an HP Bar.
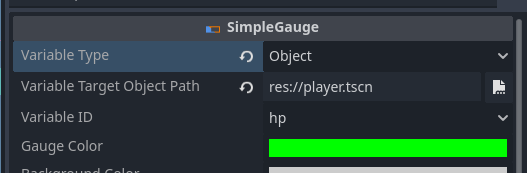
In ACTION GAME MAKER, you can use either the SimpleGauge or ImageGauge node to display various value bars.
In this tutorial, we’ll use SimpleGauge.
Additionally, since the camera now follows the player, if we place the HP bar in the same layer as the player, it will move along with the player and may even leave the screen.
Therefore, elements like the HP bar that must always remain visible on screen should be placed in the UI Layer.
About the UI Layer
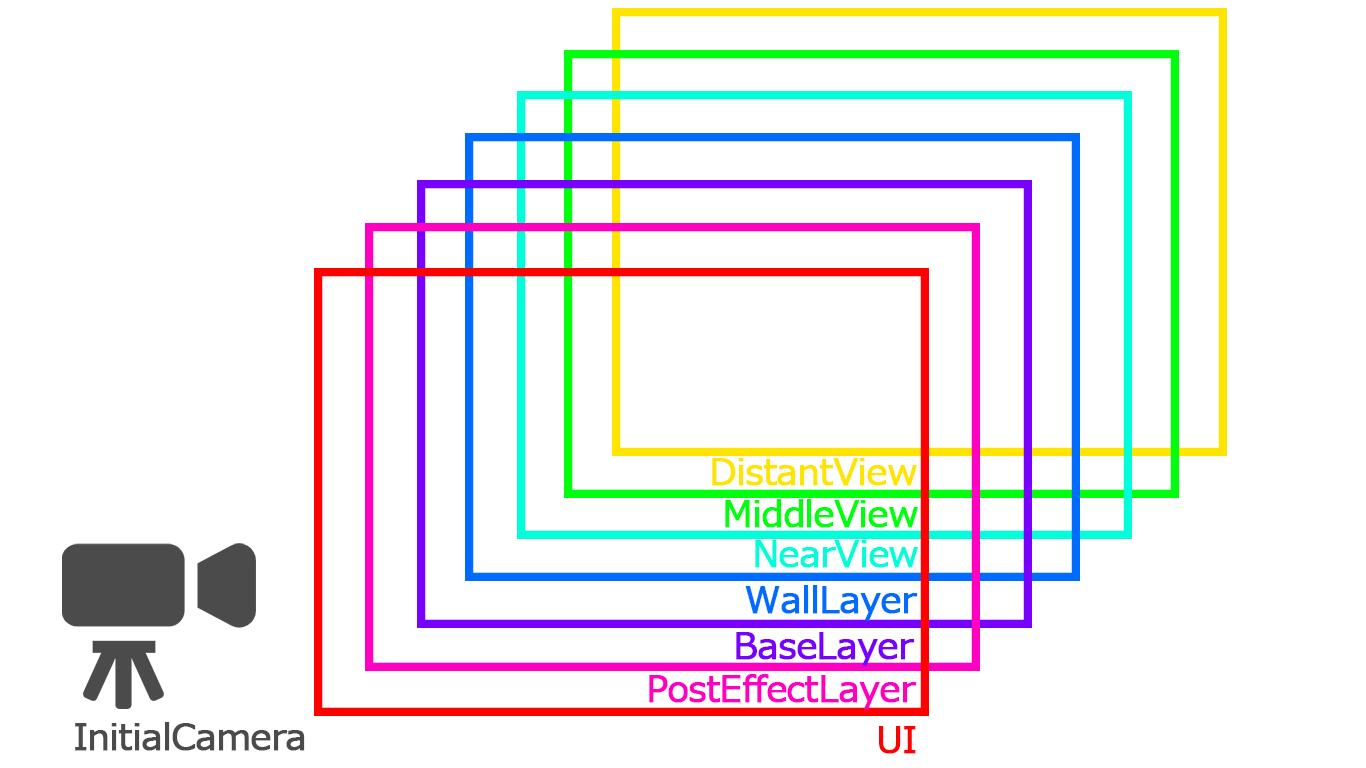
You may recall that earlier we mentioned the layer structure in ACTION GAME MAKER roughly looks like this.
Among them, the UI Layer and Screen Effect Layer are special layers unaffected by the camera.
This means:
The camera will follow the player no more than 500 pixels below the origin (intersection of red and green axes).
Run a test play.
If configured correctly:
The camera will continue to follow the player horizontally and upward.
But it will stop moving downward once it reaches the limit.
Troubleshooting
Nothing visible on screen:
This suggests the level may not be positioned near the origin.
Try changing the Bottom value to 1000 or 2000 until the scene displays correctly.
Adding “Fall Death” Detection to the Player’s Visual Script
Since we’ve already created the Death state, we only need to add an additional condition to the existing AnyState → Death transition.
The condition we’ll use is OffScreen (leaving the screen).
Steps
Switch to the Player scene and change the editor view to Script.
Thinking “Defeat 5 enemies to clear the stage”: How to handle variables
We need a way to count down from 5.
Each time an enemy is defeated, this value decreases by 1. When it reaches 0, the game triggers a Game Clear event.
To achieve this, we will use a concept called Variable.
What is a Variable?
A Variable is like a container for storing numerical values.
For example, the player’s HP (Health Points) we used earlier is essentially a variable.
When the player is hit by an enemy attack, the value stored in this HP container decreases by 1.
In ACTION GAME MAKER, variables can primarily be defined in two ways:
Using the VariableSettings node attached to an object
Using Project Variables (global variables shared across the entire project)
The HP we previously used belongs to the first type.
Differences Between Object Variables and Project Variables
Object Variables (VariableSettings)
Bound to a specific object
The variable disappears when the object is deleted
Project Variables (Project Variables)
Global variables shared across the entire project
Persist throughout the entire runtime of the project
Ideal for managing data that spans multiple scenes or objects
In practical usage:
HP, Attack Power, Jump Strength
→ Best suited for Object Variables
High Score, Coin Count, Remaining Lives
→ Best suited for Project Variables
(because they typically need to be shared across multiple levels)
Which type of variable should we use for “Remaining Enemy Count”?
Technically, both approaches can work.
However, since this value will be manipulated simultaneously by multiple objects (enemies), we will choose to use a Project Variable.
The overall flow will be:
When an enemy enters the Vanish (disappear) state
→ Decrease “Remaining Enemies” by 1
When “Remaining Enemies” becomes 0
→ Trigger the Game Clear sequence
How to Implement the Clear Sequence
We will create a dedicated game object to manage the defeat count.
This object will be placed in the UI layer, ensuring it remains visible at all times.
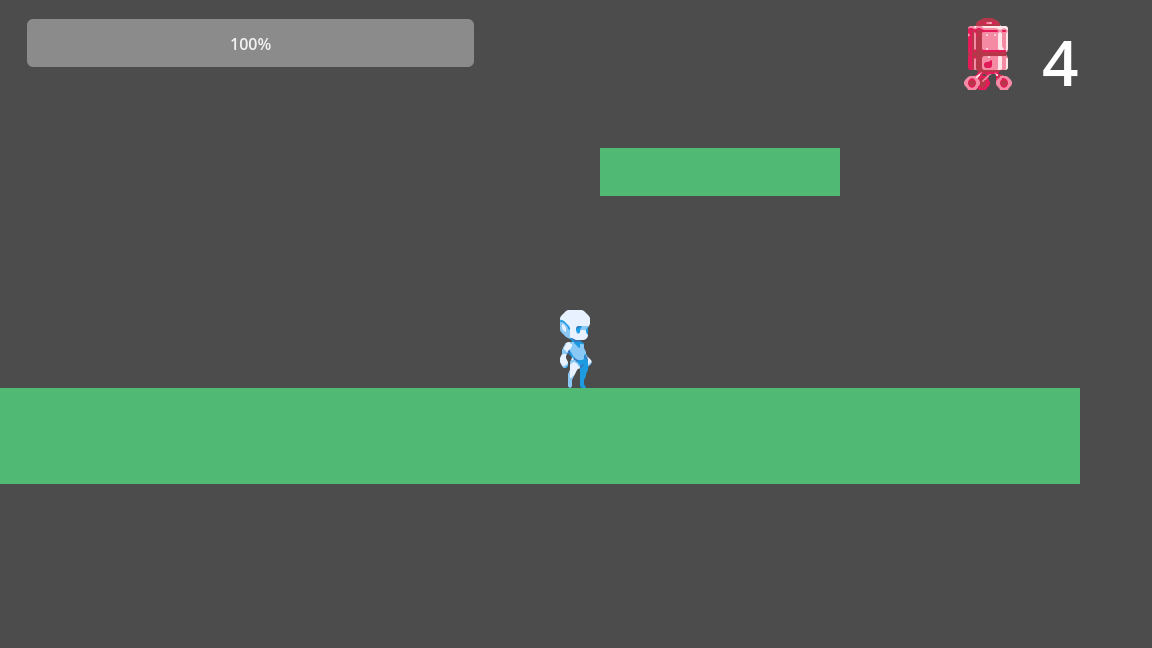
Similar to the HP bar, it will display how many enemies remain, making it clear to the player.
The specific steps are as follows:
Create a Project Variable: Remaining Enemies
In the enemy’s “Vanish” state,
Add an action to decrease this variable by 1
In the UI layer, create a Clear Event Object,
Continuously monitor “Remaining Enemies”,
And trigger the clear sequence when its value becomes 0
In ACTION GAME MAKER, modifying variables requires using the Change Property action.
Since this action supports basic arithmetic operations (addition, subtraction, multiplication, division), we can directly implement the following logic:
Remaining Enemies -= 1
(Decrease the number of remaining enemies by 1)
Steps
Open the enemy scene tab and switch the editor view to Script.
Select the Vanish state, then click + Add Executable Action.
There are 5 items to configure—please verify each one carefully.
With this action, the project variable Remaining Enemies will decrease by 1.
Finally, adjust the execution order of actions.
Actions execute from top to bottom. If Vanish Self (RemoveSelf) executes before Change Property, the variable will not be updated.
Drag the hamburger menu icon (three horizontal lines) on the left of Change Property
to move it to the very top, ensuring Change Property executes first.
We will create a UI object to manage the Remaining Enemies project variable.
This object will be responsible for two tasks:
Display the current value of Remaining Enemies
Trigger the game clear (Clear) process when this value becomes 0
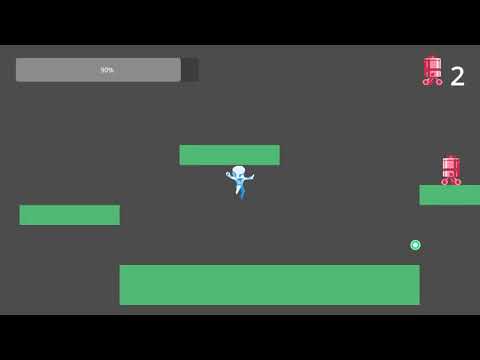
To make the display more intuitive, we will show an enemy icon (Sprite2D) in the UI,
and display the Remaining Enemies value next to it using an animation.
The enemy icon can directly reuse the previously used enemy.png.
Creating the Remaining Enemies Manager Object
Switch the editor view to 2D.
Open a new scene tab, and when creating the root node, select GameObject.
From the FileSystem, drag enemy.png (the sprite image used for enemies)
into the blank area to the left of the red and green axis intersection in the editor view.
Configure the Visualization Script for “Remaining Enemies Manager” (Display Variables)
First, let’s focus on displaying the variable itself.
We only need one state, “Count”, to display the current value of the project variable Remaining Enemies.
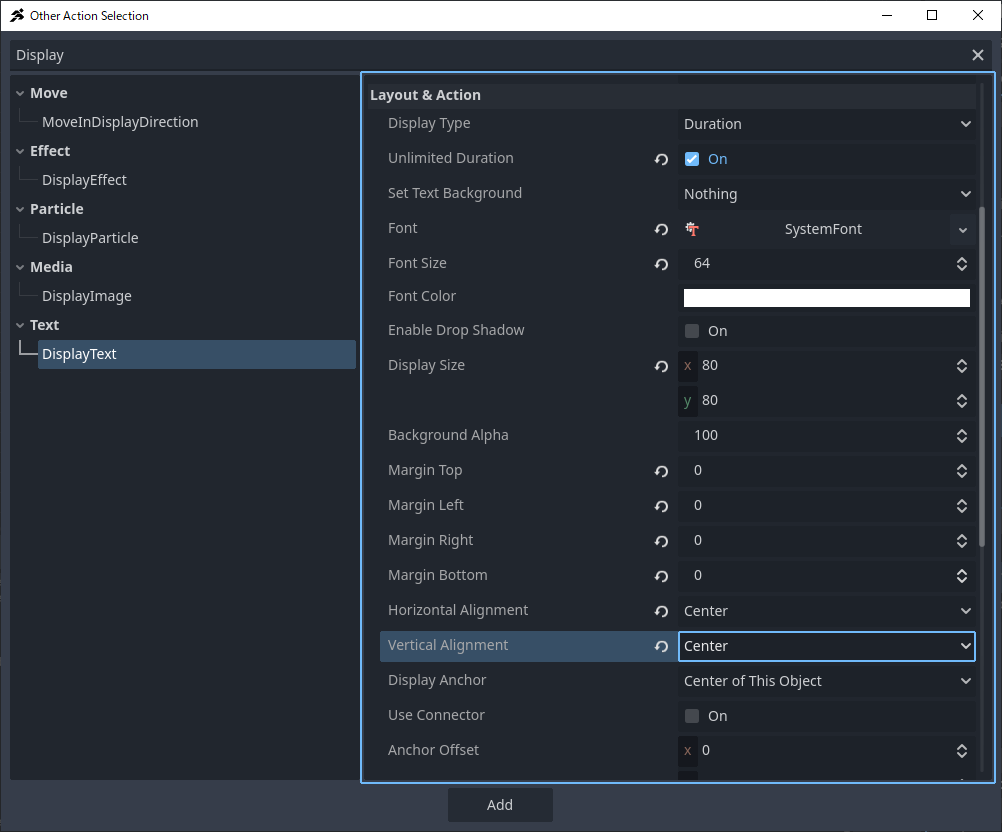
To display the variable, we will use the DisplayText action.
Create the “Count” State
In the Scene window, select the RemainingEnemiesManager (GameObject) node and click + (Attach Script).
This action creates a text box of the specified size and displays the text (or variable value) centered on the reference point for the specified duration.
When the reference point is set to “This object’s center”,
this center refers to the origin (the intersection point of the red and green axes).
In the current configuration:
A 80×80 pixel text box is created
The text box is centered on the origin
The text is centered within the box
The display duration is unlimited
Test the Display of “Count”
Next, place it in the scene for testing.
Since we want it to remain visible at all times, it must be placed in the UI layer.
Switch to the stage1 scene tab and set the editor view to 2D.
In the Scene window, select the SimpleGauge node under UI (CanvasLayer).
Neither the icon nor the number is displayed:
Ensure the object is a child of the UI layer and located within the blue border (UI display area).
The icon is displayed but not the number:
Verify in the Remaining Enemies Manager:
The icon is positioned near the origin
The DisplayText action in the Count state is configured correctly
The number does not change after defeating an enemy:
Check the execution order in the enemy object’s Vanish state—
it must be Change Property first, then RemoveSelf.
What does “Use Scene as Base” mean?
This means the display position is not relative to the object itself, but relative to the entire game screen (the area visible to the camera).
In this setup, a 1200×120 text box will be placed at the center of the screen,
and STAGE CLEAR will be centered within that text box.
Right-click the Count state → Add Link → connect to Stage Clear.
In this chapter, we learned the following concepts, which laid the foundation for turning the game into a true playable experience:
Camera following mechanics
Use of particle effects
Display of UI elements (HP bar & remaining enemy count)
Use and management of variables
These features not only make the game interactive but also provide:
Real-time UI display
Game over conditions
Victory conditions
And a smooth, streamlined level experience
However, the current presentation remains relatively simple, lacking sound effects and background settings, making the overall experience somewhat monotonous.
In the next chapter—Chapter 5—we will further enhance the game’s completeness by adding:






 icon and select the previously created DeathParticle.tscn.










 Sound effects and background music (BGM)
 Background and visual art settings
 Exporting the project so anyone can play it