STEP 2: Create an HP Bar
- Open the
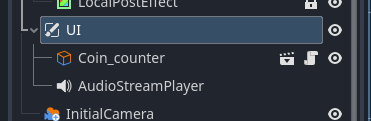
gamescenetab and selectUI.
- Add a new node:
ImageGauge.
Any UI elements you want always visible and not affected by camera scrolling should be placed underUI.
- Configure the
ImageGaugeproperties as follows:
Set the Current Value tosampleplayer.hpand the Max Value tosampleplayer.max_hp.
TheObject_Sampleplayer.tscnis located in thesampleobjectfolder.
- Next, configure the properties of
TextureProgressBarwithin theImageGauge.
Enable Nine Patch Stretch, and set Left Limit and Right Limit to10px.
This allows resizing without distorting the bar’s proportions.
- Set the textures for the
ImageGauge.
Use images fromtemplates > objects > ui > interface > variation_02_Ornate:


- Under:
I_002_hp_horizontal_02.png - Progress:
I_002_hp_horizontal_03.png

- Adjust the size of the
ImageGauge.
The blue-framed area is the UI display region. Scale the gauge to your liking.
- Test the game.
If set correctly, the HP will be displayed as a white bar and will decrease when hit by a zombie. - Now let’s add a frame.
Add a new node underImageGauge:NinePatchRect.
This node creates a rectangle that stretches while maintaining proportions, using Nine Patch settings.
- Set the
NinePatchRecttexture toI_002_hp_horizontal_01.png, and click theEdit Regionbutton.
- The Nine Patch editor will open.
Adjust the black and white bar (not the solid white lines) as shown in the image.
- Resize and position it over the HP bar.
- The HP bar is complete!


Notes
Bar Types
By changing the Fill Mode of the ImageGauge, you can create various types of bars—including vertical and circular gauges.
You can also change the bar’s color using the Tint property.
About Nine Patch
Nine Patch is a technique that divides an image into 9 sections and stretches them proportionally to avoid distortion.
This method is also useful for things like message windows.
 Next course: Part 5