Link “States” Together with “Links”
Let’s connect the three states we created this time using links so they can transition.
Consider How to Connect States (Transition Conditions)
The basic behavior this time is: if there is left/right input, go to “Move”; if there is jump input, go to “Jump”; if there is no input, go to “Idle”.
Considering the “Move” behavior, it seems we can achieve this with transitions: “Idle” → “Move” when there is left/right input, and “Move” → “Idle” when there is no input.
For “Jump”, we need “Idle” → “Jump” when jump input is present, and also “Move” → “Jump” since we want to be able to jump while moving. From “Jump”, it seems we need a transition “Jump” → “Idle” when touching the ground—that is, when the “bottom of the tile is touched”.
Note: Is it okay not to link from Jump to Move?
It is fine to link them, but if you land while pressing the move keys, the transition from “Idle” to “Move” happens instantly, so linking is not necessary.
Link “Idle” and “Move”
Now, let’s create a link so that “Idle” transitions to “Move” with left/right input, and back to “Idle” when the input is gone.
- Right-click the “Idle” state and select “Add Link”.
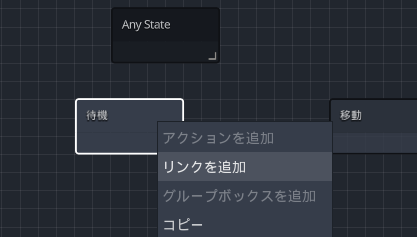
- A line will appear from Idle; click the “Move” state to create the link. This connects Idle and Move with a link. Next, set the condition (transition condition) to switch to Move when left/right input is present.
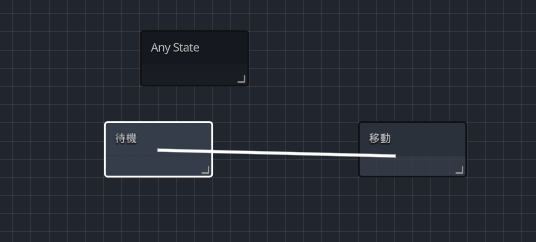
- Select the created link and click the checkbox for “When the following input operation is performed” in the Inspector panel.

- A new item called “Input Operation List” will appear; click the field showing “Array[InputCondition]…” to expand it.

-
Click the “+ Add Input” button inside the expanded section.
-
An entry labeled “” will appear in the Input Operation List; click it and select “New Input Condition”.
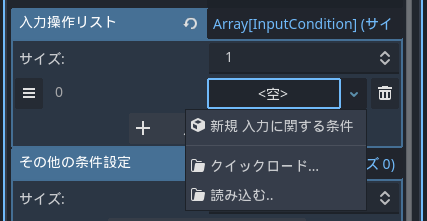
- “” will change to “Input Condition”; click it again to expand.

- A new item will appear; set it as follows:
Input Type: Any of the 4-directional inputs
Up Input Key: None
Down Input Key: None
Left Input Key: Left
Right Input Key: Right
Input Condition: Pressed

-
Now, pressing “Left” or “Right” will transition from Idle to the Move state.
-
Next, create a link from “Move” back to “Idle”. Right-click “Move” and select “Add Link”.

-
Select the newly created link from Move to Idle.
-
In the Inspector, turn on the checkbox for “No input was made”. This will transition from Move to Idle when no button or key is pressed.

Place on Stage and Test Play
Now, we can move left and right on the floor. Let’s place it in stage1.tscn and test if it works correctly. Place player.tscn on the same layer as the tiles in stage1, called BaseLayer, and run a test play.
- First, switch the editor view from “Script” to “2D”.

- Next, save the changes to Player. Right-click the player tab and save the scene.

-
Switch the tab to stage1.tscn.
-
Select Base (TileMapLayer) in the Scene window.

- Drag and drop player.tscn from the File System onto the floor in the editor view.
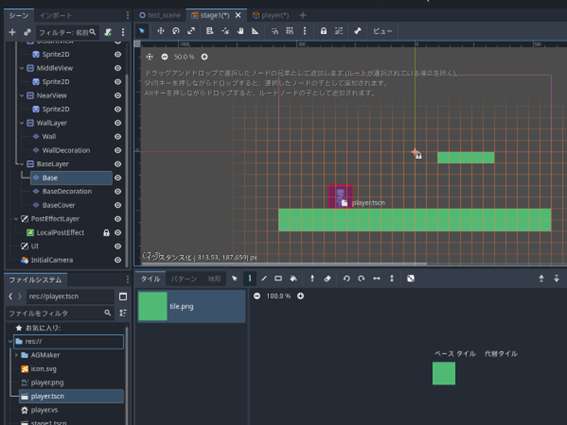
- It is OK if Player is placed as a child of BaseLayer as shown in the figure below.
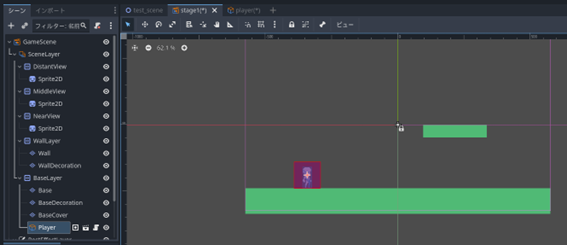
If Player becomes a child of something other than BaseLayer, drag and move it in the Scene window to reposition it. If the placement in the editor is off, use the Move mode to fine-tune the position.

- Run a test play using the “Run Project” button in the top-right corner.
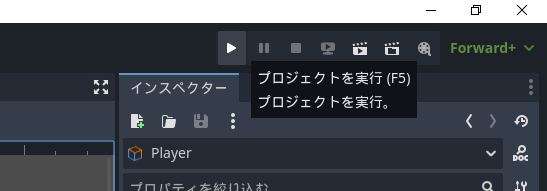
- If everything is set up correctly, pressing left or right should make the character walk, and releasing should stop it.
Checklist if it doesn’t work
Character doesn’t move: Check if the move keys in MoveAndJumpSettings are set correctly.
Character doesn’t show a move animation: Check if the link from Idle to Move and the Move state animation settings are correct.
Character doesn’t return to Idle: Check if the link from Move to Idle is correct.

This is a warning indicating that CameraTargetSettings exists but its contents are not set.
Since we are not currently setting up camera follow functionality, this error appears. We will configure it in Chapter 4, so you can ignore it for now.
Link “Idle”, “Move”, and “Jump”
Next, let’s link “Idle” and “Move” to “Jump”.
- Switch the tab back to player and return the editor view from 2D to Script.

- Right-click “Idle” to create a link and connect it to “Jump”.

-
Select the link and turn on the checkbox for “When the following input operation is performed”.
-
Expand the Input Operation List, then select “+ Add Input Condition”, “”, and “Add Input Condition”.
-
Set Input Type: Operation key used for input, Input Key: Jump, Input Condition: Moment pressed. This will transition to Jump the moment the jump button is pressed while in Idle.
-
Next, link Move to Jump. The condition is exactly the same as the Idle to Jump link: “Transition when Jump key is pressed”. Let’s copy the link we just created and reuse it.
-
Right-click the link from Idle to Jump and select “Copy”.

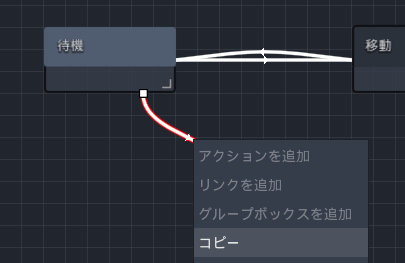
- Right-click the “Move” state and select “Paste Link”.

- As when adding a new link, a line will appear from Move; click “Jump” to connect.

- Click the link from “Move” → “Jump” to lightly verify it was copied correctly. If you see the following display, it was successful.

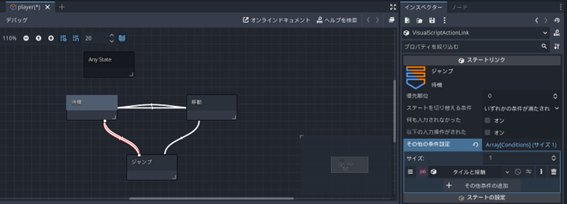
- Create a link from “Jump” → “Idle”. Right-click Jump to create a link and connect it to Idle.
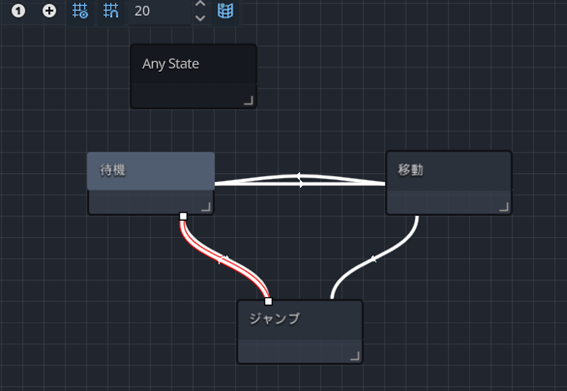
- The transition condition from “Jump” to “Idle” is when touching the floor, which is not related to input. Instead of an input condition, we will use “Other Conditions”. Click “+ Add Other Condition” in the Inspector panel.

- A new window titled “Select Other Condition” will appear. Here you can select various conditions other than input. Since we are dealing with contact with floor tiles, select “Contact with Tile”.

- In the condition details, turn on the checkbox for “Down” under “Contact Direction from this Object”. This will ensure the transition occurs only when the bottom of the object touches a tile.

- It should look like the figure below.
- Run a test play using the test play button in the top-right corner. Try jumping with the Z key while in Idle or while moving. If it works correctly, you’re done.

Checklist if it doesn’t work correctly
Cannot jump: Is the link from Move and Idle to Jump correct? Is the “Execute Jump” action correctly checked in the Jump action?
Cannot land: Is the link from Jump to Idle correct?