このコースでは、ACTION GAME MAKERの基本的なスクリプト方法を学びます。
パート2では、敵キャラクターを作成します。
コース開始前の準備
パート1と同じプロジェクトを引き続き使用します。プロジェクトを開いて、開始の準備を整えてください。
ステップ 1: 基本の敵(ゾンビ)設定
- テンプレートオブジェクトからゾンビを敵として使用します。新しいタブを開き、ゲームオブジェクトを選択し、以下のように設定します。
- 名前: 好きな名前(ここでは
Sample_Zombie を使用)。
- テンプレート:
characters
- タイプ:
Enemy_Zombie
- グループ:
Enemy
作成後、Ctrl+S を押してシーンを保存します。
- 基本設定を設定します。BaseSettings セクションを開き、以下のように設定します。
-
自動左右反転を有効にする: ON
\u003e ビジュアルスクリプトでは、オブジェクトは右を向いていると仮定されます。しかし、このオブジェクトは左向きに設計されているため、左右反転を有効にする必要があります。
-
オブジェクト条件を有効にする: カメラに近い
\u003e オブジェクトはカメラの表示範囲外では無効になります。
-
HP / 最大 HP: 5
\u003e 1 HP は低すぎるため、5 に設定します。
-
無敵時間: 0.2 秒
\u003e これはダメージを受けた後の無敵時間の長さです。速攻的な攻撃には 1 秒は長すぎるため、0.2 秒に設定します。
- 通常は衝突判定とアニメーションを手動で設定する必要がありますが、このテンプレートオブジェクトにはそれらすべてが含まれているため、追加の基本設定は不要です。
解説
無敵時間について
無敵時間は非常に重要です。
設定しないと、攻撃の当たり判定が敵に重なっている間、敵は連続してダメージを受け、即死してしまいます。
一方、長すぎると、マシンガンなどの連射攻撃が連続ダメージを与えられなくなります。
プロジェクトの要件に応じてこの設定を調整してください。
「いいね!」 2
ステップ 2: 敵(ゾンビ)のスクリプトを作成する
 + アイコンをクリックして新しいビジュアルスクリプトを作成します。
- 最初のステートをWalkにリネームし、アニメーションをゾンビの歩行アニメーション
E_01_act_003 に設定します。
また、デフォルト方向が右なので、**Facing Direction(向いている方向)を Left(左)**に設定します。
- Walk の**Executable Action(実行可能アクション)に
TemplateMove を追加します。
テンプレートタイプはHorizontal(水平)**のままにしますが、**Auto Flip(自動反転)**を無効にします。これにより、ゾンビは時間経過ではなく壁に衝突した時のみ向きを変えます。
- ゲーム内でテストします。
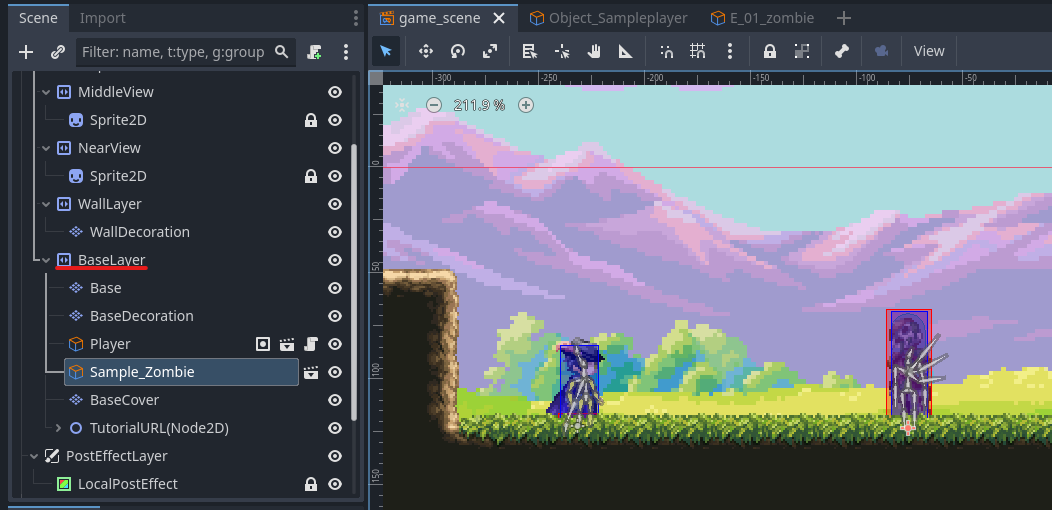
sample_zombie.tscn を BaseLayer の子として配置します。
- F5を押すか、
 をクリックしてテストプレイします。
ゾンビが左に歩き、弾に当たると消えるはずです。もし動作しない場合は、以下を確認してください:
- ゾンビが間違った方向に移動する:
BaseSettings で「Enable Auto H Flip」が有効になっているか、および Walk ステートの方向が Left に設定されているか確認してください。
- 弾がゾンビに当たっても消えない: 弾のスクリプトを確認し、衝突判定が正しく機能しているか確認してください。
- ヒットしてもゾンビが死なない: これは正常な動作です。まだ死亡ステートが追加されていないためです。
- 次に**Damaged(被ダメージ)**ステートを作成します。
AnyState の近くに Damaged という新しいステートを作成します。
アニメーションを E_01_act_008(被ダメージアニメーション)に設定します。
- アクション設定で**水平移動速度を 10%**に減らします。
これにより、被ダメージアニメーション中にゾンビの動きが遅くなります。
- 3 つのアクションを追加します:
- Play Audio(音声再生): 効果音として
Zombie2 を使用します。
- Wait(待機): アニメーションが再生されるように
0.2 秒 の待機を挿入します。
- Transfer to Previous Action(前のアクションへ遷移): 前のステートに戻ります。
- AnyState → Damagedを接続します。
AnyState はあらゆるステートからの遷移を許可し、「Transfer to Previous Action」は前のステートに戻ります。これは RPG Maker ユーザーにとっての「共通イベント」のようなものです。
- リンクに2 つの条件を追加します:
- Contact With Attack Area(攻撃エリアとの接触)
Player からあらゆる方向からのヒットに反応するように設定します。
- HP ≠ 0
- 対象:このノード
- 条件の逆転:ON(つまり、HP=0 ではない)
- 論理リンク:AND
- テストします。ゾンビはヒットするとうめき、よろめくはずです。5 回ヒットすると反応しなくなります。
もし動作しない場合:
- ヒットに反応しない: HP 条件が逆転しているか、アニメーションが正しく設定されているか確認してください。
- 5 回ヒット後も反応する: 論理条件がANDになっているか確認してください。
- 次に**Death(死亡)**ステートを作成します:
- ステート名を
Dead にし、アニメーションを E_01_act_009(死亡アニメーション)に設定します。
- Horizontal Movement Speed(水平移動速度)を
0% に設定して移動を停止します。
Dead に3 つのアクションを追加します:- Change Object Property(オブジェクトプロパティの変更)
- タイプ:Object Property
- 対象:Self(自分自身)
- ノード:
AttackCollision(
AttackArea2D ではありません)
- プロパティ:
disabled
- 値:On
→ 死体からプレイヤーがダメージを受けないように当たり判定を無効にします。
- Wait(待機): アニメーションが再生されるように
0.85 秒 待機します。
- Remove Self(自分自身を削除)
→ ゾンビをゲームから削除します。
- AnyState → Deadを接続し、条件をHP = 0に設定します(今回は条件を逆転させないでください)。
- もう一度テストプレイします。ゾンビは最大 5 回うめき、よろめき、5 回目のヒットで死亡アニメーションを再生して消えるはずです。
何かが期待通りに動作しない場合は、リンク、ステート、条件を慎重に確認してください。
次のチュートリアル(パート 3):
「いいね!」 2