アクションゲームメーカーの世界へようこそ!
このチュートリアルは、操作の基礎を学ぶために最初に推奨するものです。
チュートリアルプロジェクトを使用して、シンプルなジャンプアクションを作成してみましょう。
現在、ナレーションは日本語のみ対応していますが、必要に応じて使用できるよう動画も用意しています:
ステップ 1:はじめに
- チュートリアルプロジェクトの読み込み
まず、ACTION GAME MAKER を起動します。
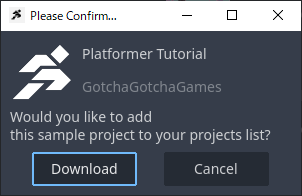
起動したら、上部の**「サンプルプロジェクト」**ボタンをクリックします。
- Platformer Tutorialを選択します。
- 「プロジェクトリストに追加しますか?」というプロンプトが表示されるので、ダウンロードを選択します。
- ダウンロードボタンを押すと、しばらく読み込み画面が表示されます。
この間、チュートリアルプロジェクトのデータがコピーされているため、お待ちください。
チュートリアルプロジェクトにはすべてのサンプルアセットが含まれており、サイズは約 1GB であるため、コピー処理には数分かかる場合があります。
- 読み込みが完了すると、タブが自動的にプロジェクトに切り替わり、リストにTutorialProjectが表示されます。これを選択して編集をクリックします。
- 以下の画面が表示されれば準備完了です!
「いいね!」 2
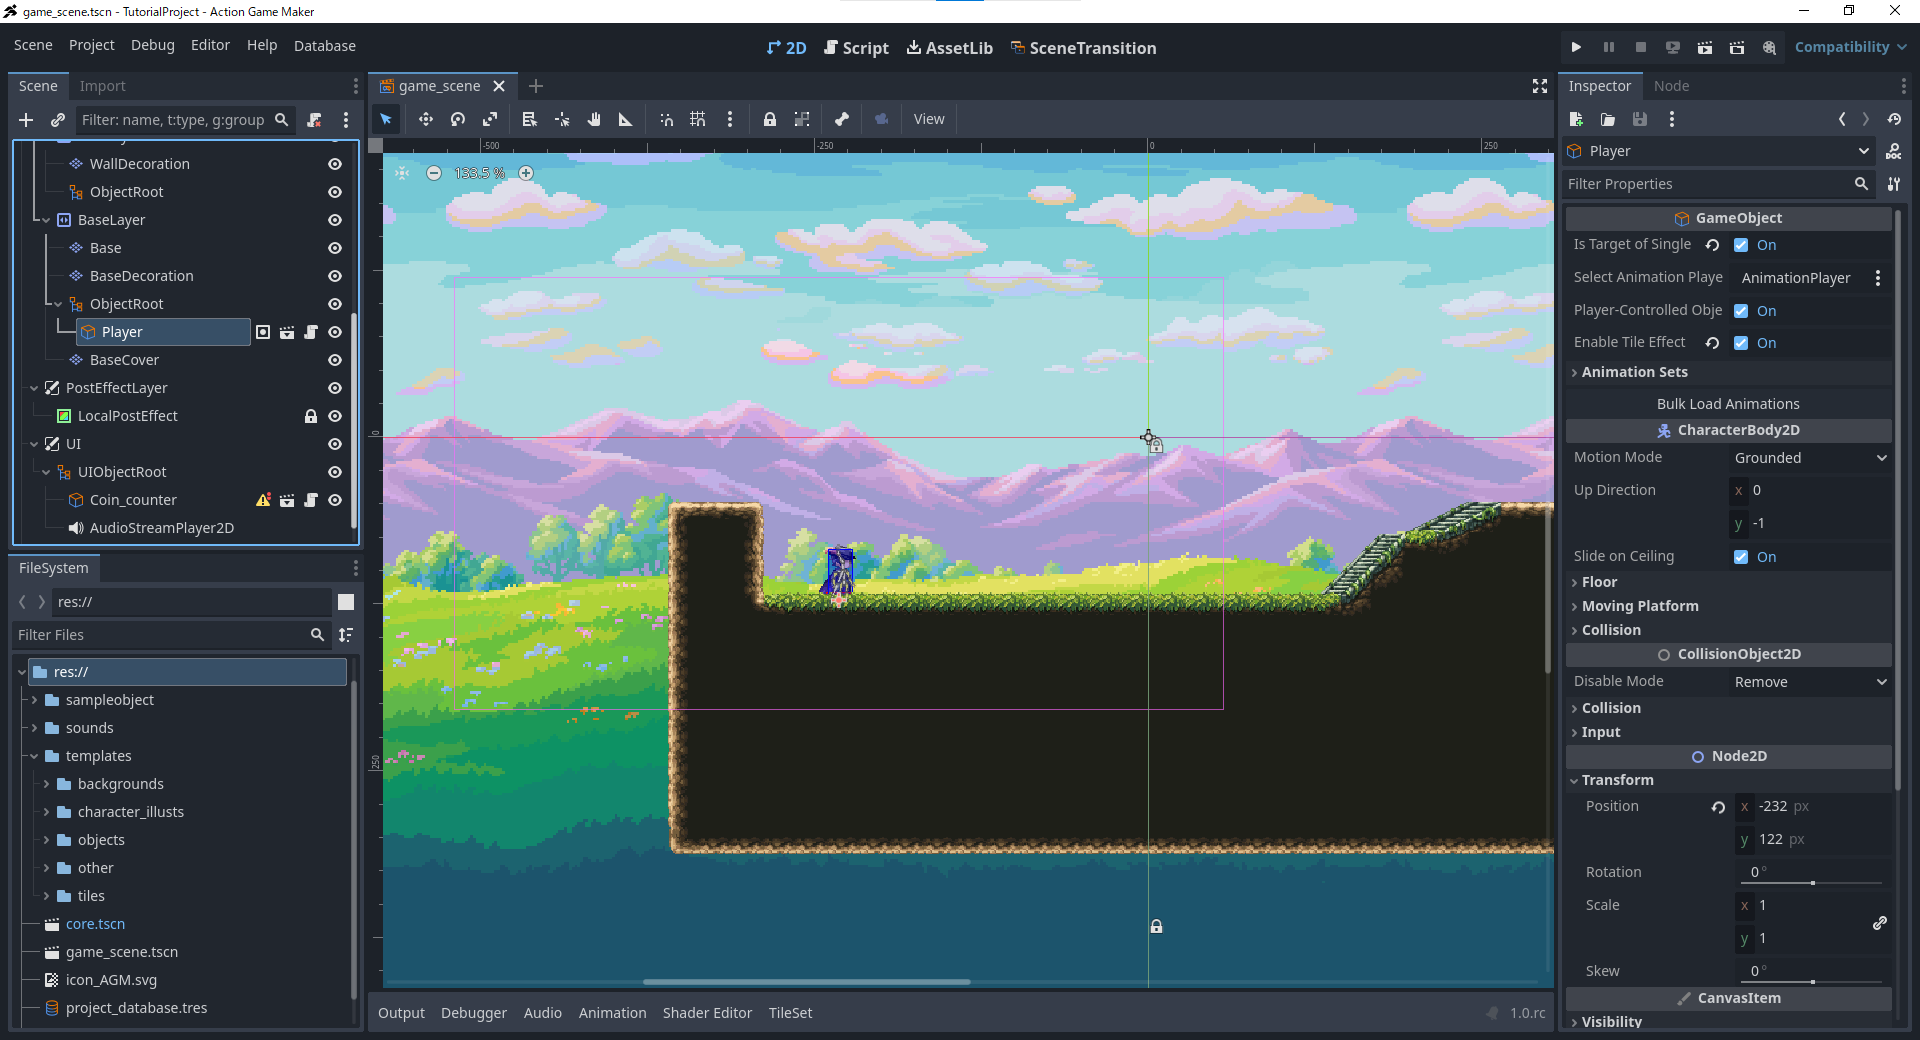
ステップ 2: エディタインターフェースの理解
さて、多くのウィンドウが開いているように見えるかもしれませんが、心配しないでください!今は、以下の 4 つの主要な領域だけを覚えておけば大丈夫です。
[シーン] ウィンドウ(左上):
これは、現在のゲームシーンに配置されているすべてのもの(Godot では
ノードと呼ばれます)のリストを表示します。
タイルマップやオブジェクトを配置するためのレイヤーが含まれており、すべてが整理されたビューで表示されます。
[ファイルシステム] ウィンドウ(左下):
ここでは、ゲームで使用可能なすべてのアセットのリストが表示されます。
このチュートリアルでは、このセクションにあるマテリアルを使用します。
[エディタビューポート] ウィンドウ(中央):
このウィンドウは、現在選択されている
シーンのプレビューを表示します。
すでにキャラクターやタイルが部分的に配置されているのが確認できます。
[インスペクタ] ウィンドウ(右側):
これは、選択されたアイテムの詳細なデータとプロパティを表示します。
通常、[シーン] ウィンドウから選択した
ノードのプロパティをここで調整し、ゲームを構築します。
「いいね!」 1
ステップ 3:サンプルオブジェクトを使ってゲームを作りましょう
それでは、付属のアセットを使って早速ゲーム制作を始めましょう。
中央の画面を見てみると、キャラクターといくつかの地面タイルがすでに配置されているのがわかります。
このキャラクターはすでに操作可能なので、早速テストプレイしてみましょう!
画面右上の  ボタンをクリックすると、新しいウィンドウが開き、テストプレイが開始されます。
操作方法:
- コントローラー: 左スティックで移動、A ボタンでジャンプ。
- キーボード: ← → 矢印キーで移動、Z キーでジャンプ。
キャラクターがステージから落ちた場合は、F5 キーを押してゲームをリセットできます。
キャラクターを動かす操作を試した後、テストプレイウィンドウを閉じてください。
「いいね!」 1
ステップ 4:タイルを配置してみましょう
このままではステージが少し小さく見えませんか?
さらにタイルを配置して広げてみましょう。
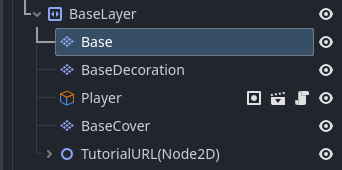
1. 左上の [シーン] ウィンドウを確認します。
ダイヤモンド型のアイコンはタイルレイヤー(技術的には TileMapLayer ノードと呼ばれます)を表します。
デフォルトの地面レイヤーは [Base] という名前なので、それを選択してください。
選択すると、中央ビューにグリッドが表示され、下部中央に [タイル配置] という新しいウィンドウが表示されます。
グリッドが表示されない場合は、[タイル配置] ウィンドウの右上にあるグリッドアイコンをクリックしてください。
2. [タイル配置] ウィンドウは、配置するタイルを選ぶパレットのように機能します。
個々のタイルを手動で選択することもできますが、代わりに 地形(オートタイル) 機能を使用しましょう。
ウィンドウ左上のタブを [タイル] から [地形] に切り替えます。
利用可能なオートタイルが 3 つ表示されます。
- 地形セット 0(上): 土のようなタイル(すでに配置済み)
- 地形セット 1(中): 岩のようなタイル
- 地形セット 2(下): 遺跡をテーマにしたタイル
お好みのセットを選んでください。
3. 選択したら、[エディタビューポート] 上でドラッグしてタイルを描画してみましょう。
タイルは自動的に既存のタイルと blend(結合)し、整列します。
タイルの配置に問題がある場合は、以下を確認してください。
- オートタイル選択エリアで
 接続モード アイコンが有効になっていますか?
- オートタイルウィンドウの上部で
 ペイント ツールが選択されていますか?

- [エディタビューポート] 上部のツールバーで ⬉ 選択ツール がアクティブになっていますか?移動や他のモードに設定されていないか確認してください。

4. 画面中央でタイルの描画を続けてください。
右クリックでタイルを消去することもできます。
[タイル配置] ウィンドウの上部では、描画ツールを切り替えることができます。左から右へ:

- ペイント: タイルごとに描画
- 線: 直線を描画
- 矩形: 塗りつぶされた矩形を描画
- バケツ: 領域を塗りつぶす
- ピッカー(スポイト): 配置されたタイルを選択
- 消しゴム: 配置されたタイルを消去(線/矩形/バケツツールでも機能)
注意:消しゴム と ピッカー ツールはオン/オフを切り替えるタイプです。注意してください。手動で選択解除されるまでアクティブな状態のままになります。
5. 地形を描画しましたが、元のタイルには草が生えていましたよね?
新しく配置したタイルに草を装飾しましょう。
草は別のタイルマップレイヤーを使用して配置されます。
[シーン] ウィンドウで [BaseCover] を選択してください。
草もオートタイルとして利用可能ですので、お好みのスタイルを選んで、マップを思いのままに装飾してください!
ステップ 5: サンプルオブジェクトを配置する
このプロジェクトにはいくつかのサンプルオブジェクトが含まれています。それらをシーンに配置してみましょう。
1. [ファイルシステム] ウィンドウ(左下)で [sampleobject] フォルダを開く
内部には .tscn ファイルがあります。これらが今回使用するサンプルオブジェクトです。
配置を始めましょう!
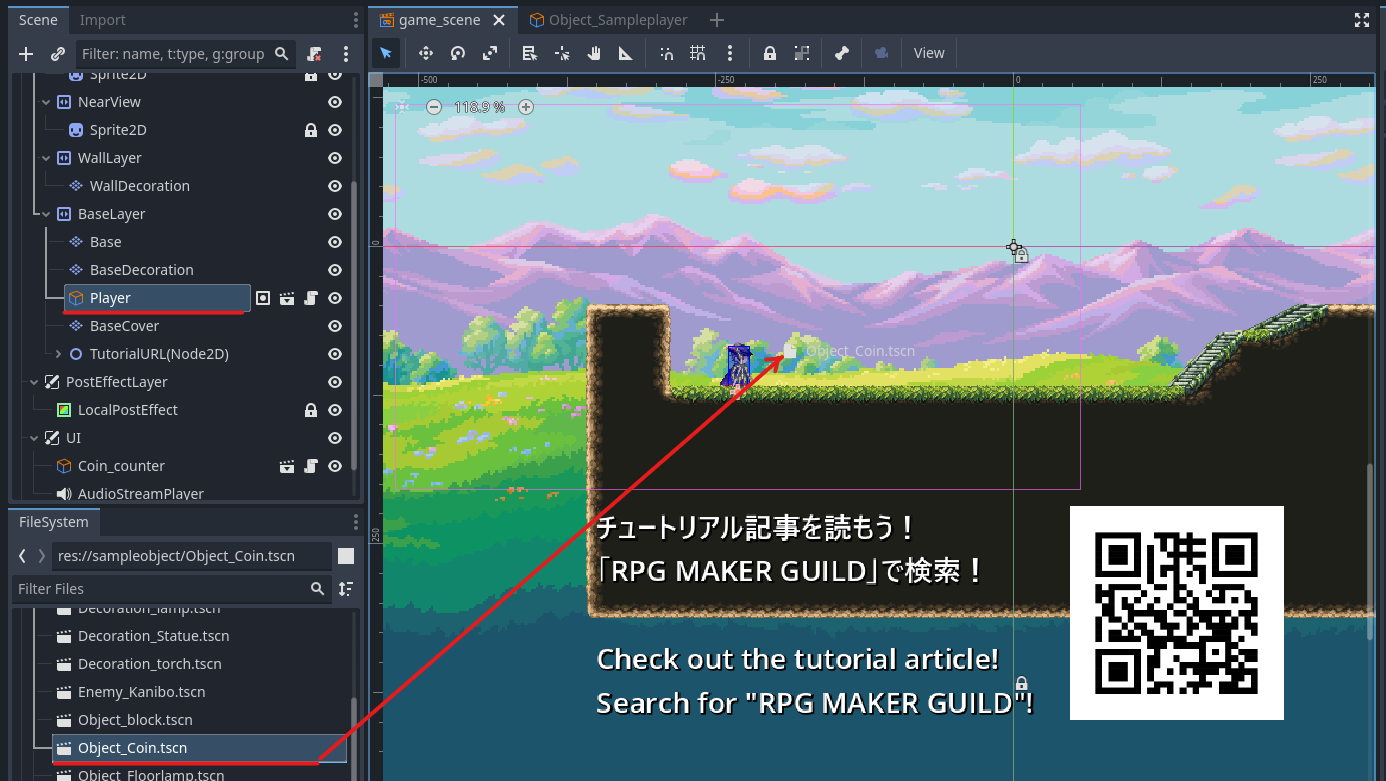
2. まず、オブジェクトを配置するレイヤーを指定します。
左上の [シーン] ウィンドウを確認してください。
ACTION GAME MAKER では、オブジェクトは「レイヤー」ノードの子として配置する必要があります。
SceneLayer > BaseLayer 下の Player ノードを選択します。
これにより、新しく配置するオブジェクトが正しいレイヤー階層の下に追加されます。
3. これでオブジェクトをシーンに配置します。
まずはコインから始めましょう。
[ファイルシステム] ウィンドウから Object_Coin.tscn をドラッグ&ドロップして、中央のエディタビューの希望する場所に配置します。
4. コインを移動するには、それを選択してマウスでドラッグします。
誤って BaseLayer の外(別のレイヤー)に配置してしまった場合は、[シーン] ウィンドウで BaseLayer ノードにドラッグして移動させることができます。
コインの配置が完了したら、 ボタンまたは F5 キーを使用してゲームをテストしてください。
プレイヤーがコインに触れると、コインは消え、右上のコインカウンターが 1 つ増加します。
5. これで他のサンプルオブジェクトも自由に配置できます。
利用可能なサンプルオブジェクトは合計 13 種類 です。
好きなように実験して配置してみてください!
サンプルオブジェクトの概要
| ファイル名 |
説明 |
| Enemy_Kanibo |
左右に移動する基本的な敵。上にジャンプして倒すことができます。 |
| Object_block |
下から攻撃すると破壊できる壊せるブロックです。 |
| Object_Coin |
プレイヤーが接触することで収集できるコインです。 |
| Object_Floorlamp |
上にジャンプすると壊せるランプです。 |
| Object_Goalflag |
プレイヤーが接触するとクリア演出がトリガーされます。 |
| Object_Jumpboard |
踏みつけるとプレイヤーを上に跳ね上げる板です。 |
| Object_Platform_horizontal, Object_Platform_vertical |
間隔を置いて水平または垂直に移動する移動プラットフォームです。 |
| Object_Sampleplayer |
プレイヤーキャラクターです。 |
| Decoration_Statue |
装飾用の像です。 |
| Decoration_lamp, Decoration_torch |
自動で影を落とす内蔵照明付きの装飾用ランプです。 |
| UI_Coin_counter |
プレイヤーが収集したコインの数を表示します。 |
オブジェクトを配置したら、 ボタンを押してテストプレイを試してみてください。
また、F5 キーをショートカットとして使用してテストプレイを開始することもできます。
ステージにこれらのオブジェクトを配置することで、徐々にゲームを構築していくことができます!
ステップ 6: オブジェクトのカスタマイズ
次に、サンプルオブジェクトの 1 つをカスタマイズしてみましょう。
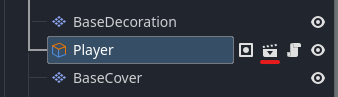
1. Player オブジェクトの  「エディターで開く」ボタンをクリックします。
2. [エディター] ビューに Object_Sampleplayer という名前の新しいタブが表示され、キャラクターが表示されます。
[シーン] ウィンドウを見ると、メインシーンと同じようにツリー構造で配置された多数のノードが表示されます。
各ノードには、このプレイヤーオブジェクトで使用される特定の情報が格納されています。
3. [MoveAndJumpSettings] ノードを選択します。
右側の [インスペクター] ウィンドウが更新され、そのノードのプロパティが表示されます。
名前の通り、このノードは入力キー、移動速度、ジャンプ力などの設定を処理します。
デフォルトでは、水平方向の移動速度は 300 に設定されています。
これを 600 に変更してみましょう。
4. ボタンを押すか、[F5] キーを押してテストプレイを実行します。
キャラクターが 2 倍の速度で移動するのを目撃できるはずです。
変更を確認したら、速度を 300 に戻すことを忘れないでください。
ステップ 7: ビジュアルスクリプトの理解
1. 次に、ビジュアルスクリプティングシステムを探求しましょう。
画面の左上にある Player オブジェクトの横にある  アイコンをクリックします。

2. [Editor] ビューがビジュアルスクリプトを表示しているはずです。
これはプレイヤーの動作を制御するプログラムです。
[Idle] や [Move] のようにラベル付けされた各ボックスは、プレイヤーが実行できるアクションを表します。これらのボックスは**状態 (States)と呼ばれます。
それらを結ぶ線は、状態間を切り替える条件を示します。これらはリンク (Links)**と呼ばれます。
次に、[Jump] 状態をクリックします。
右側の [Inspector] ウィンドウにその設定が表示されます。
3. デフォルトでは設定は折りたたまれています。展開して内容を確認してください。
- アニメーション設定:
再生するアニメーションを定義します。
この場合、009_Jump が選択されています。
- アクション設定:
ジャンプなどの基本的な動作を処理します。
ここでは、ジャンプアクションを定義する設定がなされています。
- 追加アクション:
RPG Maker のイベントコマンドと同様に、リストからさまざまなアクションを追加できます。
この場合、「サウンド再生」アクションが追加されています。
ステップ 8:新しい状態の作成
1. 新しい状態を追加しましょう。今回は「スライド移動」を作成します。
[Move] 状態ボックスの近くの空白スペースを右クリックし、**「状態の追加」**を選択します。
[State001] という新しい状態が表示されるはずです。
[State001] を選択し、右側の [インスペクター] ウィンドウを確認します。
2. まず、状態の名前を変更します。
[インスペクター] ウィンドウの下部にある タイトル フィールドを見つけ、名前を Sliding に変更します。
3. 次に、動作中に再生するアニメーションを割り当てます。
「割り当てられたアニメーション」 セクションを展開します。
\u003cAnimation Category\u003e ドロップダウンをクリックし、登録されているアニメーションのリストから選択します。
スライドの場合は、[028_sliding] を選択します。
4. 次に、動作設定を構成します。
「動作設定」 セクションを展開します。
ここでは移動速度やジャンプ動作などのプロパティを変更できます。
ダッシュをキャンセル不可にするには、**「この状態中の移動入力を無効化」**にチェックを入れます。
これにより、動作再生中にプレイヤーの入力が動作を中断するのを防ぎます。
次に、**「水平移動速度 (%)」**を 200 に設定し、スライド中にキャラクターが2倍の速度で移動するようにします。
5. プレイヤーを現在の進行方向に移動させるように強制しましょう。
このオプションは設定のさらに奥にあります。
「その他の実行アクション」 を展開し、「配列 [Actions] (size 0)」 を開きます。
「+ アクションの追加」 ボタンをクリックします。
6. 新しいアクション選択ウィンドウが表示されます。
リストから3番目の項目:**「進行方向に移動」**を選択して追加します。
いくつか設定可能なオプションがありますが、デフォルト設定のままで問題ありません。
これで、Sliding 状態の作成が完了しました!
ステップ 9:リンクで状態を接続する
スライディングアクションを作成しましたが、現在は他の状態に接続されていないため、まだ使用できません。
[Move] 状態から [Sliding] 状態へのリンクを作成しましょう。
1. [Move] 状態を右クリックして「リンクを追加」を選択します。
2. 線が表示されます。それを [Sliding] 状態にドラッグして左クリックします。
これで [Move] から [Sliding] への接続線が表示されるはずです。
3. 遷移の条件を設定しましょう。
作成したリンクをクリックし、[インスペクター] ウィンドウを確認します。
「On Input」プロパティを有効にします。
新しい入力ボックスが表示されます。Array[InputCondition] セクションを展開し、**「+ 入力を追加」**をクリックします。
4. <Empty> という新しいエントリが表示されます。
それをクリックして**「新しい InputCondition」**を選択します。
5. エントリが InputCondition と表示されます。
もう一度クリックして展開し、以下のようにキー入力を設定します。
入力をボタン B(キーボードのX キーに対応)に設定します。
これで、移動中に B が押されたときに [Move] から [Sliding] への遷移が発生します。
6. これでプレイヤーはスライドできますが、スライディング状態から抜ける方法がありません。
戻りパスがないと、プレイヤーはスライディング状態に永遠にとどまってしまいます。
[Sliding] から [Idle] へのリンクを作成しましょう。
[Sliding] 状態を右クリックして「リンクを追加」を選択し、右側の [Idle] 状態に接続します。
 ショートカット状態に関する注記:
左側と右側の両方に [Idle] 状態が表示されていることに気づくかもしれません。
これらは同じ状態です。右側のものはショートカットであり、 アイコンで示されています。

ビジュアルスクリプトのリンクは常に左から右へ流れるため、ショートカットを使用すると、以前の状態に戻す際に複雑な「スパゲッティ」状の接続を避けることができます。
7. 次に、入力以外の条件を使用して遷移を設定しましょう。
[Sliding] から [Idle] への新しいリンクのインスペクターで、「その他の条件」の下にある**Array[Conditions]を展開し、「+ 条件を追加」**をクリックします。
8. ポップアップウィンドウで「経過時間」を選択し、0.3 秒に設定します。
この条件は下部にありますので、検索して見つけてください。
追加ボタンをクリックして確定します。
9. ボタンまたは F5 キーを使用して設定をテストします。
設定が正しければ:
- 移動中にXを押すと、スライディング状態がトリガーされます。
- 0.3 秒後に、アイドル状態に戻ります。
- 移動キーを押し続けている場合、すぐに移動状態に戻ることがあります。
 トラブルシューティングのヒント
何か問題がある場合は:
- 遷移は
[Move] からのみ機能します。[Idle] や [Jump] の状態で X を押してもスライディングは発生しません。
- X を押しても反応しない場合は、
[Move] から [Sliding] へのリンクを再度確認してください。
- 遷移は発生するが何も再生されない場合は、
[Sliding] 状態のアニメーションとアクションの設定を確認してください。
- プレイヤーがスライドから戻らない場合は、
[Sliding] → [Idle] のリンクとその条件を確認してください。
 完了!
完了!
ビジュアルスクリプトを使用して、動作するアクションを正常に作成できました。
基本がわかれば、以下を試してみてください:
- 速度や持続時間を調整して、操作性を向上させる。
- **「サウンドを再生」**アクションを使用して、効果音やボイスを追加する。
[Idle] → [Sliding] を接続して、静止状態からスライドできるようにする。[Jump] や [Fall] からリンクを追加して空中スライドを作成する(Idle ではなく Landing に戻すことを忘れないでください。そうしないとキャラクターが正しく着地しません)。
ビジュアルスクリプトビューを終了する
スクリプトを終了して通常の編集モードに戻るには、画面上部の**[2D]**タブに切り替えます。
 最終的なヒント
アクション作成は、遷移と条件を組み合わせることです。
他のサンプルオブジェクトがスクリプトをどのように使用しているかを確認することで、多くのことを学ぶことができます。
 重要:
重要:
ビジュアルスクリプトを開く際は、正しいオブジェクトタブがアクティブになっていることを確認してください。
Godot ではどのタブからでもスクリプトを開くことができますが、アニメーションや変数などのビジュアルスクリプト設定は、アクティブなタブに依存します。そうでない場合、一部の設定が正しく機能しない可能性があります。
このチュートリアルでは基本的な操作について説明しましたが、まだカバーしていない機能も多数あります。ただし、アクションゲームメーカーで何を作りたいかは人それぞれであることは理解しています。
そのため、以下のチュートリアルコースを3つの主要なカテゴリに分けました:
1. グラフィックスコース
オリジナルキャラクターを自分でアニメーション化したい方向け。
2. スクリプティングコース
デフォルトのキャラクターで問題ないが、さまざまなメカニクスやシステムを構築したい方向け。
3. エフェクト強化コース
クールなゴッドスタイルのビジュアルエフェクトを追加したい方向け。
どのコースから始めても構いませんが、ゼロからゲームを制作する場合は、最終的にはすべて受講することをお勧めします。
「いいね!」 5