第3章:弾を発射して敵を倒す
第3章の目標
第2章では、以下の目標を達成しました。
- プレイヤーキャラクターが移動・ジャンプできるシンプルなステージを作成する。
今章では、さらに進めて以下のことを実現する方法を説明します。
第3章の完成イメージは以下の通りです。
「プレイヤーが弾を発射して敵を倒す」ための計画
必要な手順について考えてみましょう。
したがって、第3章での目標は以下の通りです。
-
弾オブジェクトを作成する
-
プレイヤーにショット状態を追加する
-
敵オブジェクトを作成する
最後に、敵を倒すことを可能にするために、ダメージを与える処理(攻撃システム)を実装する必要があります。
ACTION GAME MAKERには、攻撃とダメージを処理するための専用システムが用意されているため、制作に入る前に、このシステムがどのように動作するかを学ぶ時間を取りましょう。
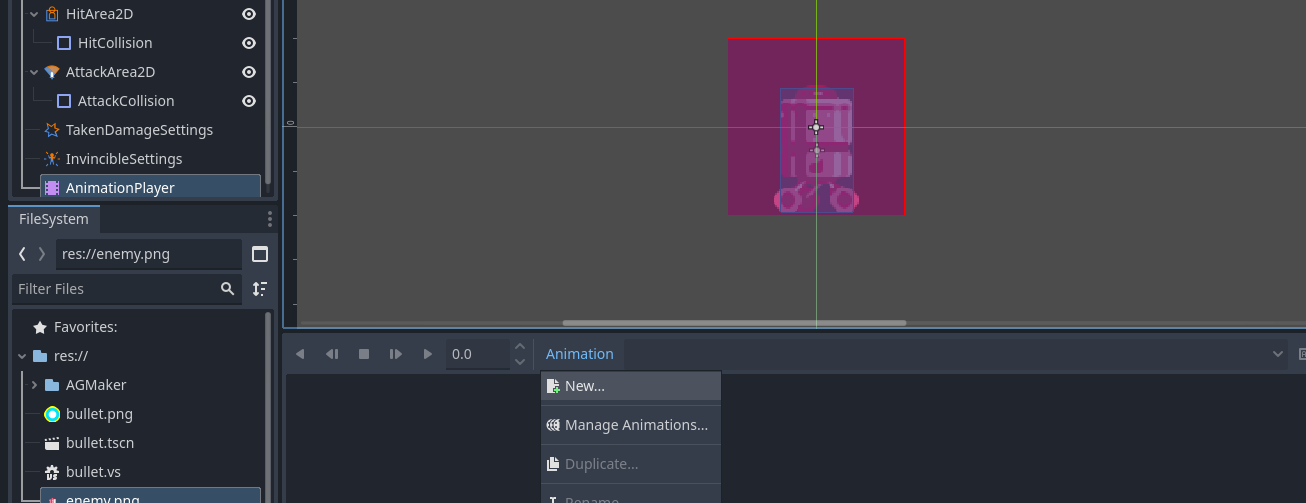
「攻撃」と「ダメージ」の仕組み(ACTION GAME MAKER)
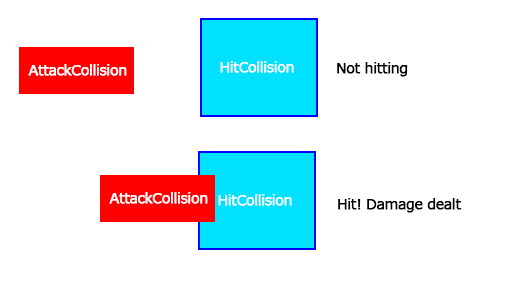
攻撃のヒット
HitArea2D / HitCollisionやAttackArea2D / AttackCollisionのノードを、プレイヤーオブジェクト内で覚えていますか?
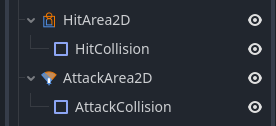
ACTION GAME MAKERでは、AttackArea2DのAttackCollisionがHitArea2DのHitCollisionと衝突すると、システムが自動的にダメージ処理を行います。
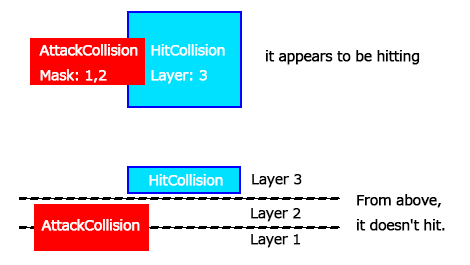
さらに、Godot の標準機能であるCollisionLayerとCollisionMaskを使用することで、どのオブジェクトが「衝突」し、どのオブジェクトが衝突しないかを微調整できます。
CollisionLayer と CollisionMask
前述の「壁との衝突」で説明した通り、Godot はCollisionLayerとCollisionMaskシステムを使用して衝突を制御します。
これらは、衝突検出に奥行きを加えるレイヤーと考えるとわかりやすいでしょう。
以下のようなパネルで設定します:

例えば:
- AttackCollisionのマスクがレイヤー1と2に設定されている場合、レイヤー3にのみ存在するHitCollisionには当たりません。
この設定は、キャラクターが自分の攻撃ヒットボックスと衝突してしまうような望ましくないケースを防ぐのにも役立ちます。
ダメージ処理
攻撃が成功すると、ダメージは自動的に処理されます:
-
攻撃側のオブジェクトの攻撃力(BaseSettingsで設定)が、防御側のオブジェクトのHPから差し引かれます。
-
その後、無敵時間(これもBaseSettingsで設定)を有効にすることで、ダメージを受けたオブジェクトが一定時間、それ以上の攻撃を受け付けなくすることができます。
 このシステムにより、ACTION GAME MAKERは攻撃とダメージのロジックの核心を自動的に処理するため、関連するノードと設定のみを構成すれば済みます。
弾丸オブジェクトの作成
攻撃の仕組みの基本を説明したので、実際に弾丸を作成しましょう。
弾丸もゲームオブジェクトであるため、基本的なワークフローはプレイヤーと同じです。
- 画像を割り当てる
- 移動速度などの設定を調整する
- ビジュアルスクリプトで処理を追加する
唯一の違いは、弾丸がプレイヤーの入力デバイスによって直接制御されない点です。
代わりに、弾丸は「弾丸発射」アクションによって発射され、移動が与えられるため、弾丸自体に独自の移動ロジックを作成する必要はありません。
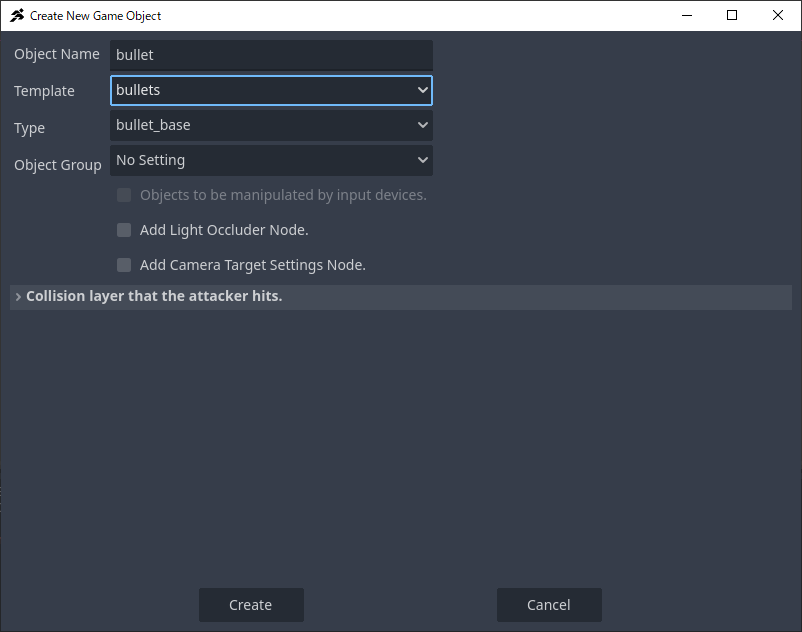
弾丸用のゲームオブジェクトの作成
-
新しいシーンタブを開き、ルートノードとしてゲームオブジェクトを選択します。
-
新しいオブジェクトの作成ウィンドウで、以下を設定します。
-
オブジェクト名: bullet
-
テンプレート: bullets
-
タイプ: bullet_base
-
弾丸オブジェクトのテンプレートが読み込まれます。
弾丸の画像の設定
弾丸に画像を割り当てましょう。
よりクールに見せるためにアニメーションを作成することもできますが、このチュートリアルではシンプルにするため、静的な画像のみを使用します。
-
以下の画像を右クリックして、コンピューターに保存します。

-
ダウンロードしたbullet.pngをエディターのファイルシステムにドラッグ&ドロップします。
-
シーンパネルでSprite2Dを選択します。
- インスペクターで、bullet.pngをテクスチャプロパティ(現在は
<empty>)にドラッグ&ドロップします。
弾丸の MoveAndJumpSettings の調整
弾丸はプレイヤーよりも速く移動するようにします。
プレイヤーの速度は300に設定されているため、弾丸の速度を600に設定しましょう。
-
シーンパネルでMoveAndJumpSettingsノードを選択します。
-
インスペクターで、水平速度と垂直速度の両方を600に設定します。
これで、独自のスプライトと速度設定を持つ基本的な弾丸オブジェクトが完成しました。
弾の攻撃ヒットボックスの調整
AttackArea2D での衝突レイヤーとマスクの設定
デフォルトでは、このオブジェクトはレイヤー 1に配置され、マスクは1 と 2に設定されています。
つまり、レイヤー 1 と 2 のオブジェクトにヒットするようになります。
しかし、プレイヤーもレイヤー 1 にあり、マスクは 1,2 です。このままでは、弾が発射された瞬間にプレイヤーと衝突してしまいます。
これを防ぐため、弾の衝突をレイヤー 3に、マスクは 3 のみに変更します。
-
シーンパネルでAttackArea2Dを選択します。
-
インスペクターでCollisionセクションを展開します。
-
Collision Layers/Masksを選択するためのパネルが表示されます。
-
Layerを1 → 3に変更します。
-
Maskを1,2 → 3 のみに変更します。
これで、弾がプレイヤーと衝突しなくなります。
AttackCollision のサイズ調整
現在、攻撃ヒットボックスは弾のスプライトよりもはるかに大きくなっています。
これを弾に合わせてサイズを変更しましょう。
-
シーンパネルでAttackCollisionを選択します。
-
エディタのビューポートで、形状周りのオレンジ色のハンドルをドラッグしてサイズを変更します。
これで、弾の衝突設定が適切に完了しました。プレイヤーに当たらず、攻撃ヒットボックスも弾のサイズに合うようになりました。
弾のセットアップ
壁の衝突(CollisionShape2D)はすでに適切なサイズになっているため、変更は不要です。
基本的なセットアップが完了したので、弾用のスクリプトを作成しましょう。
弾は以下のときに消去されるべきです:
- 敵に衝突したとき
- タイルに衝突したとき
- カメラの表示範囲外に出たとき
これを実現するには、2 つの状態だけで十分です:Move(移動)とDisappear(消去)。
これらを設定していきましょう。
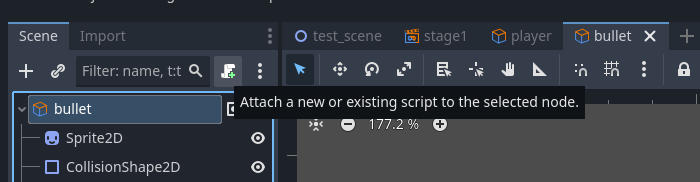
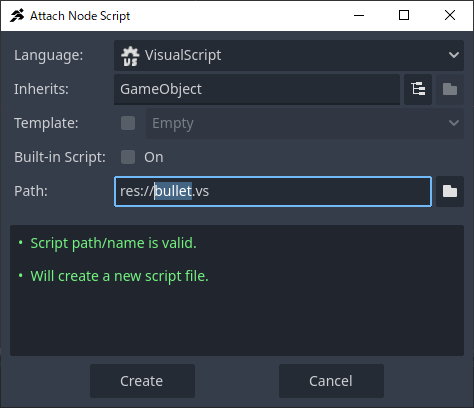
スクリプトの添付
-
Bullet (GameObject) ノードを選択します。
-
シーンパネルで** +(スクリプトの添付)**ボタンをクリックします。
-
デフォルトのオプションを変更せず、Createをクリックして、bullet.vs という名前の新しいスクリプトを作成します。
「Move」状態の設定
デフォルトのState001を「Move」状態として再利用します。
弾の移動は「シューター」(弾を発射するオブジェクト)によって処理されるため、この状態に追加アクションは必要ありません。
-
State001を選択します。
-
インスペクターでTitleをMoveに変更します。
「Disappear」状態の作成
-
Move 状態の右側を右クリックし、Add Stateを選択します。
-
新しく作成されたState001を選択し、TitleをDisappearにリネームします。
-
インスペクターで**+ Add Executable Action**をクリックします。
-
RemoveSelfを選択し、Addをクリックします。
- これで、弾がこの状態に入るとシーンから削除されます。
Move → Disappear のリンク
弾は以下のときに消去されるべきです:
- 敵に衝突したとき
- タイルに衝突したとき
- カメラの表示範囲外に出たとき
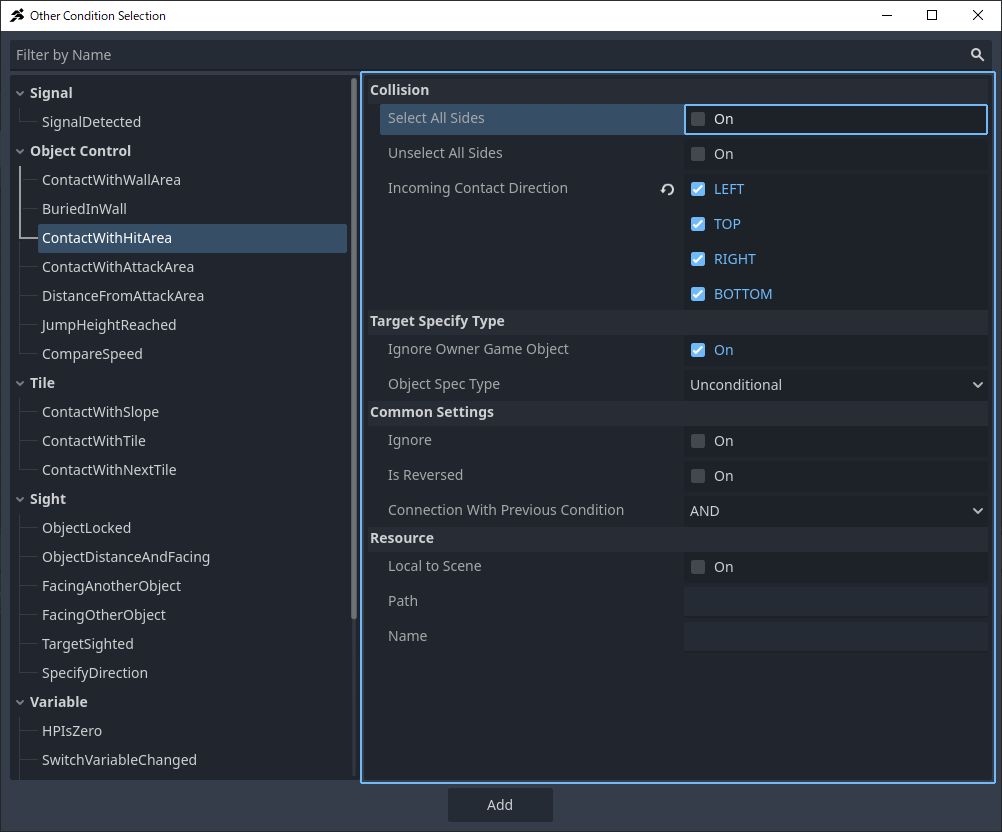
複数の条件をAND(かつ)/ **OR(または)**ロジックを使用して、1 つのリンクに組み合わせることができます。
この場合は、OR で接続します:
敵との衝突 OR タイルとの衝突 OR カメラの表示範囲外
手順:
-
Move状態を右クリックし、Add Linkを選択します。
-
リンクをDisappear状態に接続します。
-
新しく作成されたリンクを選択し、インスペクターで**+ Add Condition**をクリックします。
-
ContactWithHitAreaを選択します。
-
Select All Sidesにチェックを入れ、Addをクリックします。
-
もう一度**+ Add Condition**をクリックします。
-
今回はContactWithTileを選択します。
-
All Directionsを選択し、論理条件としてORを選択してからAddをクリックします。
-
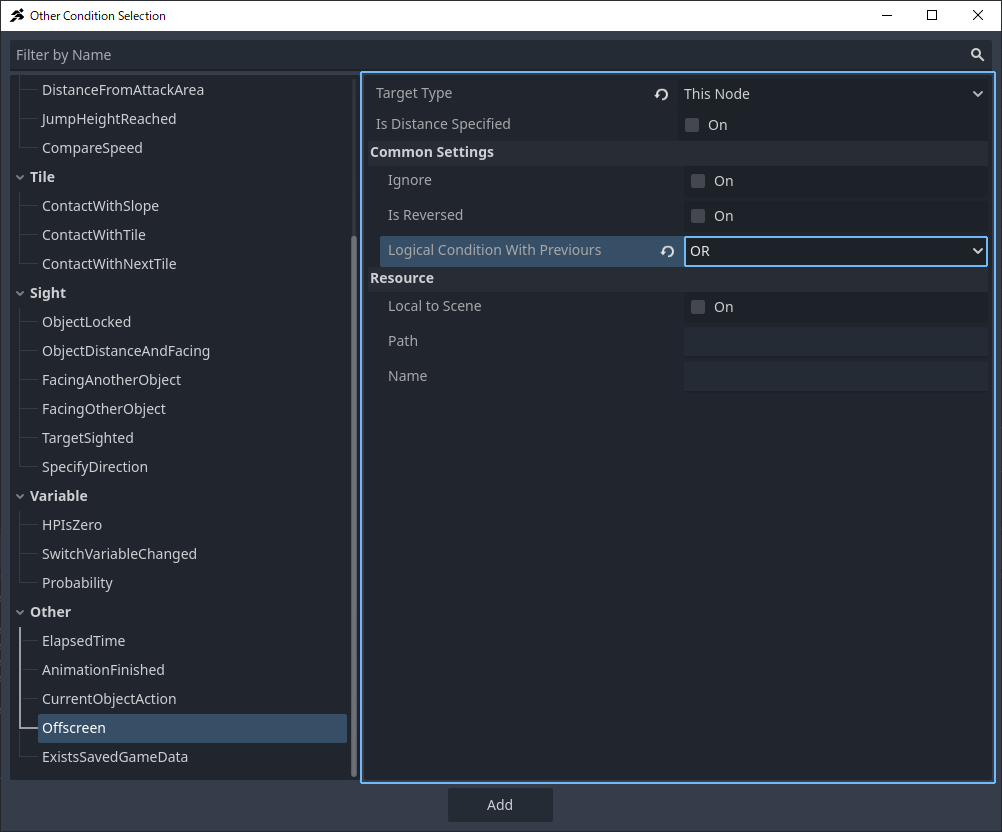
+ Add Other Conditionで3つ目の条件を追加します。
-
下にスクロールしてOffscreenを選択します。
-
Target TypeをThis Nodeに設定し、ロジックをORに設定してからAddをクリックします。
-
条件が正しいことを確認します。
- AND/OR の設定が間違っている場合は、アイコンをクリックして切り替えてください。
補足:「ContactWithHitArea」は AND を使うべきか?
AND/OR の設定は、前の条件との関係を示します。
これは最初の条件なので、AND でも OR でも結果は変わりません。
ただし、他の条件の下に移動させた場合は AND が適用されます。
安全のために、OR のままにしておきましょう。
これで弾のセットアップは完了です!シーンを保存することを忘れないでください。
プレイヤーオブジェクトを改造して弾を発射させる
プレイヤーが弾を発射できるようにするには、4 つのステップを踏む必要があります。
A. 発射アニメーションを作成する
B. BulletsSettings ノードを追加して設定する
C. Connector ノード(発射点)を追加して設定する
D. Visual Script に**「弾を発射」ステート**を作成する
最初のステップである発射アニメーションの追加から始めましょう。
A. 射撃アニメーションの作成
まず、プレイヤーが弾を発射する状況を考えましょう。メガーマン風のセットアップを目指す場合、以下の3つの射撃状態が必要になるようです:立ちながら発射、移動しながら発射、空中で発射。
ただし、すでに作成済みの「移動」アニメーションは、キャラクターが手を前に出して走るように設計されており、これは射撃動作に完璧に適合します。つまり、新たに作成する必要があるのは2つのアニメーションのみです。地上射撃と空中射撃です。
前回と同じ方法を使用します:必要な射撃ポーズはすでに読み込まれたスプライトシートに含まれています。ワークフローは以下の通りです:アニメーションの追加 → キーフレームの挿入 → アニメーションセットへの読み込み。
「地上射撃」と「空中射撃」アニメーションの作成
-
「シーン」タブを「Player」に、「エディタービュー」を「2D」に設定します。
-
AnimationPlayer ノードを選択します。
-
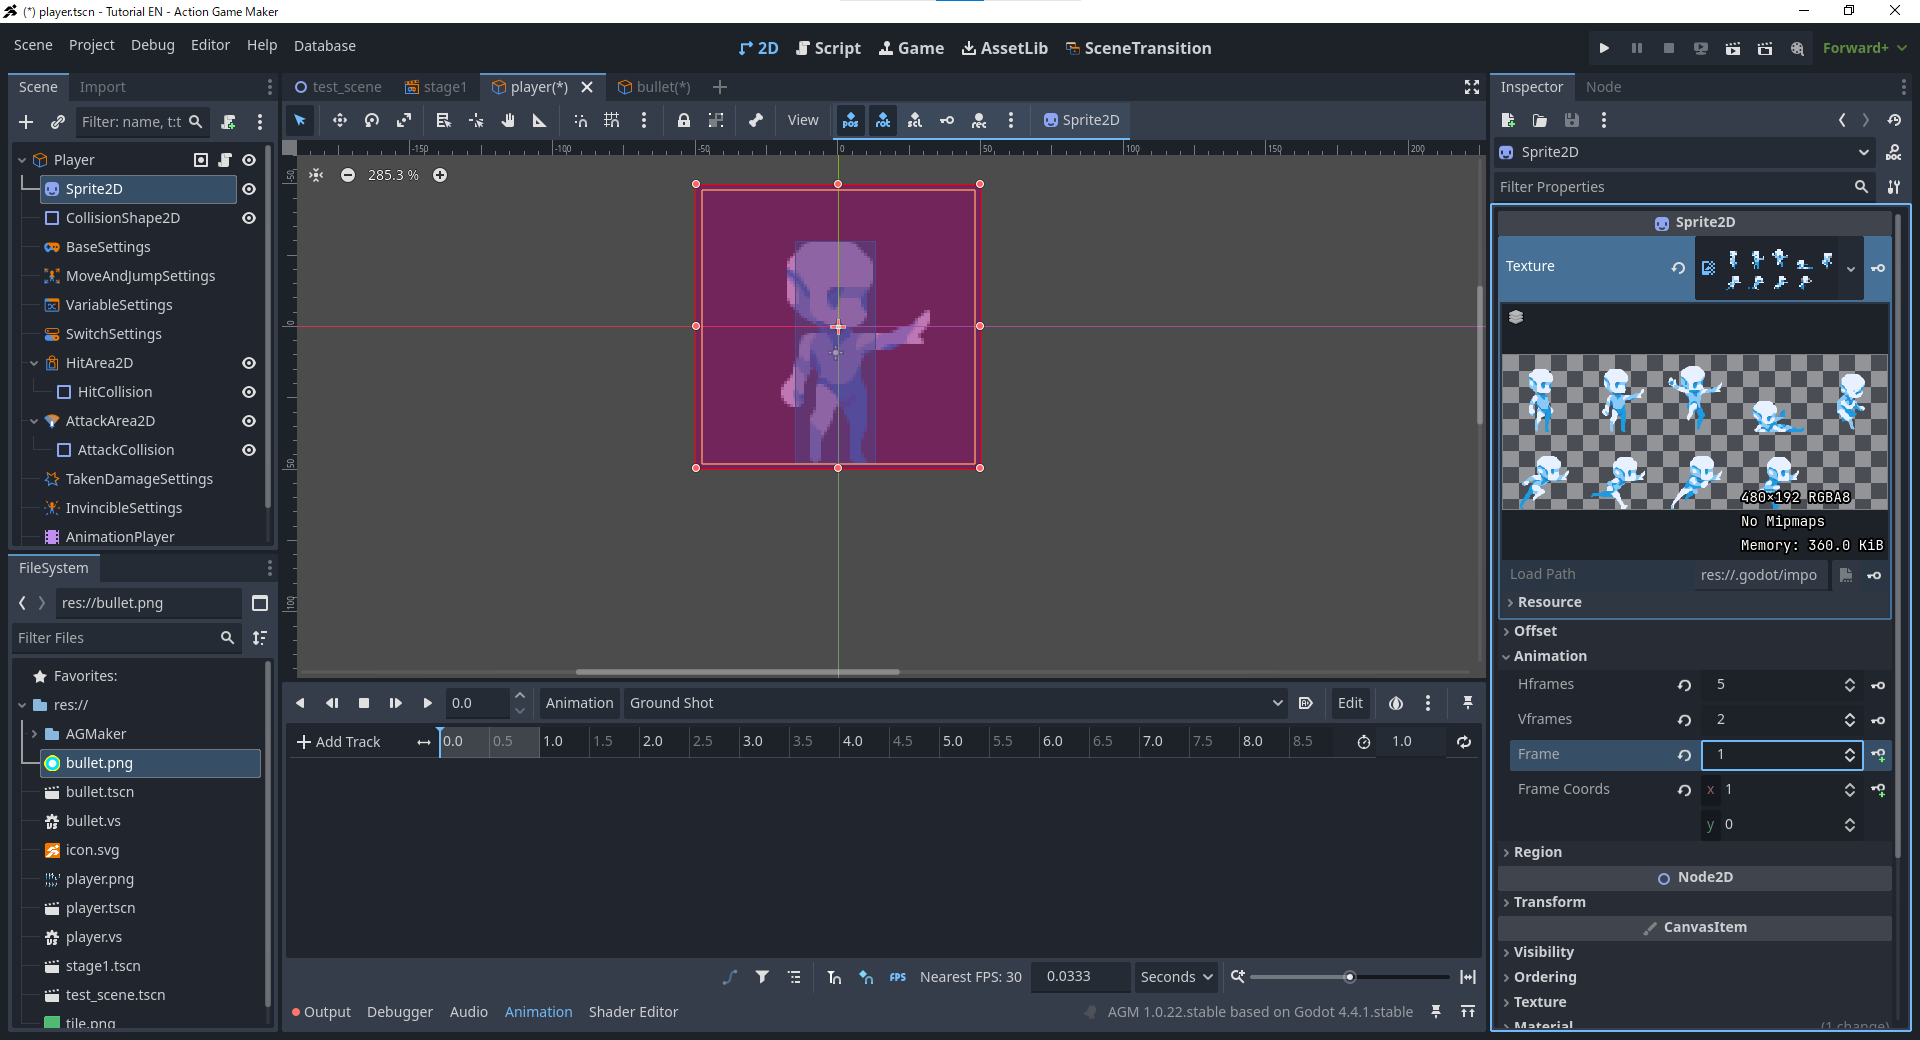
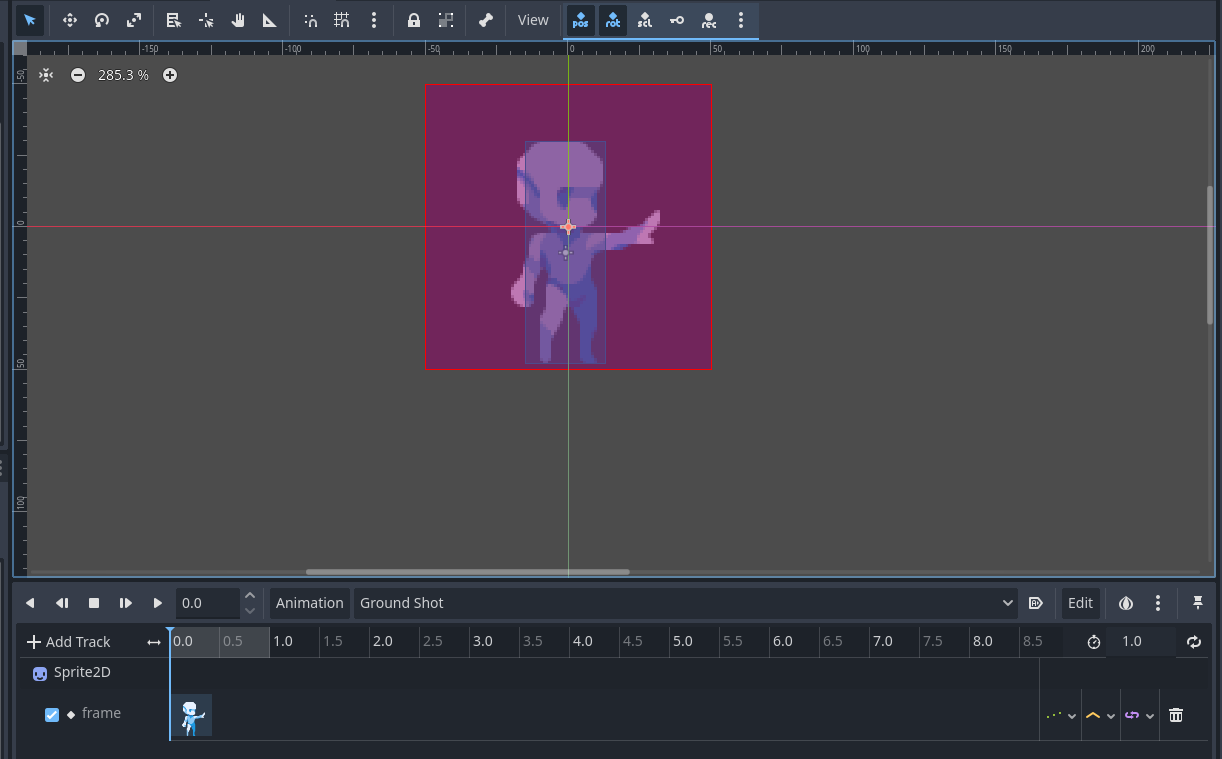
下部のアニメーションパネルでAnimationをクリックし、新しいアニメーションを作成します。
-
新しいアニメーションにGround Shotと名前をつけます。
-
Sprite2Dを選択し、インスペクターでAnimationプロパティを展開します。
-
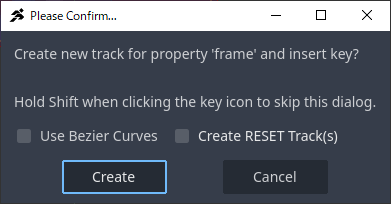
Frameを1(プレイヤーが立ち、手を前に出しているフレーム)に設定します。その後、 + (Add Keyframe) ボタンを押します。
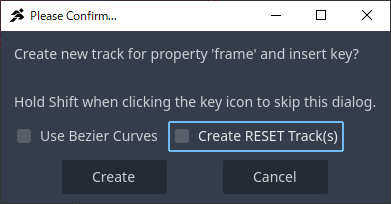
-
ポップアップでCreate RESET Trackのチェックを外し、Createをクリックします。
-
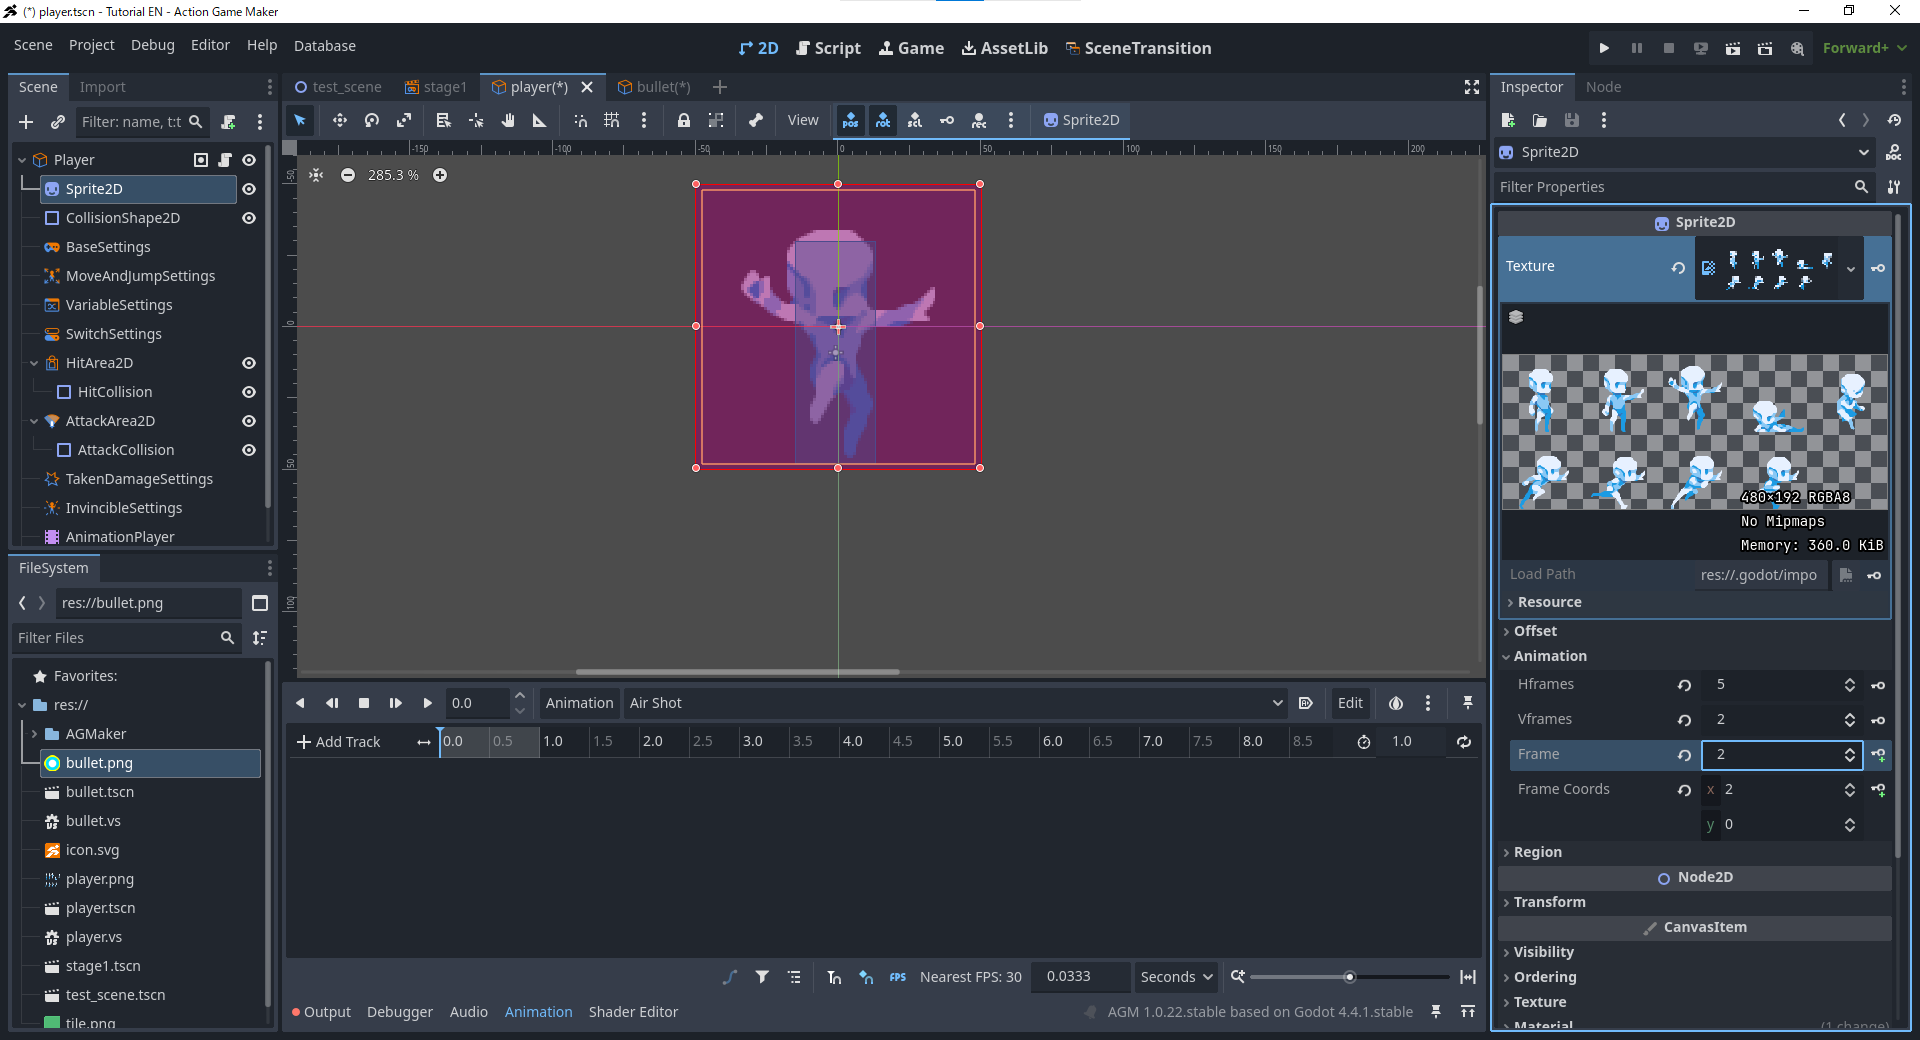
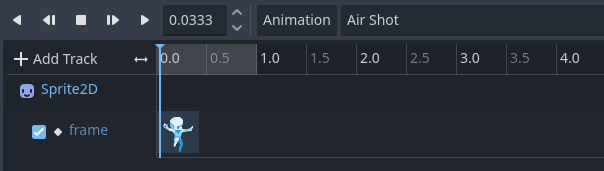
ステップ2〜3を繰り返して、今度はAir Shotという名前の新しいアニメーションを作成します。
-
Sprite2Dが選択された状態で、Frameを2(プレイヤーが空中にあり、手を前に出しているフレーム)に設定します。+ (Add Keyframe) ボタンを押して挿入します。
アニメーションセットへのアニメーションの登録
-
Player (GameObject) ノードを選択します。
-
インスペクターでBulk Load Animationsボタンをクリックします。
-
これでGround ShotとAir Shotのアニメーションがアニメーションセットに追加されます。
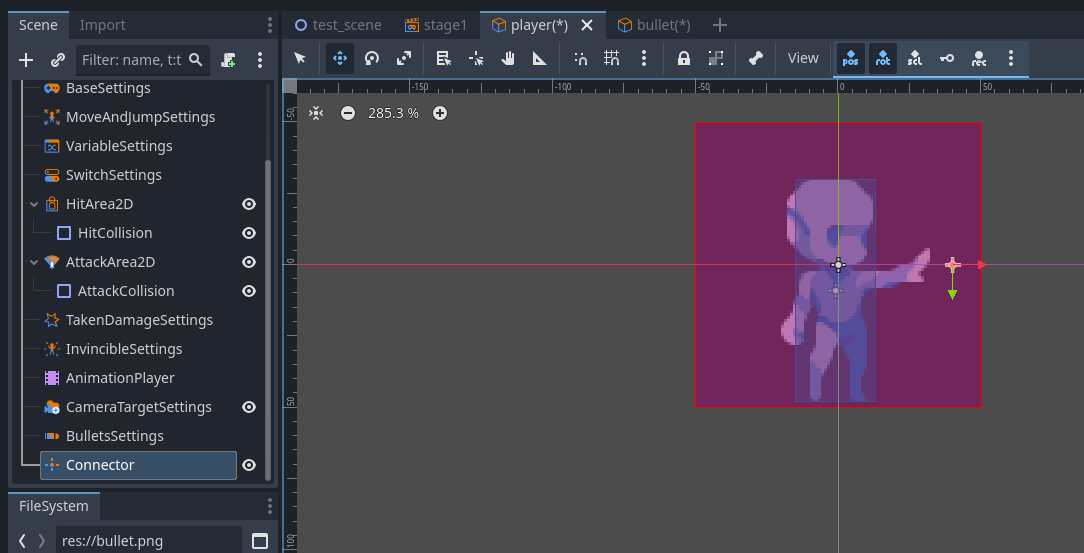
C. Connector ノードの追加と設定
Connector ノードは、ビジュアルスクリプトを扱う際に「位置」を指定するために使用されます。例えば、弾丸を発射する起点や、オブジェクトが出現する場所などです。この場合、Connector は発射点として機能するため、射撃アニメーションで示された手の先端に配置します。
-
Player (GameObject) ノードを選択します。
-
左上の + (Add Child Node) ボタンをクリックして、Create New Node ダイアログを開きます。
-
Connector を選択し、Create をクリックします。
-
AnimationPlayer ノードを選択し、アニメーションを Ground Shot に切り替えます。
-
再度 Connector ノードを選択します。
-
エディタツールを Move Mode に切り替えます。
-
✛(Connector マーカー)をキャラクターの手の先端までドラッグします。これで Connector の設定が完了します。
D. シュート状態の追加
次に、弾を発射するために必要な状態を追加します。Ground Shot(地上射撃)とMoving Shot(移動射撃)の状態、そしてAir Shot(空中射撃)の状態が必要です。
ただし、空中射撃には特別な処理が必要です。単にAir ShotからJump(ジャンプ)状態に戻ると、ジャンプアクションが再度トリガーされ、弾を発射するたびにプレイヤーがさらに高く跳んでしまいます。これを防ぐために、Jump状態をJumpとAirの2つの状態に分割します。
- Jump状態は即座にAir状態へ遷移します。
- Air状態でプレイヤーが地面(下のタイル)に触れると、Idle状態へ戻ります。
- Air ShotはAir状態に戻るので、ジャンプアクションが繰り返されるのを防げます。
これを段階的に構築していきましょう。
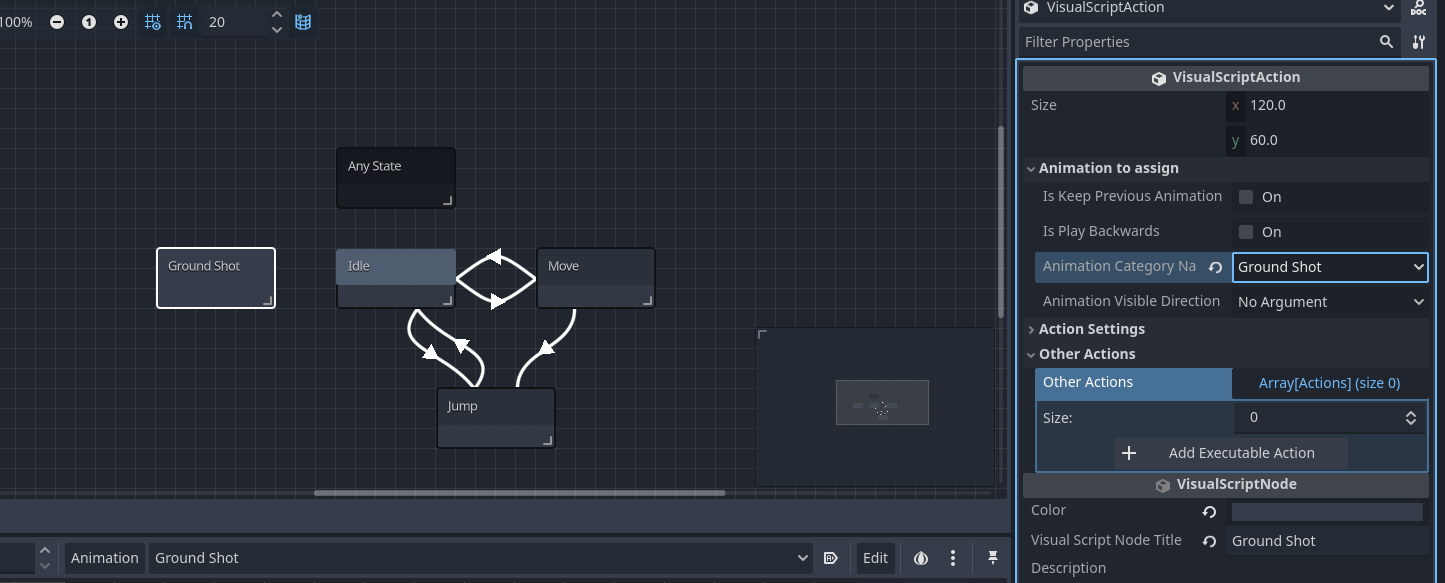
Ground Shot と Moving Shot 状態の作成
-
Scriptタブに切り替えます。
-
Idle状態の左側に新しい状態を作成します。
-
作成されたState001をGround Shotにリネームします。
-
Select AnimationでGround Shotアニメーションセットを割り当てます。
-
+ Add Execution Actionをクリックします。
-
アクションとしてFireBulletを選択します。
-
Bullet Dataで、以前作成した弾オブジェクトを指定します。
-
Connectorの隣のAssignボタンをクリックします。
-
Select Nodeウィンドウで、以前作成したConnectorを選択します。
-
Bullet Data = “bullet”、Connector = “Connector” であることを確認し、Addをクリックします。
-
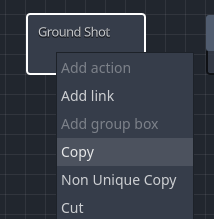
Moving Shotについては、Ground Shot 状態をコピーします:
-
Ground Shotを右クリックし、Copyを選択します。
-
Move状態の右側の近くで右クリックし、Paste Stateを選択します。
-
作成された状態をMoving Shotにリネームします。
-
チェックボックスContinue Previous Animationを有効にします。Moving Shot はMoveと同じアニメーションを使用するため、ここではアニメーションの変更は不要です。
Idle ↔ Ground Shot および Move ↔ Moving Shot のリンク
Idle または Move でAttackボタンを押すと、Ground Shot または Moving Shot に遷移し、0.3 秒後に Idle または Move に戻るようにします。
-
Idleを右クリックし、Ground Shotへのリンクを追加します。
-
プロパティでTrigger On Inputにチェックを入れます。
-
**Input Operations List (Array[InputCondition])**を展開します。
-
+ Add Inputをクリックして新しいエントリを追加します。
-
をクリックし、New Input Conditionを選択します。
-
Input Conditionを展開し、Input Key = Attackを設定します。
-
リンクを右クリックし、Copyを選択します。
-
Moveを右クリックし、Paste Linkを選択します。
-
Moving Shotに接続します。
-
Ground Shotを右クリックし、Idleへのリンクを追加します。
-
インスペクタで**+ Add Condition**をクリックします。
-
条件としてElapsed Timeを選択します。
-
期間を 1 秒から0.3 秒に変更します。
-
このリンクを右クリックし、Copyを選択します。
-
Moving Shotを右クリックし、Paste Linkを選択して、Moveに接続します。
これで、地上での射撃状態の作成は完了です。
地上射撃のテスト
-
右上の**Run Project (F5)**ボタンをクリックします。
-
正しく設定されていれば、Idle または Move でXキーを押すと弾が発射されます。
-
動作しない場合は、以下を確認してください:
-
アニメーションが再生されない → 状態のアニメーション設定と AnimationPlayer を確認します。
-
アニメーションは再生されるが弾が発射されない → FireBulletアクションの設定を確認します。
-
弾は出現するが動かない、または正しく飛んでいかない → BulletsSettingsを確認します。
テストが完了したら閉じます。
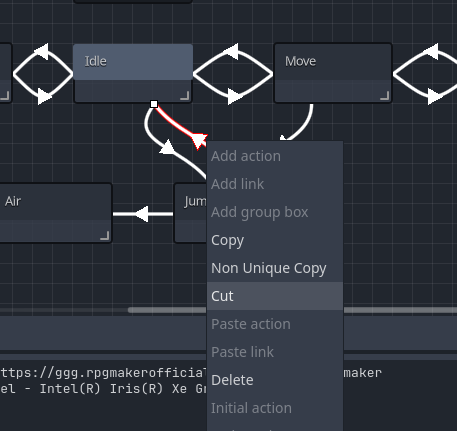
Jump 状態を Jump と Air に分割
-
Jump状態の左側に新しい状態を作成します。
-
State001をAirにリネームします。
-
AnimationをJumpに設定します(空中でのビジュアル用)。
-
Jumpを右クリックし、Airへのリンクを追加します。
-
インスペクタでConditions for SwitchingをUnconditionalに設定します(これにより、Jump は即座に Air に切り替わります)。
-
既存のJump → Idleリンクを切り取ります:選択して右クリックし、Cutを選択します。
-
Airを右クリックし、Paste Linkを選択して、Idleに接続します。
-
これで、着地時の遷移は Jump を経由せず、Air を経由するようになります。
-
テストプレイで、ジャンプ → 空中 → 着地のフローが正しく動作するか確認します。
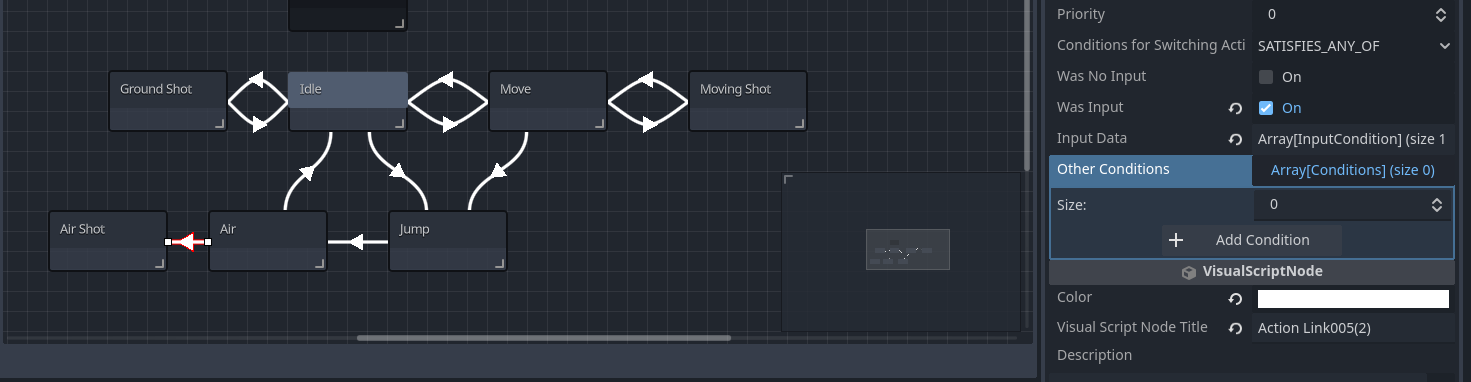
Air Shot の作成とリンク
Air Shot は Ground Shot と同じように動作しますが、異なるアニメーションを使用するため、既存の状態を再利用します。
-
Ground Shotを右クリックし、Copyを選択します。
-
Airの左側に貼り付けます。
-
Ground Shot (1)をAir Shotにリネームします。
-
インスペクタでAnimationをAir Shotに変更します。
-
Idle → Ground Shotリンクをコピーします。
-
Airを右クリックし、リンクを貼り付けてAir Shotに接続します。
-
Ground Shot → Idleリンクをコピーします。
-
Air Shotを右クリックし、リンクを貼り付けてAirに接続します。
最終テスト
プロジェクトを再度実行します:
- IdleまたはMoveでXキーを押すと、プレイヤーが弾を発射します。
- Zでジャンプし、その後Xキーを押すと、プレイヤーが空中で弾を発射します。
両方が正しく動作すれば、射撃システムの完成です!
敵オブジェクトの作成
次に、敵オブジェクトを作成しましょう。まずは最も単純なタイプの敵、つまり左右にのみ移動するタイプから始めます。手順はプレイヤーキャラクターを作成したときと同じです。シーンを作成し、画像とアニメーションを割り当て、ノードを設定し、その後スクリプトを構築します。
enemy GameObject の作成
-
エディタのビューをスクリプトから2Dに戻します。
-
新しいシーンタブを作成し、ルートノードとしてGameObjectを選択します。
-
新規オブジェクトの作成ウィンドウで、以下を設定します。
-
Unsaved を右クリックし、シーンをenemy.tscnとして保存します。
「いいね!」 1
敵の画像とアニメーションの設定
敵には、以下の画像を使用します。単純な対称円だった弾丸とは異なり、この敵は非対称であり、移動方向に応じて反転させる必要があります。自動反転機能はアニメーションセットで処理されるため、テクスチャはSprite2Dで設定し、AnimationPlayerでアニメーションを作成し、プレイヤーと同様に敵(GameObject)ノードにAnimation Setを設定します。
Sprite2D の設定
-
上記の画像を右クリックして PC に保存します。

-
画像をFileSystemにドラッグ&ドロップしてインポートします。
-
Sprite2Dノードを選択します。
-
インスペクターで、Textureプロパティにenemy.pngをドラッグ&ドロップします。この画像はフレームに分割する必要がないため、スプライトの設定は完了です。
CollisionShape2D による衝突形状の調整
現在の衝突形状はスプライトよりもはるかに小さいため、サイズを変更します。
-
SceneウィンドウでCollisionShape2Dノードを選択します。
-
衝突ボックスの隅にあるオレンジ色のハンドルをドラッグしてサイズを変更し、スプライトに適切に合うように調整します。
AnimationPlayer の設定とアニメーションセットの作成
アニメーションセットを設定するには、アニメーションが必要です。プレイヤーとは異なり、この敵はフレーム切り替えを必要としないため、単にアニメーションを作成するだけで十分です。
-
AnimationPlayerノードを選択します。
-
下部のアニメーションウィンドウでAnimationをクリックし、Newを選択します。
-
新しいアニメーションにMoveという名前を付けて作成します。トラックは不要なため、このアニメーションはこれで完了です。次に、アニメーションセットを設定します。
-
**enemy (GameObject)**ノードを選択します。
-
インスペクターでAnimationPlayerをクリックします。
-
正しい AnimationPlayer が割り当てられていることを確認し、OKをクリックします。
-
インスペクターでBulk Load Animationsボタンをクリックします。
-
アニメーションセットを展開し、Moveが正しく登録されていることを確認します。
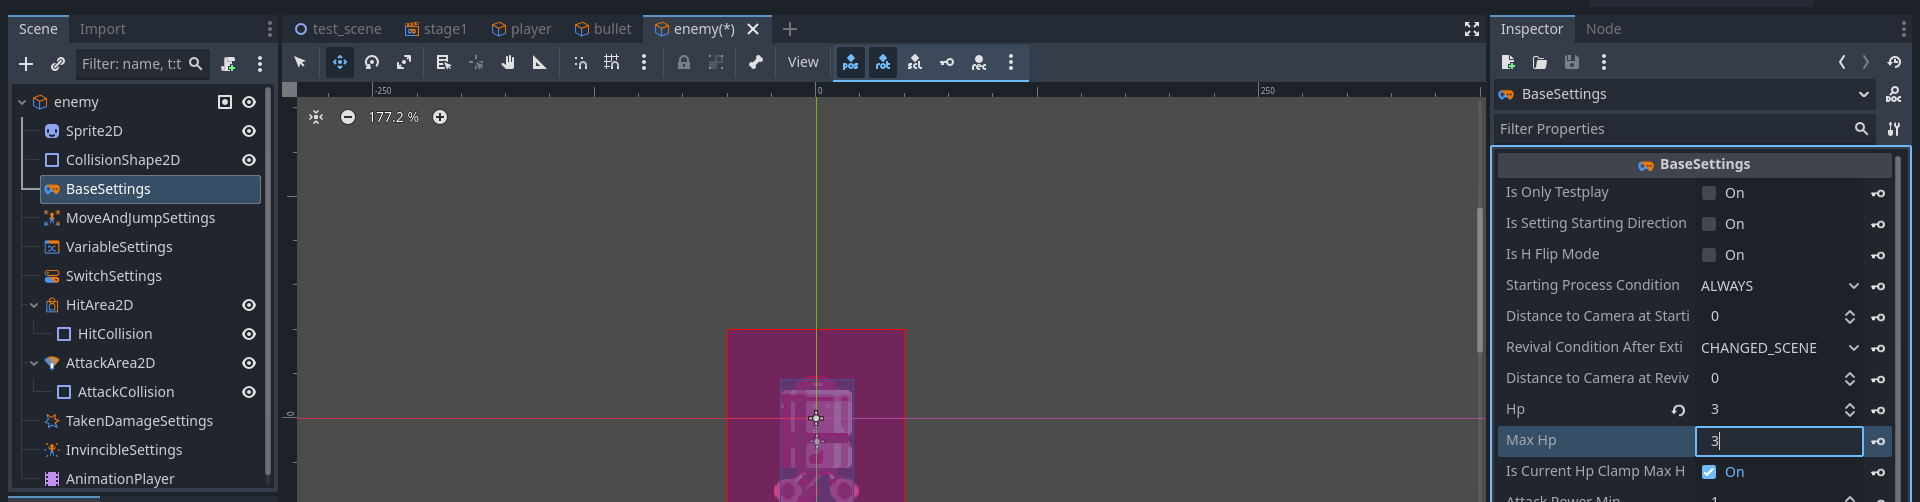
敵の BaseSettings の調整
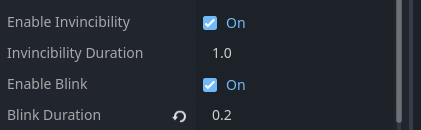
敵が攻撃によって実際に倒せるようにするには、HP と無敵状態の設定を構成する必要があります。
HP の設定
-
BaseSettings ノードを選択します。
-
Inspector で、HP と Max HP を 1 から 3 に変更します。
- これにより、敵は 3 点のダメージを受けるごとに HP が 0 になります。
無敵状態の設定
無敵状態は、ダメージを受けた直後の短い間、オブジェクトが HP を失わないようにする機能です。これを設定しないと、敵が同一瞬間に複数の攻撃を受ける可能性があります。
プレイヤーの発射間隔が 0.3 秒 に設定されているため、無敵時間の目安は 0.2 秒 程度が適切です。
さらに、無敵状態のシステムには、無敵中にオブジェクトが点滅する機能も含まれています。無敵時間を 0.2 秒に設定する場合、点滅間隔を 0.1 秒 に設定すると、点滅が視覚的に確認できます。
-
Inspector で、Invinciblity Duration プロパティを 1.0 から 0.2 に変更します。
-
その直下にある Blink Duration プロパティを 1.0 から 0.1 に変更します。
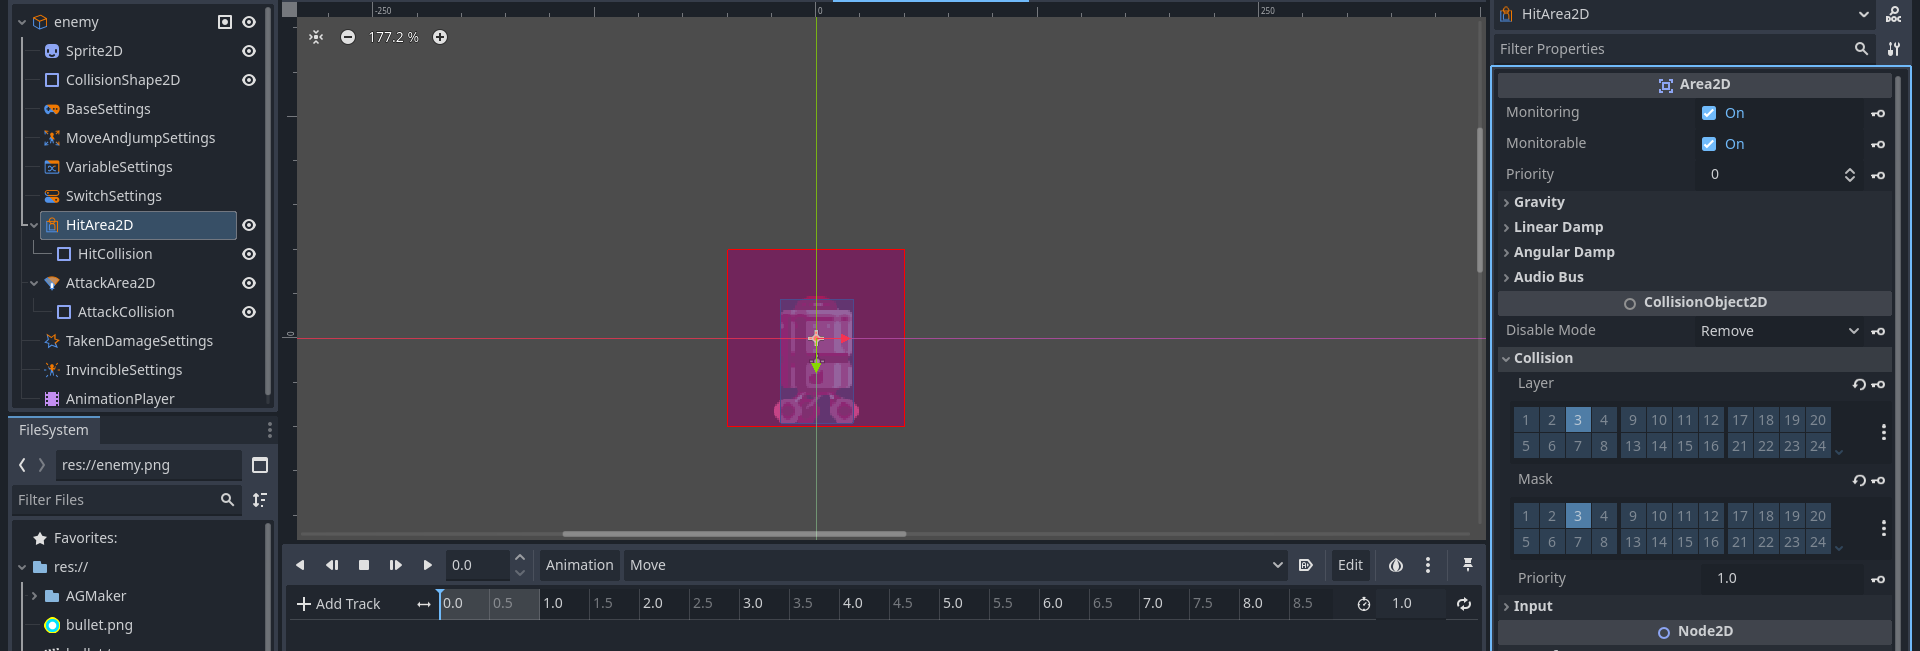
敵のヒットボックスの調整
次に、敵のヒットボックスを設定します。弾オブジェクトの衝突レイヤーを3に設定しているため、敵もレイヤー3に配置して、弾と正しく相互作用できるようにする必要があります。
HitArea2D での衝突レイヤーとマスクの設定
-
HitArea2D ノードを選択します。
-
インスペクターで、Collision セクションを展開します。
-
Layer と Mask の両方を3に変更します。
- これにより、敵のヒットボックスが弾の攻撃衝突と正しく相互作用できるようになります。
HitCollision のサイズ調整
現在、HitCollision が大きすぎるため、サイズを調整します。
-
Scene ウィンドウで、HitCollision ノードを選択します。
-
衝突ボックスのオレンジ色の隅のハンドルをドラッグしてサイズを変更し、敵の表示スプライトよりわずかに大きくなるように調整します。
敵の攻撃当たり判定の調整
次に、敵の攻撃ヒットボックスを設定しましょう。弾丸とは異なり、攻撃の当たり判定はプレイヤーとのみ相互作用すれば十分です。プレイヤーの当たり判定レイヤーはデフォルト値のままなので、ここではレイヤーやマスクの設定を変更する必要はありません。必要なことは、当たり判定の形状のサイズを変更することだけです。
-
シーンウィンドウで、AttackCollisionノードを選択します。
-
当たり判定ボックスのオレンジ色の角ハンドルをドラッグしてサイズを変更し、敵のヒットボックスのサイズと一致するように調整します。
敵スクリプトの設定
敵は左右にのみ移動するため、必要なものは移動機能と、HP が 0 になったときに消える機能だけです。
理論的には、「左へ移動」、「右へ移動」、**「消滅」の 3 つの状態で行うことも可能ですが、ここでは単純なパトロール移動を自動で処理する「テンプレート移動」**アクションを活用します。
したがって、作成するのは2 つの状態のみです:「テンプレート移動」と「消滅」。これらをリンクさせ、HP が 0 になったときに敵が消えるようにします。
ビジュアルスクリプトの添付
-
敵 (GameObject) ノードを選択します。
-
スクリプトの添付ボタンをクリックします。
-
デフォルトの名前を enemy.vs のままにして、作成を押します。
「テンプレート移動」と「消滅」状態の作成
-
State001をテンプレート移動に名前変更します。
-
Inspector でアニメーションカテゴリを移動に設定します。
-
+ 実行可能アクションの追加ボタンをクリックします。
-
MovementTemplateを選択します。
-
移動時間を 3 に設定し、崖から転落不可を有効にします。
-
追加を押します。
-
テンプレート移動状態の右側の空いている場所で右クリックし、状態の追加を選択します。
-
新しく作成されたState001を消滅に名前変更します。
-
+ 実行可能アクションの追加ボタンをクリックします。
-
RemoveSelfを選択して追加します。
以下のような図になれば、状態の設定は完了です。
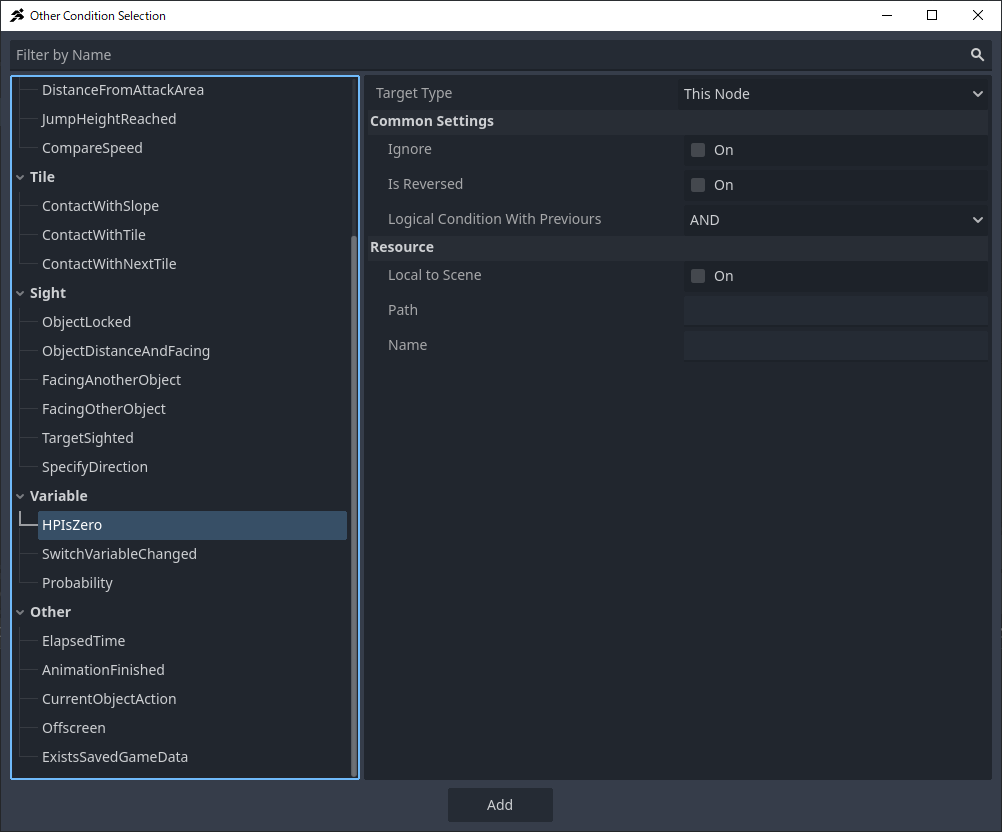
テンプレート移動から消滅へのリンク
-
テンプレート移動状態で右クリックし、リンクの追加を選択して、消滅に接続します。
-
Inspector で、条件の追加ボタンをクリックします。
-
HPIsZeroを選択します。
-
デフォルト設定(TargetType: このノード)のままにして追加します。
リンクが例と一致していれば、設定は完了です。
敵を Stage1 シーンに配置
これで敵の準備が整ったので、stage1にプレイヤーと一緒に配置しましょう。
-
エディタの表示をスクリプトから2Dに切り替えます。
-
シーンタブをstage1に切り替えます。
-
Scene ウィンドウでPlayerノードを選択します。
-
Player が選択された状態で、enemy.tscnを FileSystem からステージにドラッグし、Player の右側に配置します。
-
ゲームをテストプレイします。
すべて正しく設定されていれば、敵は 3 秒ごとに左右にパトロールし、3 発の弾丸に当たると消滅します。
トラブルシューティングチェックリスト
-
敵が左右に移動しない:
テンプレート移動状態の設定を確認してください。
-
敵が方向転換する際に反転しない:
敵ノードのアニメーションセットを確認し、テンプレート移動状態に正しいアニメーションが割り当てられているか確認してください。
-
敵が 1 発で消滅する:
敵のHP、最大 HP、無敵時間の設定をBaseSettingsで確認してください。
-
弾丸が敵に当たらない:
敵のHitArea CollisionLayer/Maskと、弾丸のAttackArea CollisionLayer/Maskを確認してください。
-
弾丸が衝突しても消滅しない:
弾丸の移動 → 消滅リンクを確認し、消滅状態にRemoveSelfアクションが設定されているか確認してください。
プレイヤーへのダメージ処理の追加
この時点で、このパートの目標である「プレイヤーは敵を撃つことで倒せる」を達成しました。
しかし、まだ問題があります。敵にはすでに攻撃ヒットボックスが存在しますが、プレイヤーはダメージを受けた際に何も反応していません。
さらに、プレイヤーにも攻撃ヒットボックスがあるため、現在は敵に衝突するだけで敵を倒せてしまいます。
そこで、プレイヤーの設定を以下のように調整します。
- プレイヤーはダメージを受けた際に反応する。
- 「ダメージを受けた」アニメーションが再生される。
- 被弾後に無敵時間が適用される。
- ヒットボックスと攻撃ボックスが適切に調整される。
- 最後に、ビジュアルスクリプトに対応する動作を追加する。
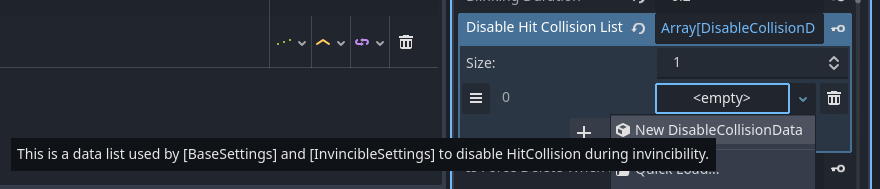
BaseSettings の無敵時間の調整
次に、無敵時間を設定します。
これはプレイヤー用なので、少し長めの無敵時間を与えるのが良いでしょう。無敵時間を1 秒、点滅間隔を 0.2 秒に設定します。
さらに、無敵中は当たり判定を無効にする必要があります。
この間、プレイヤーは HP を失いませんが、当たり判定を無効にしないと、攻撃との衝突がシステムによって検知されてしまいます。
-
BaseSettings ノードを選択します。
-
Inspector で、Blink Duration を 1.0 から 0.2 に変更します。
-
Blink Interval プロパティのすぐ下にある Disabled Hit Collision List (Array…) を展開し、+ Add Element をクリックします。
-
クリックして New DisableCollisionData に設定します。
-
DisableCollisionData に変更されたら、それをクリックして展開します。
-
Assign ボタンを押します。
-
ノード選択ウィンドウが表示されます。HitCollision を選択して OK を押します。
これで、プレイヤーがダメージを受けると、1 秒間だけ当たり判定が無効になります。