前章では、プレイヤーが弾を発射して敵を倒せるようにすることで、ゲームプレイの基礎を完成させました。
今章では、さらに進めて、実際にゲームとして遊べるプロジェクト に仕上げていきます。
現在のバージョンでは、プレイヤーは移動でき、敵も存在しますが、いくつかの要素がまだ不足しています。
ステージが小さすぎるため、拡大する必要があります。
プレイヤーにはダメージ反応がありますが、実際に倒すことはできません。また、プレイヤーの残HPがわからないため、それを表示できるようにする必要があります。
最後に、ゲームにゴール がありません。理想的にはボス戦を含めたいところですが、まずはシンプルにしましょう:敵を5体倒せばゲームクリア です。
まず、より多くのタイルを描画してステージを拡張しましょう。ステージが大きくなるため、プレイヤーが最終的にカメラの現在の範囲外に出てしまう可能性があります。そのため、カメラがプレイヤーを追跡するようにもする必要があります。
タイルはBase (TileMapLayer) ノードを使用して作成されたため、このノードを使用してステージを拡張します。
stage1 シーンタブに切り替えます。
シーンウィンドウでBase (TileMapLayer) ノードを選択します。
下部のウィンドウでTileMap タブを開き、タイルを選択します。
右側のスペースに自由にタイルを配置します。ステージのバランスを保つために:
十分なタイルを配置したら、次のステップに進みます。
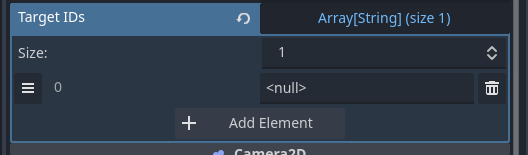
ACTION GAME MAKER におけるカメラの追従は、Target ID と呼ばれるシステムによって制御されます。プレイヤーを作成し、CameraTargetSettings ノードを追加した際を覚えていますか?そのノードにはTarget ID というプロパティがあります。
カメラノードのZoomCamera2D にもTarget ID プロパティがあります。カメラとゲームオブジェクトの両方が同じTarget IDを共有している場合、カメラは自動的にそのオブジェクトを追従するように設計されています。
ZoomCamera2D とプレイヤーのCameraTargetSettings の両方のTarget IDを設定しましょう。
Stage1 シーンタブで、**InitialCamera (ZoomCamera2D)**ノードを選択します。
Inspectorで**Target ID (Array…)**プロパティを展開します。
+ Add Element ボタンをクリックします。
テキストフィールドが表示されます。プレースホルダーテキストの<null>を削除し、player と入力します。
player シーンタブに切り替えます。
CameraTargetSettings ノードを選択します。
InspectorでTarget ID フィールドにplayer と入力します。
これで拡張されたステージのプレイテストを行い、すべてが正しく機能しているか確認しましょう。プレイヤーをステージの右端まで動かしてみてください。
すべてが適切に設定されていれば、カメラはスムーズにプレイヤーを追従するはずです。
敵と同様に、プレイヤーの HP が 0 になったときも敗北させる必要があります。死亡アニメーションに適したフレームがないため、パーティクル を使用して視覚的なエフェクトを作成しましょう。
パーティクルは、本質的に大量に散らばった小さな画像 で、エフェクトを表現するものです。例えば、紙吹雪を想像するとわかりやすいでしょう。パーティクルを使えば、各「破片」の外観や動きを自由に調整できます。
Godot Engine では、通常GPUParticle2D やCPUParticle2D などのノードを使用します。ACTION GAME MAKER では、ParticleObject ノードを使用してパーティクルを処理します。
ParticleObject には、すぐに使用できる20 種類以上のパーティクルテンプレート が用意されています。
パーティクルオブジェクトの作成は、ゲームオブジェクトを作成するのと全く同じです。
新しいシーンタブ を作成します。
ルートノードとしてGameObject を選択します。
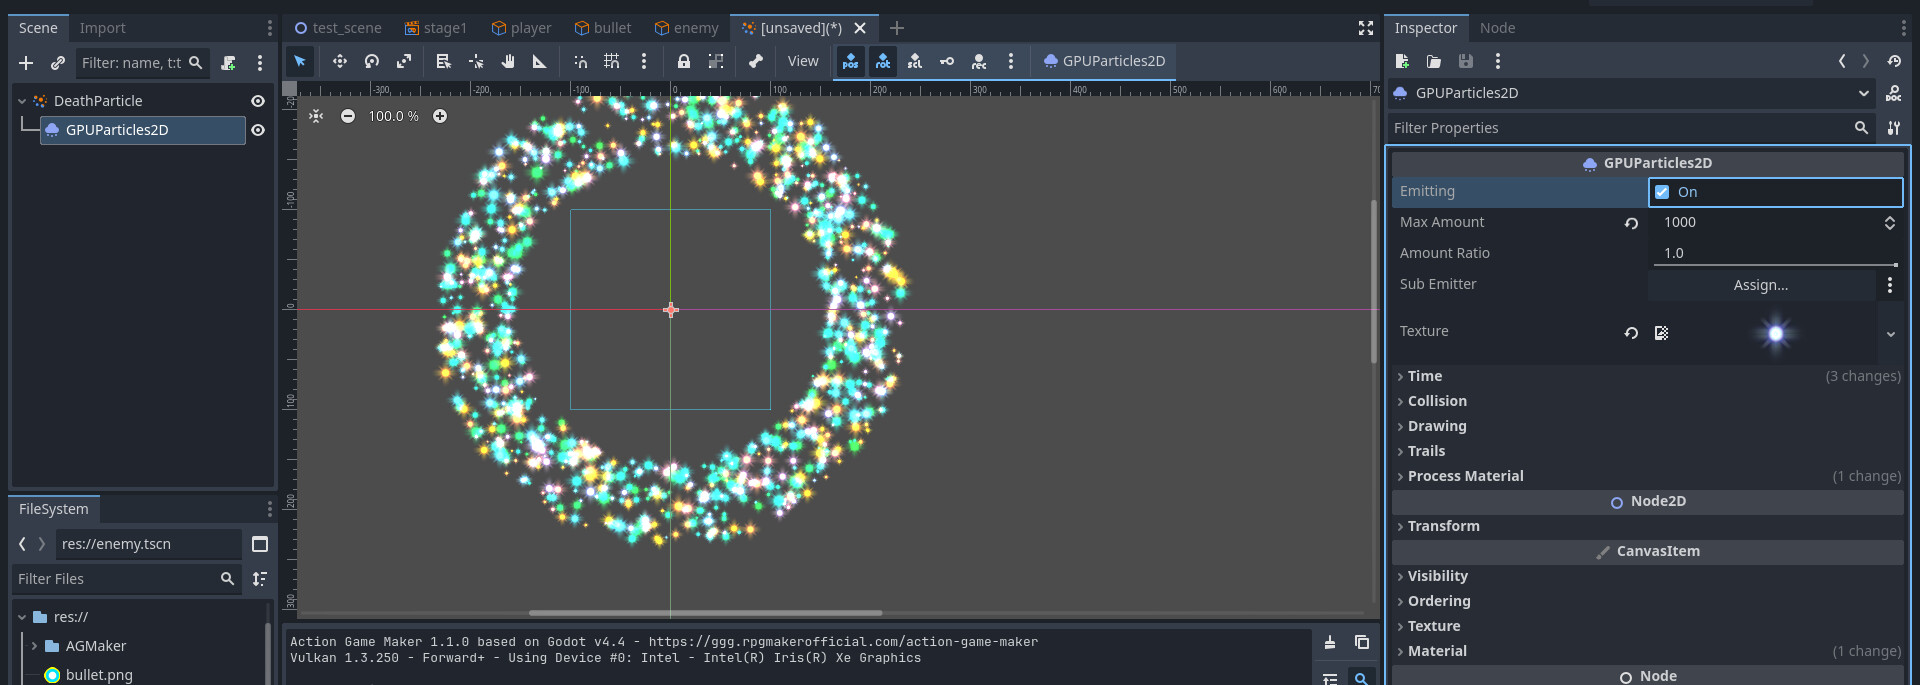
オブジェクト名 を DeathParticle に設定し、テンプレート をparticles に選択して、作成 をクリックします。
シーンウィンドウで、新しく作成されたDeathParticle ノードを選択します。
インスペクターで、パーティクルテンプレート をNone からFireworks に変更します。
GPUParticles2D ノードが自動的に追加されます。
GPUParticles2D のインスペクターで、Emitting プロパティにチェックを入れます。これによりパーティクルの放出が有効になります。
これでシーンビューにパーティクルが放出され、花火のようなエフェクトが表示されるはずです。[未保存](*) タブを右クリックして、シーンをdeathparticle.tscn として保存します。
プレイヤーの HP が 0 になると、移動を停止し、「Death Particle」エフェクトを発生させる必要があります。AnyState から接続するのが妥当ですが、一つ問題があります。
現在、以下に示すように、プレイヤーは状態に関係なく敵の攻撃に衝突すると、常にTake Damage 状態に遷移してしまいます。
HP = 0 はプレイヤーがすでに攻撃を受けたことを意味するため、「Death」状態にある間にもTake Damage 状態に遷移してしまう可能性があります。
これを修正するため、ダメージ遷移に「HP が 0 ではない 」という条件を追加し、プレイヤーがすでに死亡している場合に発動しないようにします。
完全に一致するアニメーションがないため、Damage アニメーションを再利用します。ただし、視覚的に区別しやすくするため、プレイヤーが倒されたことが明確になるようにFilter エフェクトも使用します。
Player シーンを開きます。
エディタを2D からScript に切り替えます。
Take Damage 状態の上部領域で右クリックし、Add State を選択します。
新しい状態の名前をDeath に変更します。
Animation をDamageTaken に設定します。
Action Settings セクションを展開します。
Ignore Movement Input を有効にします。
+ Add Executable Action をクリックします。
DisplayParticle を選択します。
Particle Object path フィールドでDeathParticle.tscn を選択します。
Add をクリックします。
再度、+ Add Executable Action をクリックします。
ApplyObjectFilter を選択します。
Filter Type をTransparent に、Finish Time を3.0 秒 に設定します。これにより、プレイヤーは 3 秒かけて徐々にフェードアウトします。
Add をクリックします。
Actions リストが正しい場合、「Death」状態の準備は完了です。
AnyState を右クリック → Add Link → Death に接続します。
+ Add Other Condition をクリックします。
HPIsZero を選択し、Add をクリックします。
最後に、HP がすでに 0 の場合にTake Damage 遷移が発動しないようにする必要があります。これにはIs Reversed オプションを有効にします。
AnyState → Take Damage のリンクを選択します。
+ Add Condition をクリックします。
HPIsZero を選択します。
Is Reversed を有効にします。これにより条件が「HP が 0 ではない 」に変更されます。
Other Conditions パネルに逆転条件(≠ アイコンがハイライト)が表示されていれば、設定は正しいです。
実際にテストしてみましょう。プレイヤーの初期 HP は 1 に設定されているため、敵の攻撃を 1 回受けるだけで Death 状態に入ります。
設定が正しければ以下のようになります。
パーティクルが表示されない: DeathParticle.tscn とDisplayParticle アクションを確認してください。
プレイヤーがフェードアウトしない: ApplyObjectFilter アクションの設定を確認してください。
死亡後もダメージ反応が発動する: リンク条件とTakeDamage 遷移の逆転条件を再確認してください。
現在、1 回の攻撃で倒されてしまうのは厳しすぎるため、プレイヤーの HP を増加させましょう。HP バー を作成します。
ACTION GAME MAKER では、SimpleGauge またはImageGauge ノードを使用してゲージを表示できます。このチュートリアルではSimpleGauge を使用します。
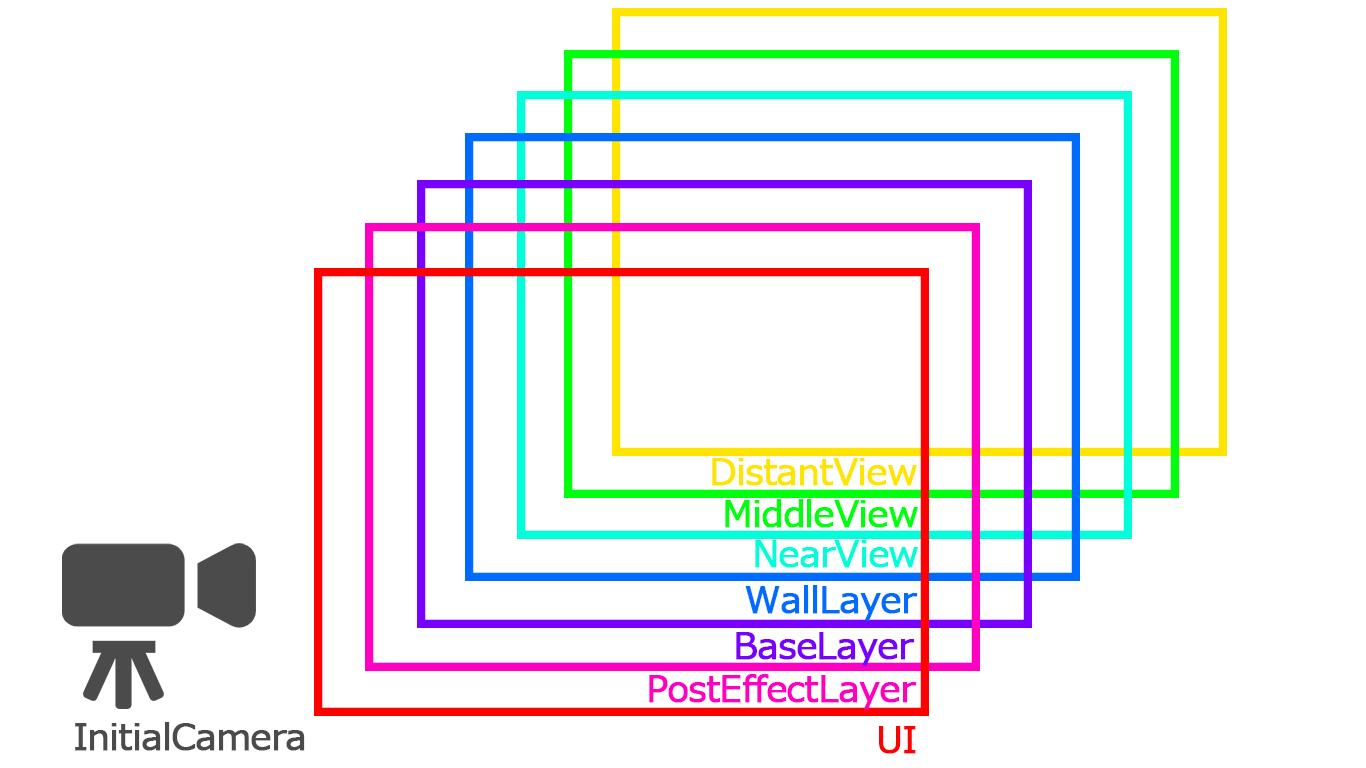
カメラがプレイヤーに追従するようになったため、HP バーをプレイヤーと同じレイヤーに配置すると、画面外に移動して見えなくなってしまう可能性があります。HP バーのように常に表示しておく必要がある要素には、UI レイヤー を使用してください。
以前にも触れた通り、ACTION GAME MAKER のレイヤー は以下のようになっています。UI レイヤー とスクリーンエフェクトレイヤー は、カメラの影響を受けない特別なレイヤー です。
つまり、UI レイヤーに配置されたものは常に表示され続けるため、HP バーには最適です。一方、スクリーンエフェクトレイヤーはアクションによってトリガーされる特殊効果用に予約されているため、ここでは UI レイヤーを使用します。
プレイヤーのBaseSettings ノードを選択します。
インスペクターで、HP とMax HP の両方の値を 1 から10に変更します。
stage1 シーンタブに切り替え、エディタ表示をScript から2D に戻します。
UI ノードを選択します。
シーンウィンドウの左上にある**+(子ノードを追加)**ボタンをクリックします。
SimpleGauge を選択し、作成 をクリックします。
サイズを調整します。最初は潰れたように表示されます。
橙色のハンドルをドラッグして、適切なサイズに拡大します(チュートリアルの参考画像を参照)。
UI レイヤーの表示範囲は細い青い線でマークされています。ゲージをこの境界内の左上 に移動させます。
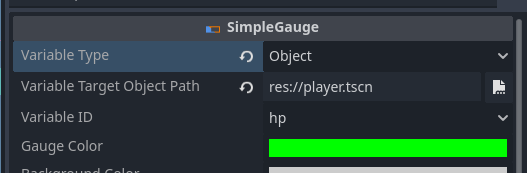
次に、ゲージをプレイヤーの HP にリンクします。インスペクターで変数タイプ をオブジェクト に設定します。
新しいプロパティターゲットオブジェクトパスを指定 が表示されます。
player.tscn を選択し、開く をクリックします。
変数名 フィールドに自動的にhp が表示されるはずです。これは現在の値として使用する変数を指定するもので、そのままにしておきます。
変数を最大値として使用 チェックボックスを有効にします。
手順 9〜10 を繰り返して、再度player.tscn を指定します。
最大値変数フィールドでは、デフォルトでobject_id になっている場合があります。これをmax_hp に変更します。これにより、ゲージはプレイヤーの最大 HP を最大値として使用することが指定されます。
テストプレイ ボタンをクリックしてゲームを実行します。設定が正しければ:
ゲージが表示されない: SimpleGauge がUI レイヤー の子ノードであり、青い境界線内に配置されていることを確認してください。
HP が低い値から始まる: BaseSettings でプレイヤーのHP が 10 に設定されているか再確認してください。
最大 HP があるのに HP が即座に 0 になる: BaseSettings でMax HP が 10 に設定されていること、および SimpleGauge の最大値変数 が正しくmax_hp に設定されていることを確認してください。
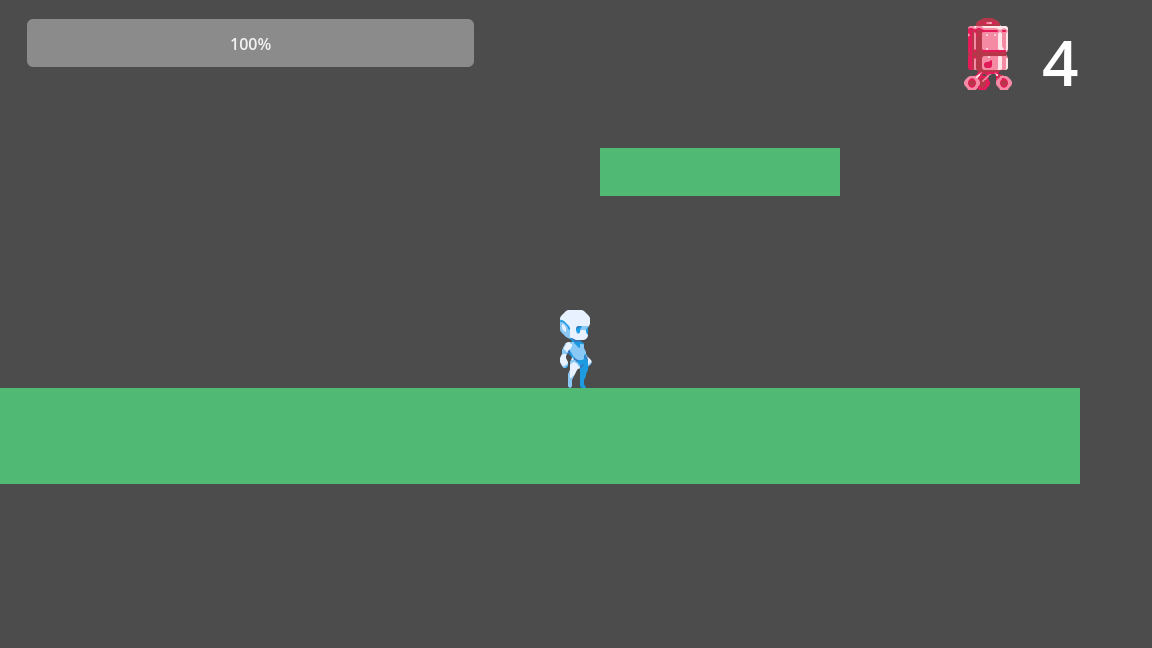
テストプレイ中に、プレイヤーが穴に落ちると無限に落下し続けることに気づかれたかもしれません。これを修正し、プレイヤーが穴に落ちた際に「敗北」状態になるように設定しましょう。
解決策は、カメラが無限に下へ追いかけるのを防ぐためにカメラの移動範囲を制限 し、プレイヤーがカメラの範囲外に出た際に**「Death(死亡)」**状態に移行させることです。
InitialCamera ノードを選択します。
インスペクターで、Limits(制限) セクションを展開します。
Bottom(下限) の値を 10000000 から 500 に変更します。
これにより、カメラは赤い原点線から下へ 500 ピクセルまでしか移動しなくなります。
テストプレイを実行します。
正しく設定されていれば、カメラはプレイヤーを水平方向や上方向には追従しますが、ある点を超えて下方向には追従しなくなります。
カメラに何も表示されない場合: 1000 や 2000 などに調整し、適切に揃うまで試してください。
すでに**「Death」状態が存在するため、既存のリンクに新しい条件 「OffScreen(画面外)」**を追加するだけです。
Player シーンに切り替え、エディタの表示を**Script(スクリプト)**に変更します。
AnyState → Death のリンクを選択します。
+ Add Condition(条件を追加) をクリックします。
条件として OffScreen を選択します。
Data Type(データ型) を Unset(未設定) から This Node(このノード) に変更します。
Connection With Previous Condition(前の条件との接続) を OR に設定し、追加します。
条件リストが正しく以下のように表示されていることを確認します。
テストプレイを実行し、穴に落ちます。
落下敗北が発動しない場合: AnyState → Death リンク上の条件を確認してください。HP = 0 OR OffScreen となっていることを確認します。
5 という数値からカウントダウンする方法が必要です。敵が倒されるたびにこの数値は減少し、0 になった時点でゲームクリアイベントが発動するようにします。これを実現するために、変数 と呼ばれるものを使用します。
変数 とは、値を格納するコンテナのようなものです。例えば、以前扱ったプレイヤーの HP(体力)も実際には変数です。プレイヤーが敵の攻撃を受けると、HP コンテナ内の値が 1 減少します。
ACTION GAME MAKER では、変数を定義する主な方法が 2 つあります。
オブジェクト上のVariableSettings ノードを使用する方法。
プロジェクト全体で使えるProject Variables データベースを使用する方法。
以前使用した HP は、前者のタイプの例です。
オブジェクト変数(VariableSettings) : 特定のオブジェクトに紐付いた変数です。オブジェクトが削除されると、変数も消滅します。プロジェクト変数 : プロジェクト内のどこからでもアクセスできるグローバル変数です。プロジェクトが実行されている限り利用可能であり、セーブデータなどの用途に適しています。
実際の使い分けは以下の通りです。
HP、攻撃力、ジャンプ力 → オブジェクト変数 として扱うのが最適です。ハイスコア、コイン数、ライフ数 → 複数のステージをまたいで維持され、ゲーム全体で共有される必要があるため、プロジェクト変数 として扱うのが最適です。
技術的にはどちらの変数タイプでも機能しますが、複数のオブジェクト(敵たち)がこの数値と相互作用するため、プロジェクト変数 を使用します。
したがって、処理の流れは以下のようになります。
敵が**「消滅」**状態に入ると → 「残敵数」を 1 減らす。
「残敵数」が0 に達すると → ゲームクリアシーケンスを発動させる。
キル数を管理するための専用のゲームオブジェクト を作成します。このオブジェクトは常に表示されるようにUI レイヤー に配置します。HP バーと同様に、倒された敵の数を表示し、プレイヤーにクリアまであと何体残っているか知らせます。
手順は以下の通りです。
プロジェクト変数 「残敵数」を作成する。敵の「消滅」状態 に、キル数を減らすアクションを追加する。「残敵数」を監視し、0 に達したときにクリアシーケンスを発動させるクリアイベントオブジェクト を UI レイヤーに作成する。
プロジェクト変数はデータベース 内にあります。今すぐ追加しましょう。
左上のメニューにあるデータベース ボタンをクリックします。
データ管理 という新しいウィンドウが開きます。
ユーザーデータベース タブからプロジェクト変数 タブに切り替えます。
ウィンドウの左上にある+ ボタンをクリックします。
下部にvariables1 という名前の新しい行が表示されます。これをRemaining Enemies に名前変更します。
値 を5.0 に設定します。プレイヤーに5体の敵を倒してもらうためです。
OK をクリックしてウィンドウを閉じます。設定は完了です。
ACTION GAME MAKER では、プロパティの変更 アクションを使用して変数を修正します。
敵 シーンタブを開き、エディタビューをスクリプト に切り替えます。
消滅 状態を選択し、実行可能アクションを追加 をクリックします。
ChangeObjectProperty を選択します。
以下の通りフィールドを設定します。
設定すべきフィールドは5つ あります。それぞれを再確認してください。残りの敵数 が1減ります。
最後に、実行順序を並べ替えます。アクションは上から下へ 実行されるため、消滅 がプロパティの変更 より先に実行されると、変数は更新されません。
-= を使うのか、単に - ではダメなのか?プログラミングにおいて、-= は以下の意味を持つ短縮演算子です。
new_value = previous_value - 1
これは、減算 と結果を変数に代入する という2つの処理を1ステップで行います。= がない単なる -(マイナス)だけを使用すると、結果をどこに保存するか が指定されないため、実際には変数は変更されません。
残りの敵変数を管理するための UI オブジェクトを作成します。
このオブジェクトは、「残りの敵 」の現在の値を表示 し、値が 0 に達したときにクリアシーケンスをトリガー します。明確にするために、敵のアイコン(Sprite2D 経由)を表示し、アクションを使用してその隣に残りの敵 変数を表示します。敵のアイコンには、既存の敵スプライト画像 をそのまま再利用できます。
エディタビューを2D に切り替えます。
新しいシーンタブ を開き、ルートノードとしてGameObject を選択します。
オブジェクト名 を RemainingEnemiesManager に設定し、テンプレート を UI、タイプ を Empty に選択してから、作成 をクリックします。
新しく作成したシーンを保存します。
ファイルシステム から、敵で使用されているスプライトである enemy.png を、エディタビュー内の原点の左側 (赤と緑の軸が交差する場所)の空のスペースにドラッグします。
Enemy という名前の Sprite2D が自動的に追加されます。Godot では、画像ファイルをエディタビューポートに直接ドロップすると、Sprite2D ノードが自動的に作成され、テクスチャが割り当てられます。
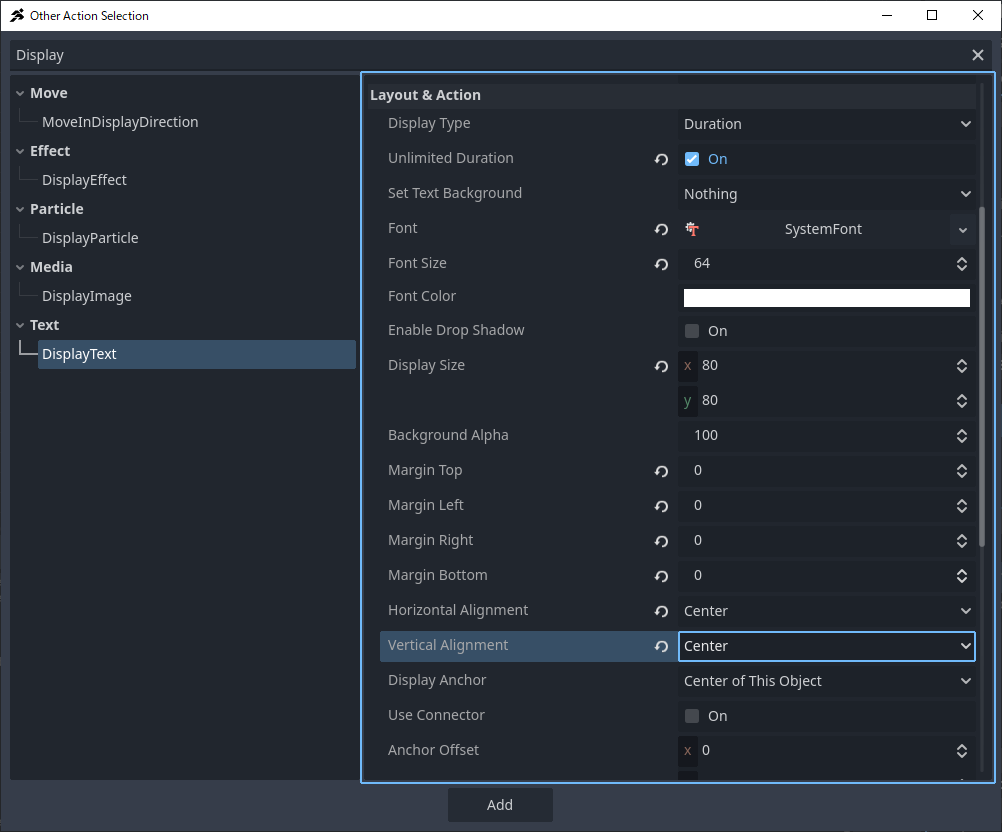
まず、変数の表示 に焦点を当てます。単一の状態**「Count」だけで、 「残存敵」**変数の値を表示すれば十分です。
変数を表示するには、DisplayText アクションを使用します。
Sceneウィンドウで**RemainingEnemiesManager (Game Object)**ノードを選択し、**
RemainingEnemiesManager.vs を作成します。
デフォルトのState001 をCount にリネームします。
DisplayText 実行アクションを追加し、Basic Settings を以下のように設定します。
Text Type: Variable
Variable Source: Data Management
Database Type: Project Variables
Record Name: Remaining Enemies
Layout & Action セクションを以下のように設定します。
Unlimited Duration: On
Font: New SystemFont
Font Size: 64
Display Size: x = 80, y = 80
Margins (Top/Left/Right/Bottom): すべて 0
Horizontal Alignment: Center
Vertical Alignment: Center
注:DisplayTextアクションにおける配置について 基準点を中心に 作成し、選択した期間、その中に指定されたテキスト(変数)を表示します。の場合、それは 原点**(赤と緑の軸が交差する点)を意味します。80×80 px のテキストボックスを作成し、テキストを中央 に配置し、表示期間を無制限 に設定しています。
シーンに配置してテストしましょう。常に表示されるようにするため、UIレイヤー に配置します。
stage1 シーンタブに切り替え、エディタを2D に変更します。
UI (CanvasLayer)下の SimpleGauge ノードを選択します。
FileSystemでRemainingEnemiesManager.tscn を選択し、UIレイヤーの青い枠内 の右上 エリアにドラッグ&ドロップします。
テストプレイを実行し、以下を確認します。
アイコンも数値も表示されない: UIレイヤーの子 であり、青い枠 (UI表示領域)内に配置されていることを確認してください。
アイコンは表示されるが数値が表示されない: 原点の近く に配置されていることを確認し、Count 状態のDisplayText アクション設定を再確認してください。
敵を倒しても数値が変化しない: Vanish 状態で、実行順序がまずプロパティの変更 、次に自身を削除 になっていることを確認してください。
次に、クリアシーケンス を作成します。これにもDisplayText アクションを使用します。
画面の中央に**「STAGE CLEAR」を大きく表示し、正式なクリアの雰囲気を出します。残り敵数 変数が 0**に達したときとします。
RemainingEnemiesManager シーンタブに切り替え、エディタビューをScript に変更します。
Count ステートの近くで、Add State (ステート追加)をクリックします。
新規ステートをStage Clear にリネームします。
+ Add Executable Action (実行可能アクションの追加)をクリックします。
DisplayText を選択します。
以下のように設定します(項目が多いので、一つずつ確認してください):
Text Body(テキスト本文): STAGE CLEAR
Unlimited Duration(無制限の継続時間): On(有効)
Font(フォント): New SystemFont
Font Size(フォントサイズ): 96
Display Area(表示領域): x = 1200, y = 120
Horizontal Alignment(水平配置): Center(中央揃え)
Vertical Alignment(垂直配置): Center(中央揃え)
Reference Point(基準点): Use Scene as Base(シーンを基準として使用)
Anchor(アンカー): Center(中央)
\u003e 「Use Scene as Base(シーンを基準として使用)」とは何ですか? ゲームシーン全体 (つまり、カメラで表示されている領域)にアンカーされます。この設定では、テキストボックス(1200×120)がシーンの中央に配置され、STAGE CLEAR がそのボックス内で中央揃えされます。
Count ステートを右クリック → Add Link (リンク追加)を選択し、Stage Clear に接続します。
+ Add Condition (条件追加)をクリックします。
SwitchVariableChanged (変数切り替え)を選択します。
条件を設定します:
Variable Type(変数タイプ): Variable(変数)
Target Type(ターゲットタイプ): Project Variable(プロジェクト変数)
Database Record Name(データベースレコード名): Remaining Enemies(残り敵数)
Variable Condition(変数条件): =Remaining Enemies == 0 のときに遷移が発生します。)
まず、敵を十分に配置します(合計5体 )し、クリアシーケンスが正しくトリガーされるかテストします。
stage1 シーンタブに切り替え、エディタビューを2D に設定します。
BaseLayer の下で、配置の準備としてenemy やplayer などの子ノードを選択します。
FileSystem からenemy.tscn をステージにドラッグして、敵をもう1体配置します。
enemy5 が配置されるまで、手順1–3 を繰り返します。
テストプレイを開始します。
「配置した5体の敵が表示されない」: 固形地面 の上に配置されていることを確認し、Template Move でDon’t fall off ledges (崖から落ちない)が有効になっているか確認してください。
「カウントが0になっても何も起こらない」: Stage Clear ステートのDisplayText 設定を確認し、リンクの遷移条件(プロジェクト変数Remaining Enemies が0に等しい)が正しいか確認してください。
この章では、ゲームが正式なゲームとして機能するようにするためのカメラ追従メカニクス 、パーティクル 、UI 、および変数 について学びました。
しかし、現状ではプレゼンテーションは依然として非常に地味で、音もありません。
次の章である第5章では、サウンド設定 や背景設定 を追加し、ついにプロジェクトをエクスポートして誰でもプレイできるようにすることで、ゲームの完成度を高めます。