このコースでは、ACTION GAME MAKERでのスクリプトの基礎を学びます。
パート5では、シーン遷移を作成します。
コース開始前の準備
パート1から4と同じプロジェクトを引き続き使用します。
開始するには、プロジェクトを開いてください。
このコースでは、ACTION GAME MAKERでのスクリプトの基礎を学びます。
パート5では、シーン遷移を作成します。
パート1から4と同じプロジェクトを引き続き使用します。
開始するには、プロジェクトを開いてください。
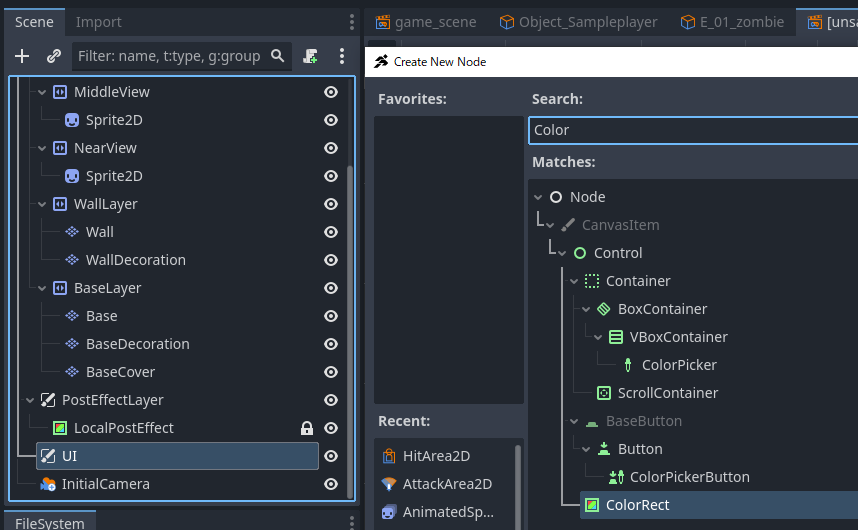
title にして保存します。UI の下に ColorRect ノードを追加します。ColorRect を拡大してメニュー表示領域全体を覆うようにします。Color プロパティを黒に変更します。UI の下に Label ノードを追加します。これはテキスト表示に使用されます。Text プロパティに "SAMPLE GAME PROJECT PRESS A START" と入力します。LabelSettings を作成し、フォントサイズを 80 に設定します。Label を画面のほぼ中央に移動させます。title.tscn シーンを game_scene の左側に配置し、ビジュアルスクリプトのように title から game_scene へのリンクを接続します。BLACK に設定します。Title を右クリックし、開始シーンとして設定 を選択します。特定のシーンが開いている状態で、テストプレイボタンの近くにある ![]() アイコン(または F6 キー)を押すと、そのシーンだけを実行できます。
アイコン(または F6 キー)を押すと、そのシーンだけを実行できます。

ただし、このモードではシーン遷移が正しく機能しない場合があります。
遷移もテストしたい場合は、シーン遷移タブでそのシーンを 開始シーン に設定し、そこからテストすることをお勧めします。
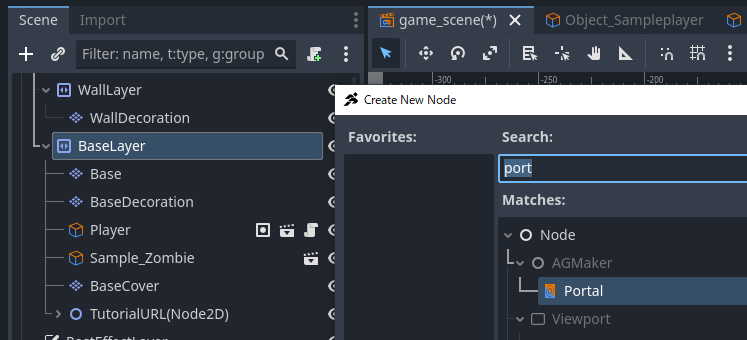
game_scene タブに切り替えます。UI の下に新しい Portal ノードを作成します。BLACK に設定します。CollisionMask にレイヤー 2を追加します。game_scene.tscn を複製し、game_scene2.tscn と名前を付けます。game_scene2 を開き、プレイヤーオブジェクトを削除します。Portal ノードをマップの左端に移動させます。PortalCollision の位置を調整します。game_scene2 内の Portal プロパティを変更します:game_scene.tscn に設定します。game_scene 内のポータルを選択できるようになります。game_scene に戻ります。game_scene2.tscn に設定し、そのポータルを選択します。これでスクリプトコースのチュートリアルシリーズは終了です。
このチュートリアルの内容は基本のみをカバーしています。
ACTION GAME MAKER のビジュアルスクリプティングを使用すれば、条件とアクションを組み合わせることで、さまざまな動作を作成することができます。
あなたの想像力次第では、開発者が予想もしなかったものを作り出すこともできるかもしれません!
何か素晴らしいものを作った場合は、SNSや公式ギルドで共有してください。
1. グラフィックスコース
オリジナルキャラクターをアニメーション化したい方のためのコースです。
3. 表現強化コース
クールな、Godot スタイルのビジュアルエフェクトを追加したい方のためのコースです。