このコースでは、アクションゲームメーカーでのスクリプトの基礎を学びます。
この第4回では、HPバーUIを作成します。
前提条件
前のチュートリアル(#1〜#3)で使用したプロジェクトを続けます。
プロジェクトを開いて準備を整えてください。
このコースでは、アクションゲームメーカーでのスクリプトの基礎を学びます。
この第4回では、HPバーUIを作成します。
前のチュートリアル(#1〜#3)で使用したプロジェクトを続けます。
プロジェクトを開いて準備を整えてください。
Object_Sampleplayer を開きます。BaseSettings を開き、HP と Max HP を 20 に設定し、Blink Duration を 0.1 秒 に設定します。これにより、点滅エフェクトを追加して無敵状態をより目立たなくします。TakenDamageSettings を追加します。TakenDamageSettings では多くの設定が可能ですが、今回は ダメージボイス を追加するために使用します。Other Settings で Play Sound を有効にし、サウンドを male_1_1_A に設定します。Player ノードを選択し、Collision > Collision Layer を 1 から 2 に変更します。TakenDamageSettings でできること
Attack Settings で設定した攻撃属性に基づいてダメージ倍率を調整できます。これは弱点や耐性の設定に役立ちます。
また、大きなダメージを受けた際にゲームが一時的にスローモーションになるような「ヒットストップ」の設定も可能です。
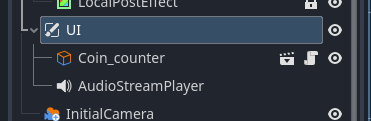
gamescene タブを開き、UI を選択します。ImageGauge。UI の下に配置してください。ImageGauge のプロパティを以下のように設定します:sampleplayer.hp に、Max Value を sampleplayer.max_hp に設定します。Object_Sampleplayer.tscn は sampleobject フォルダにあります。ImageGauge 内の TextureProgressBar のプロパティを設定します。10px に設定します。ImageGauge のテクスチャを設定します。templates > objects > ui > interface > variation_02_Ornate から画像を使用します:I_002_hp_horizontal_02.pngI_002_hp_horizontal_03.pngImageGauge のサイズを調整します。ImageGauge の下に新しいノードを追加します: NinePatchRect。NinePatchRect のテクスチャを I_002_hp_horizontal_01.png に設定し、Edit Region ボタンをクリックします。バーの種類
ImageGauge の Fill Mode を変更することで、垂直や円形のゲージなど、さまざまな種類のバーを作成できます。
Tint プロパティを使用して、バーの色を変更することも可能です。
Nine Patch について
Nine Patch は、画像を 9 つの領域に分割し、歪みを避けるために比例して伸縮させる技術です。
この方法は、メッセージウィンドウなどの作成にも役立ちます。
![]() 次の講座: パート 5
次の講座: パート 5